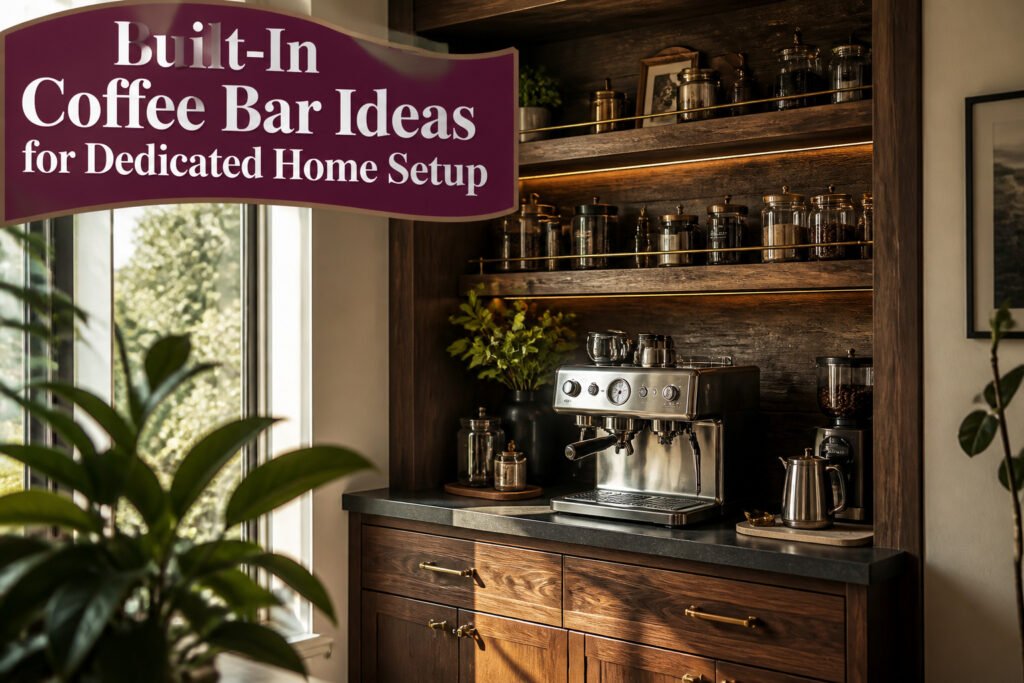
A built-in coffee bar can run from a 12-inch wall niche to a full closet conversion, and the deciding factor is not the square footage you have but whether you have the vertical clearance to lift a water reservoir and swing a portafilter without rapping your knuckles. Most home espresso machines need at least three inches of headroom above their stated height, a measurement that trips up nearly every first build. Brass rails, walnut edge banding, and reclaimed wood shelving all appear in the setups below, though the one detail that separated the projects that lasted from the ones that were rebuilt was checking the cord path with tape before the drywall went back on.
1. French Bistro-Inspired Glass and Brass
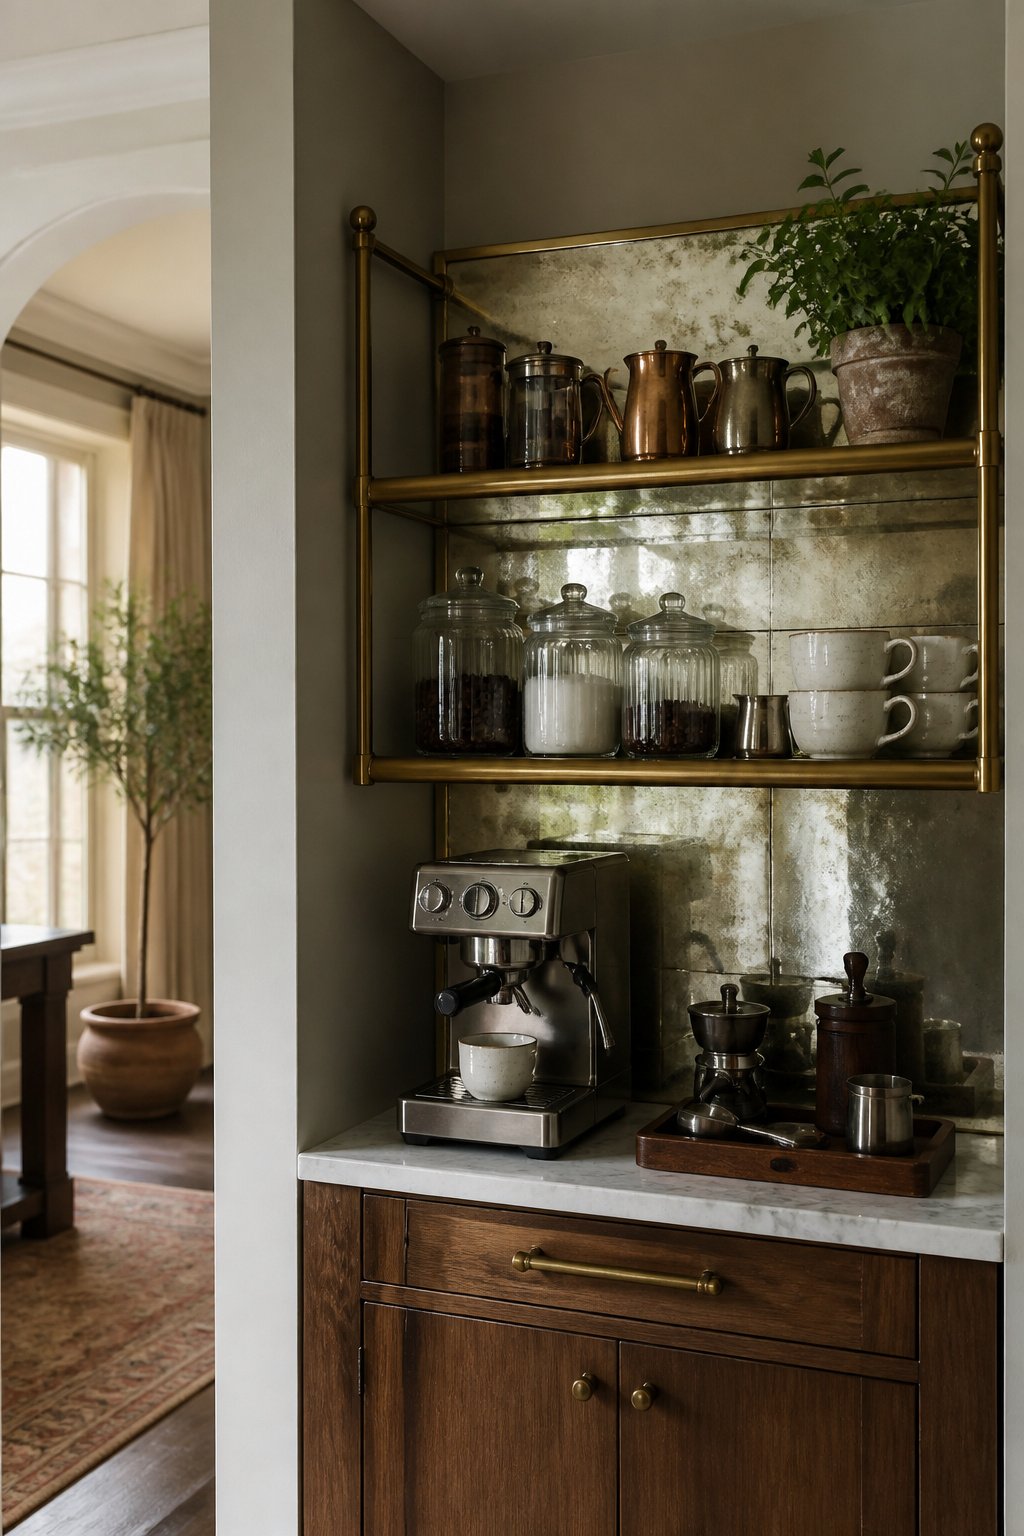
Antique mirror panels behind a coffee station do more than look pretty; they throw morning light back into the room twice over, which matters when your built in coffee bar is tucked into a narrow galley or a corner that never sees a window. The brass shelving layered in front needs to be the real thing, not spray-painted steel, because the patina that builds up over years of steam and finger contact is what sells the Parisian cafe illusion. Vintage-style brass rails are easier to find than actual salvage if you know where to look: architectural salvage yards in older East Coast cities often strip them from pre-war buildings, and several Etsy sellers in Pennsylvania and Ohio specialize in reproduction rail systems with the right weight and bracket spacing. Glass canisters for beans and sugar complete the look, but choose ones with rubber gasket seals, not just cork stoppers, or humidity will wreck your grind within a week. The whole setup reads as intentional rather than themed if you keep the mirror foxing light and the brass unlacquered so it darkens naturally.
2. Narrow Niche Simple Station
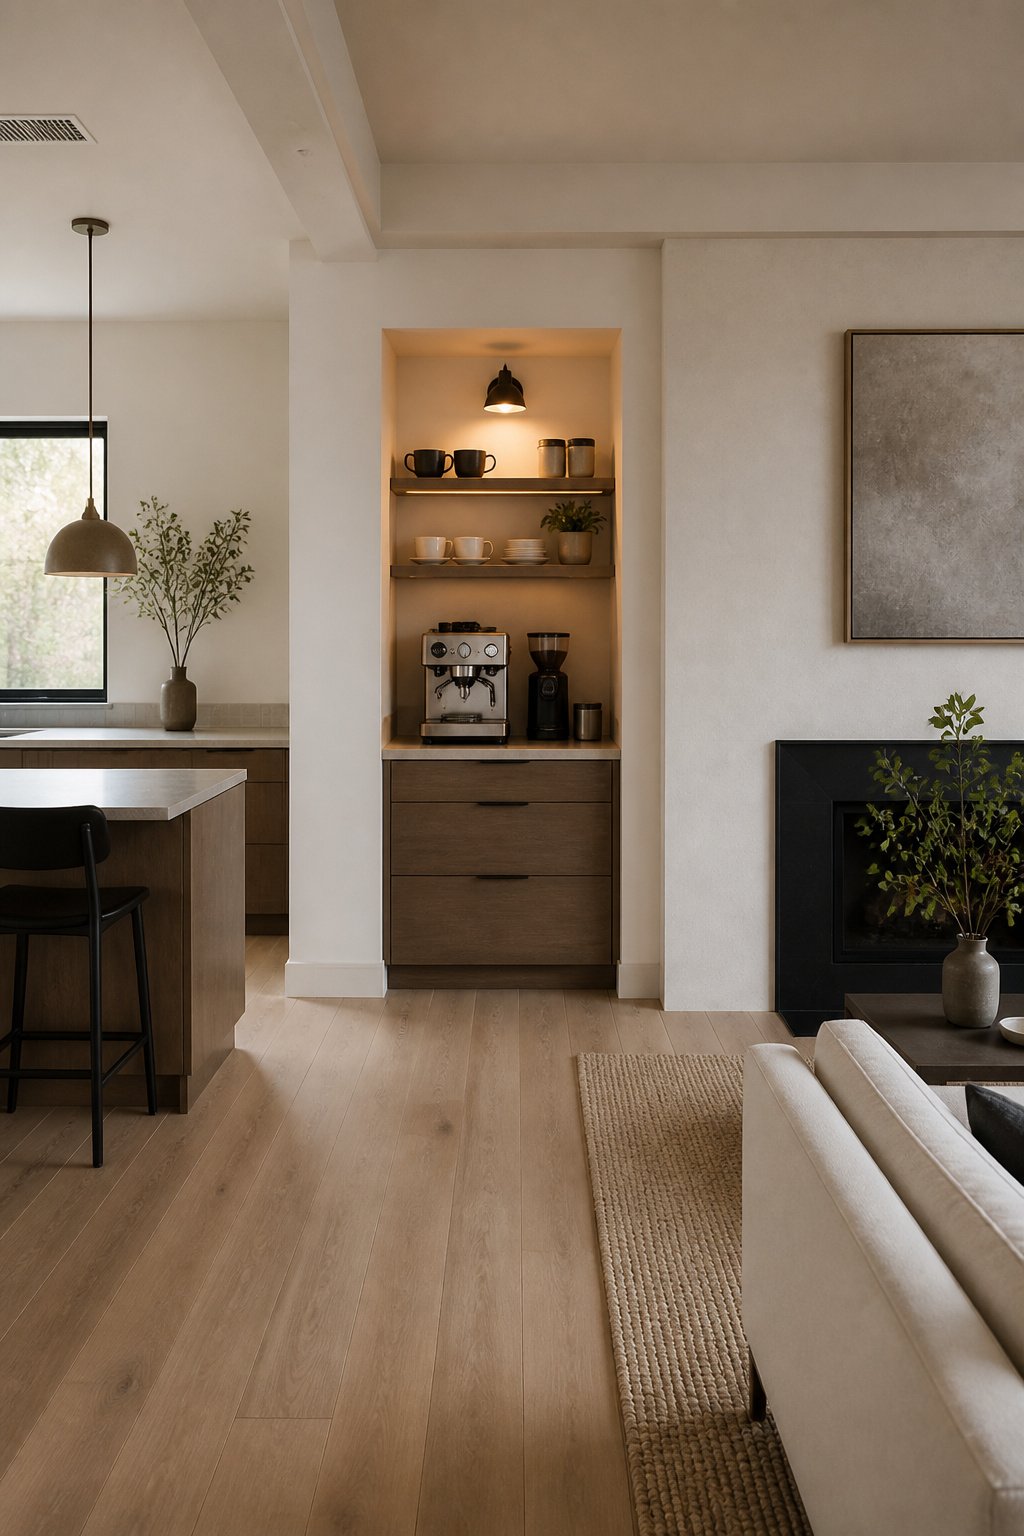
A wall recess as shallow as 12 inches can still host a real built-in coffee bar if you stop treating depth like the only dimension that matters. The trick is accepting that your machine will sit nearly flush to the wall and building upward instead of outward.
Twenty-four inches of counter width is the floor for a functional espresso corner. Anything narrower and you are juggling the portafilter over the sink. At 24 inches, you have just enough room for the machine, a knock box, and the small ritual of tamping without knocking over your cup.
Vertical storage compensates for the tight footprint. Stacked floating shelves above the machine hold cups, beans, and a scale without eating the limited counter. The lower shelf sits high enough that the steam wand clears it, which in a 12-inch recess means measuring your machine height before you drill.
The editing matters more than the carpentry. Backup supplies live in a drawer or pantry, not on display. What stays at the station is what you touch every morning: the grinder, the tamper, one mug style you actually use. The rest is clutter that makes shallow space feel unusable.
3. Terracotta Backdrop
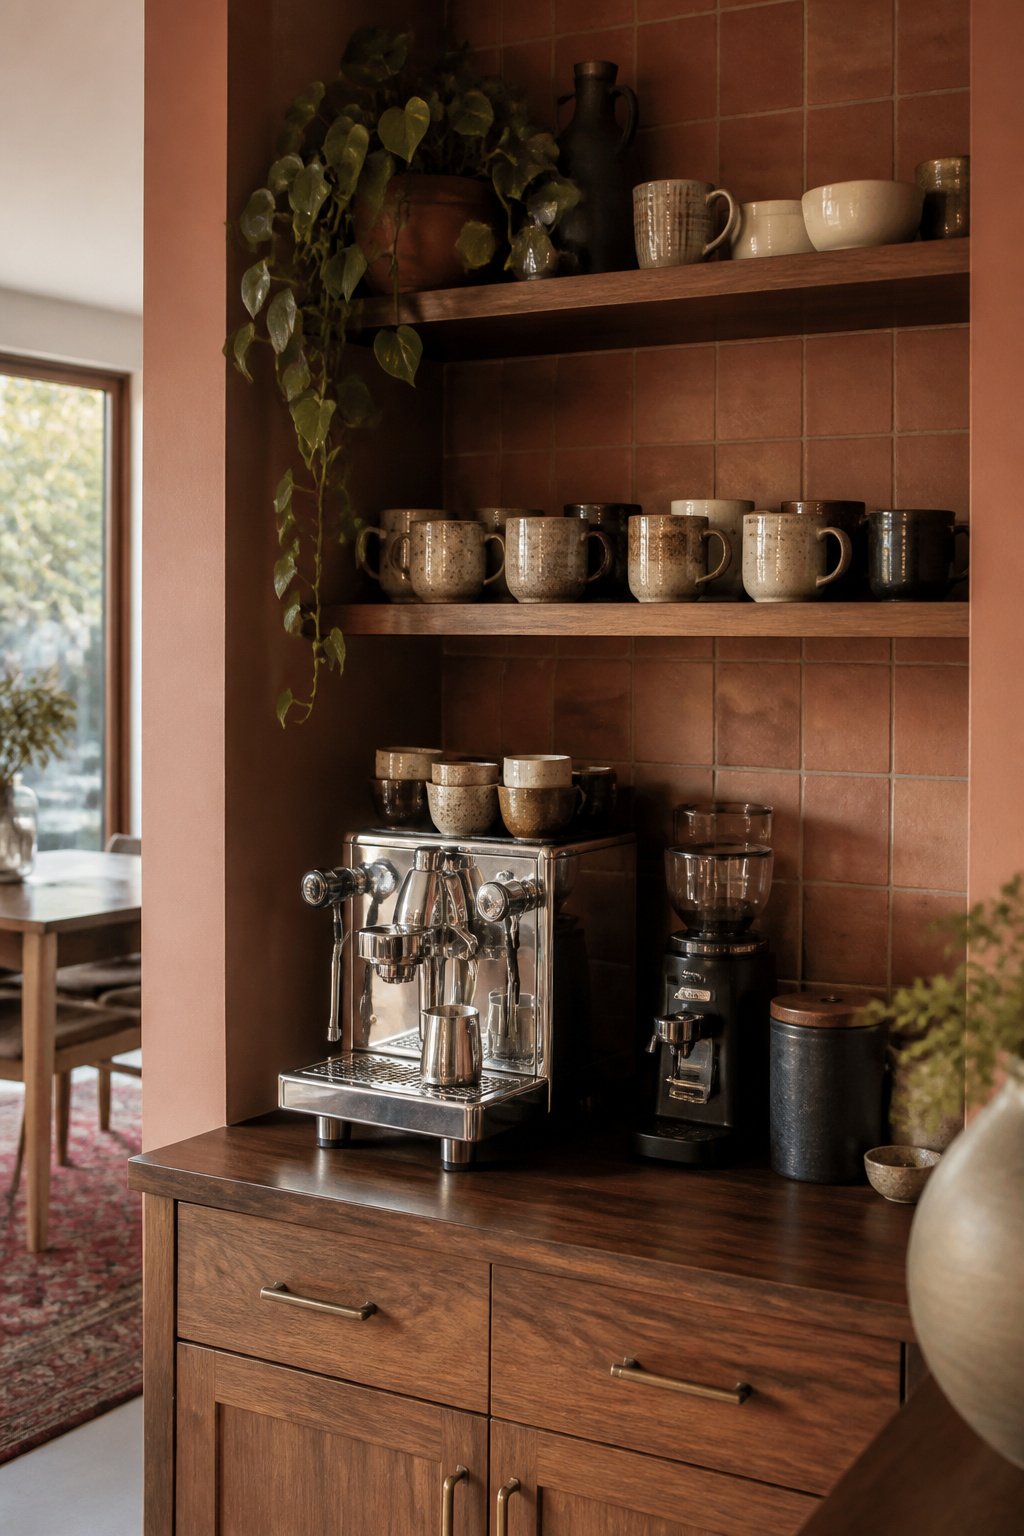
Warm clay-toned tile or painted plaster behind open shelving gives a built in coffee bar the grounded feeling of a small Italian kitchen. The color works because it sits low on the visual register; it does not compete with the chrome of the machine or the gloss of ceramic cups.
Grout choice matters more than people expect. A mid-tone gray or warm taupe grout between terracotta tiles hides coffee splatter better than stark white, which shows every drip by the second week of use. Sanded grout with a penetrating sealer holds up to the daily wipe-down without going pinkish from absorbed oils.
Natural wood counters against this backdrop need to be the right brown. Very pale oak can look washed out and apologetic; walnut or a medium-stained maple has enough depth to feel intentional. The pairing succeeds when the wood reads as furniture against the clay wall, not as another warm tone melting into it. If the counter is already a light species, staining it a half-shade darker than the tile usually solves the problem.
4. Double-Duty Coffee and Wine Bar
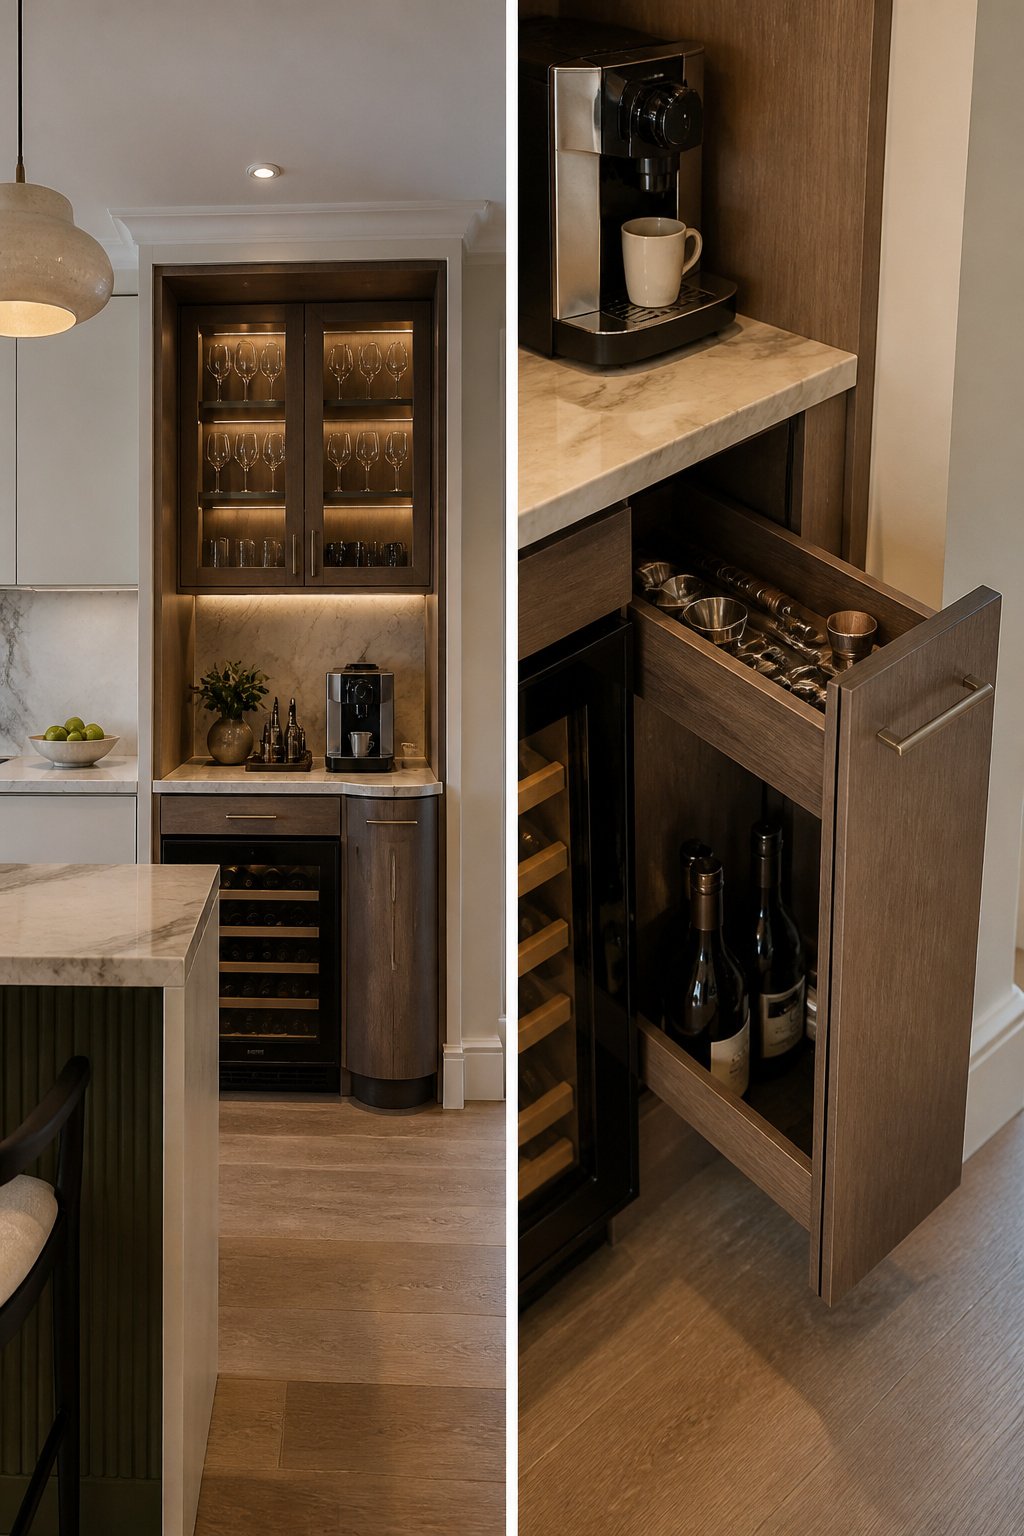
A built-in coffee bar that pulls evening duty as a wine station means thinking about temperature from two directions. Coffee gear wants to stay dry and reasonably cool; wine, especially if you are storing bottles on site, needs something closer to cellar conditions. The compromise is usually a cabinet interior that stays away from the oven wall and any radiator pipe, letting the room’s ambient temperature do most of the work.
The shared zone works best at the standard 34–39 inch height used for lower kitchen cabinets. Mine sits at 37.75 inches, raised slightly on a 2×4 base, and that extra bit of lift keeps the countertop comfortable for pouring wine without stooping. Glassware lives in the same upper cabinet for both shifts, though I would keep red and white stems on separate shelves if you collect both.
A pull-out shelf at counter level, tucked behind a slim drawer front, stores corkscrews and a wine stopper where they do not clutter the morning espresso setup. The same drawer can swallow a small tray for coasters when the coffee cups go back on their hooks. Dual-zone temperature control is not something most kitchen cabinets offer; if you are serious about keeping bottles long-term, a narrow under-counter wine fridge slotted into the base cabinet beside the coffee machine handles that job, and the shared bar simply becomes the serving surface above it.
5. Home Gym Coffee Bar
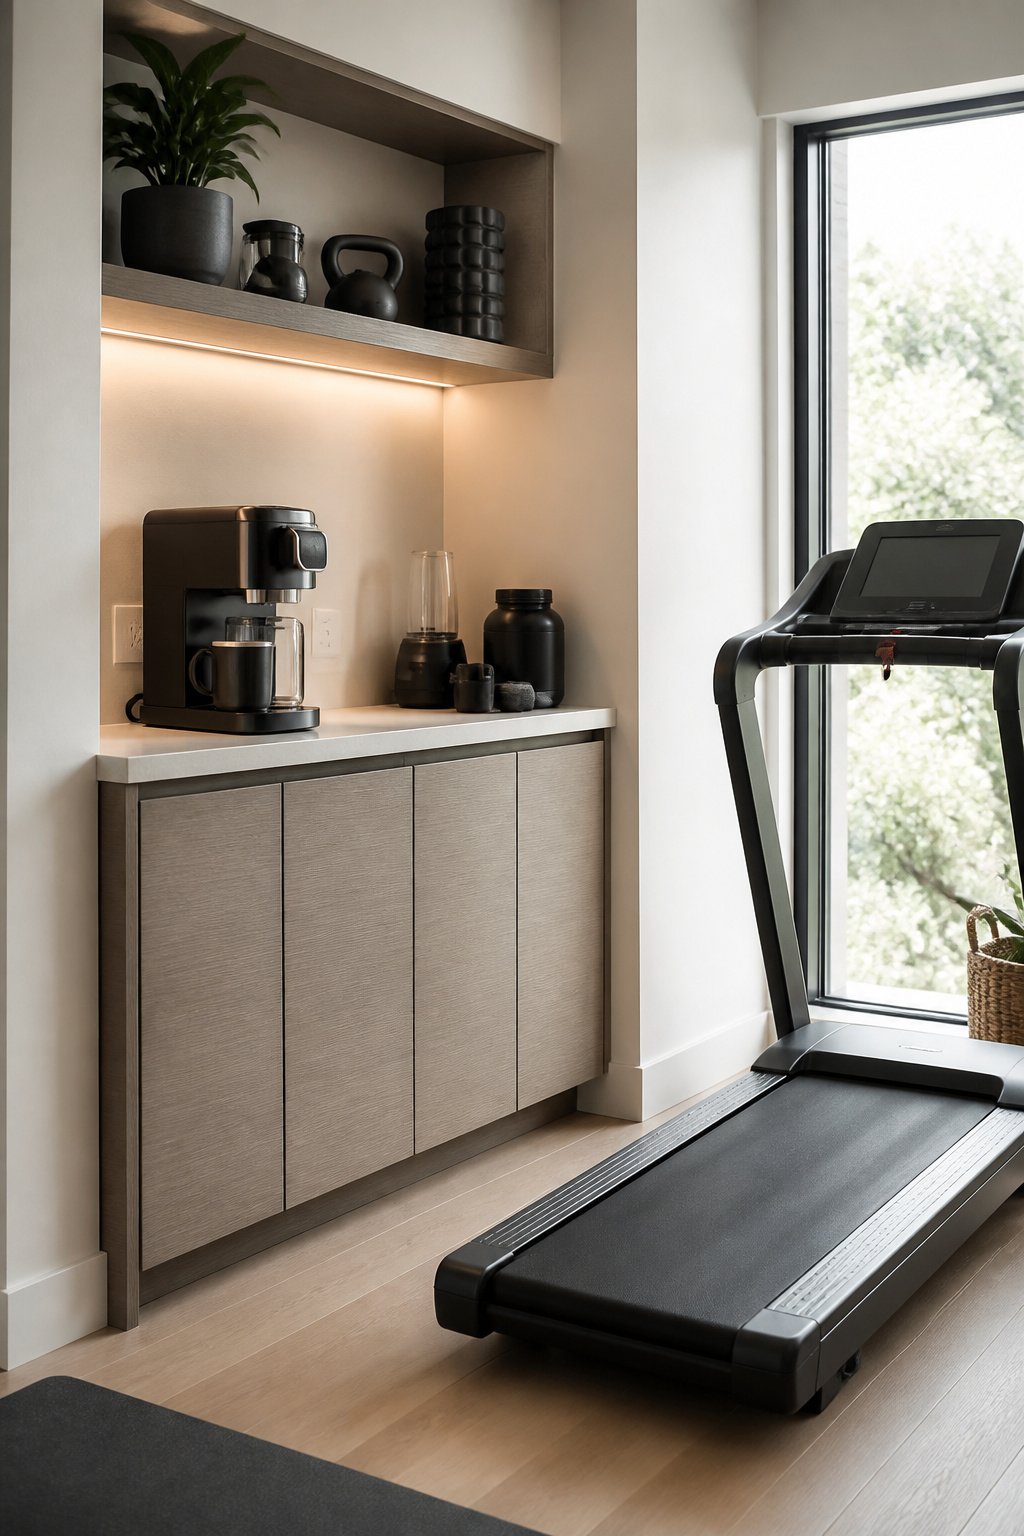
A 24-inch stretch of counter beside the treadmill turned out to be enough for the basics. The outlet was already there for the machine, so the coffee setup piggybacked on that same circuit. Water was the question. A pot filler above the station would have looked sharp, but that meant plumbing I did not want to run through the basement ceiling. A reservoir machine skips all of that. You lift the tank out, fill it at the kitchen sink, and the station stays compact. For post-workout shakes, the same water source works, and the same 24 inches keeps protein powder and a blender corralled without spreading into the workout zone itself.
6. Coffee and Wine Bookends
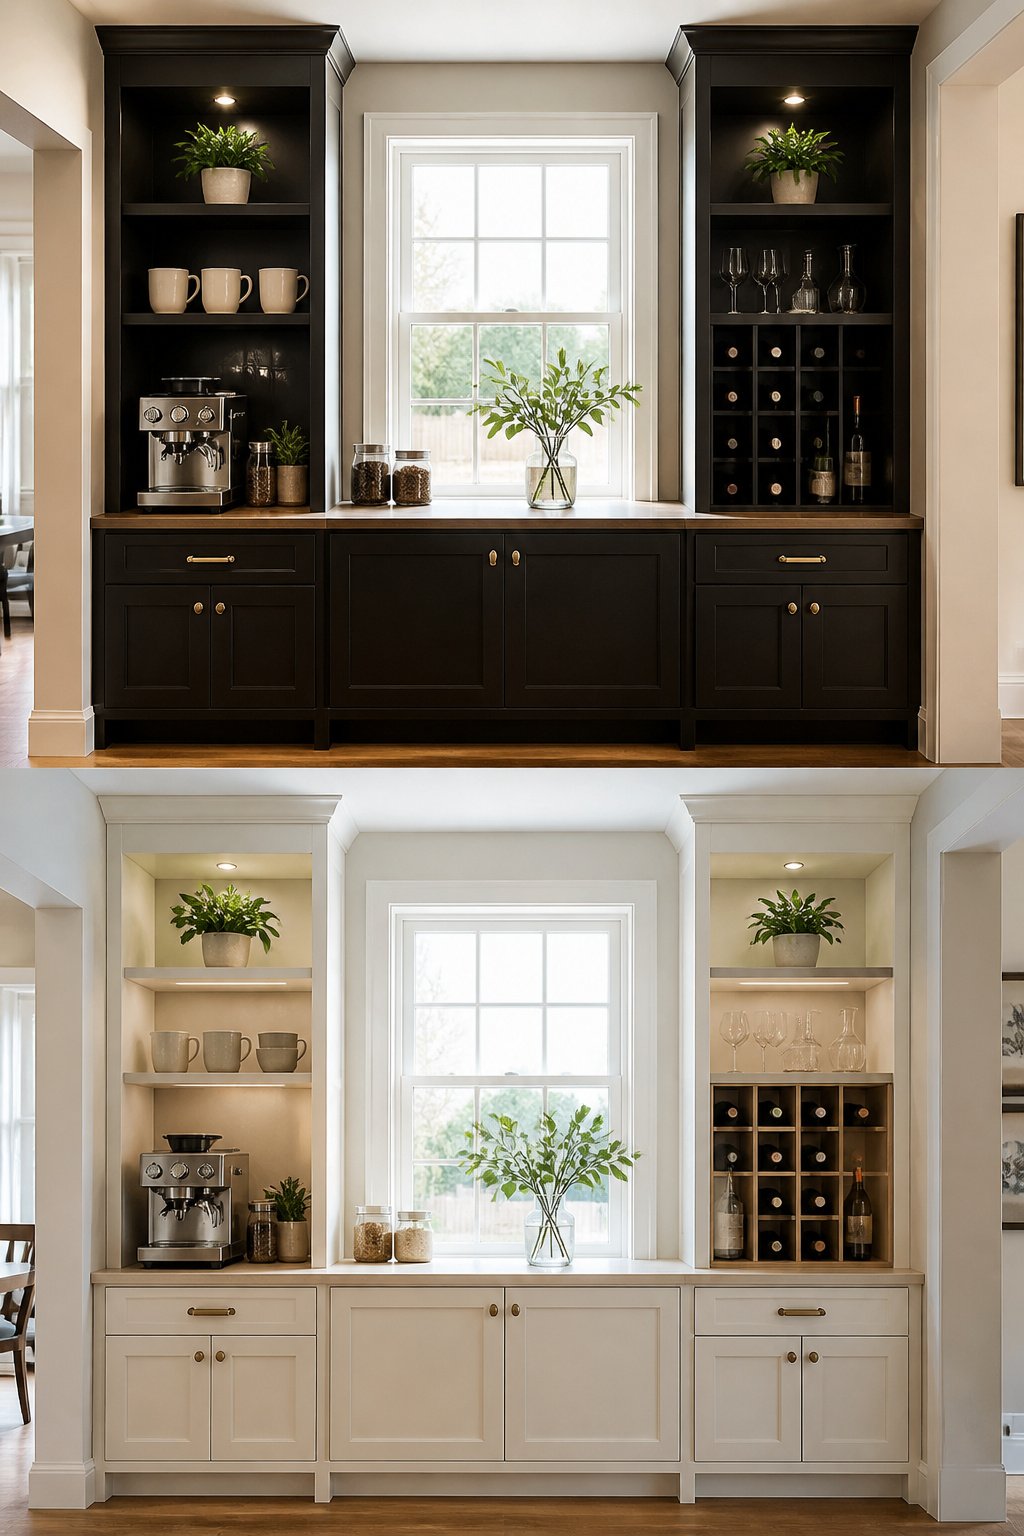
A pair of narrow built-ins flanking a doorway or window can frame the day like bookends, one side for morning brewing and the other for evening bottles. The coffee side needs at least 24 inches of counter width for a functional espresso corner, though 36 inches or more gives you breathing room for storage and multiple appliances. I learned the hard way that mismatched heights between the two sides read as a mistake, not character. My first attempt put the wine counter at 42 inches and the coffee bar at standard 36; the asymmetry made the whole wall feel accidental. Matching both at 36 inches gave the visual balance the doorway deserved. Plumbing is not required for most home espresso machines, since they pull from refillable reservoirs, so a nearby sink is enough. The wine side benefits from the same depth and counter material, letting the pair read as intentional architecture rather than two separate projects that happened to land next to each other.
7. Awkward Corner Drawer
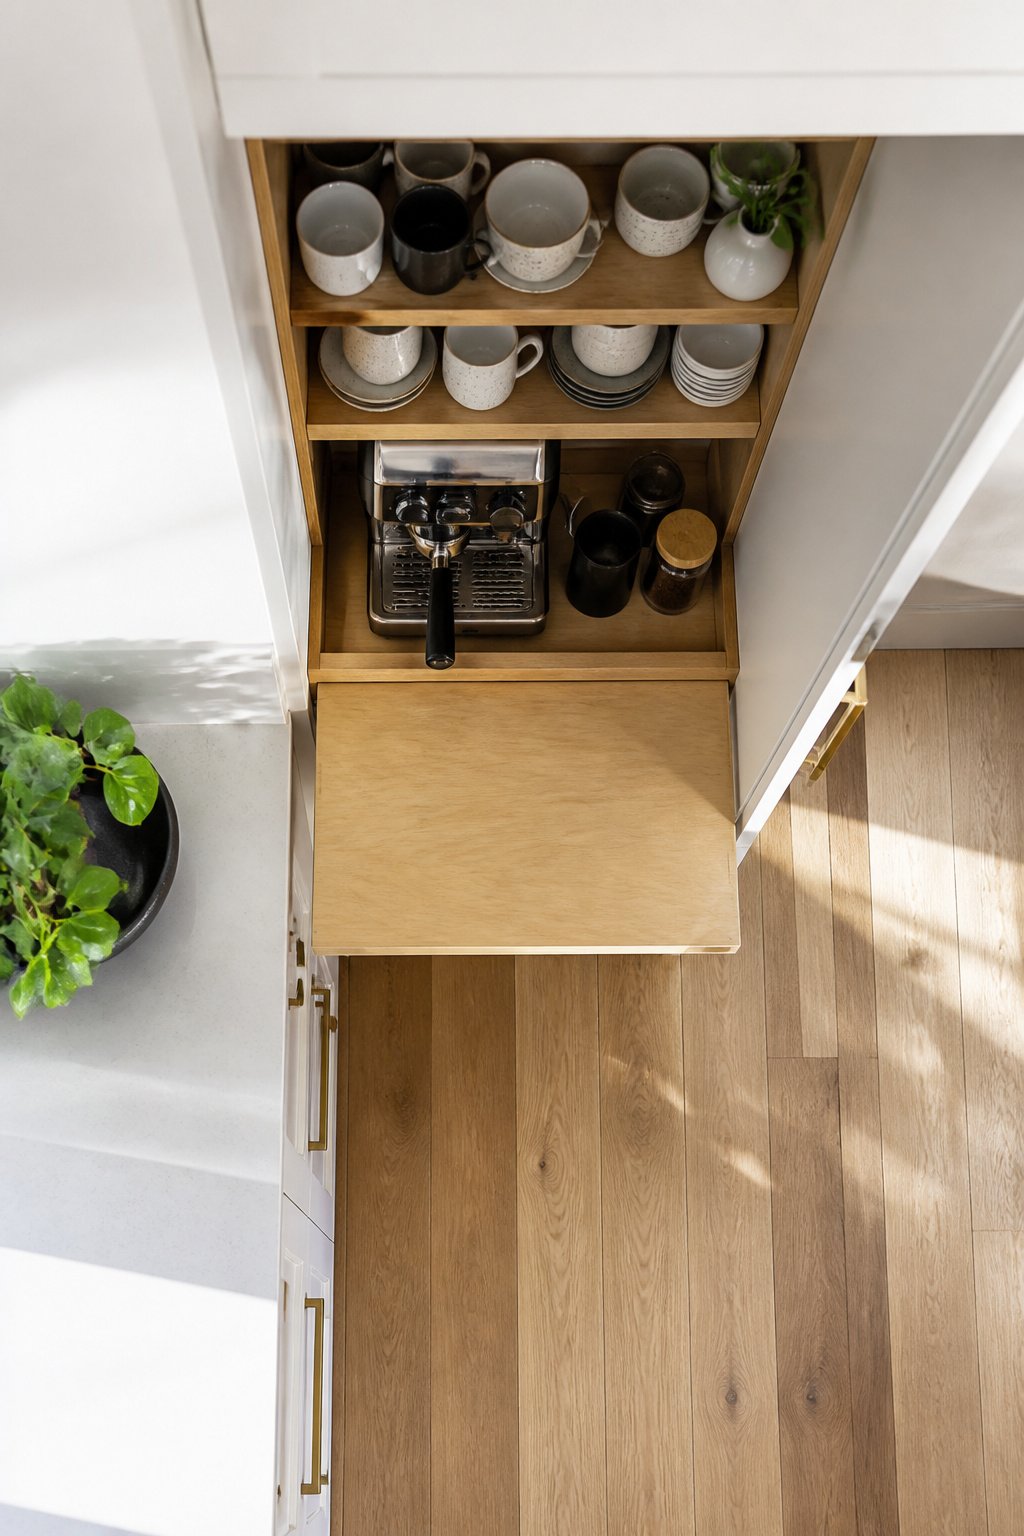
The dead triangle where two cabinet runs meet is usually wasted on a lazy Susan no one enjoys digging through. Two 24-inch drawer base cabinets, set perpendicular and joined with a plywood top, turn that same footprint into a pull-out coffee station that keeps the machine hidden until you need it.
Appliance storage below takes the grinder, the scale, and the tamping mat. Cups and saucers ride on open shelves above, where steam from the group head will not reach them. Leave enough overhead clearance to lift the water reservoir straight up; most home espresso machines need at least three inches of breathing room above the stated height to clear the portafilter and the reservoir in one motion. Skip that measurement and you are sliding the machine forward every morning just to fill it, which defeats the point of built-in.
8. Work From Home Setup
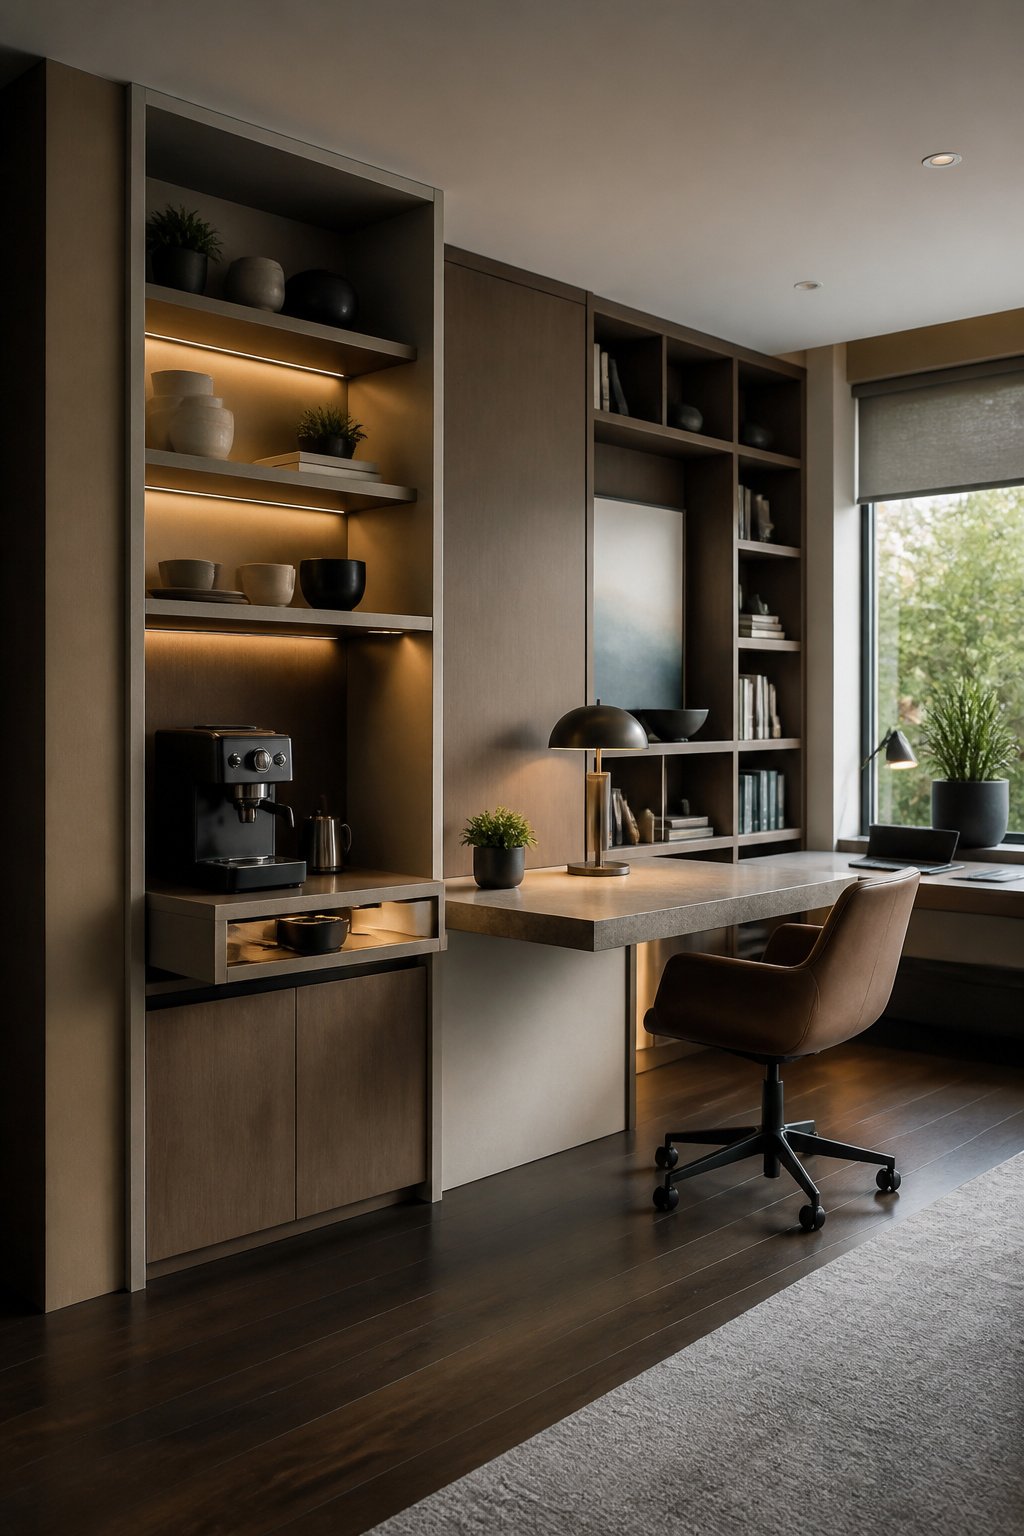
A built-in coffee bar within arm’s reach of a desk needs to keep the grinder away from your microphone. The vibration and whine travel through hard surfaces, so placing it on a lower shelf or in a side cabinet rather than the top surface makes a real difference during Zoom calls. I learned that after three weeks of muting myself every time my husband ground beans in the next room.
The knock box drawer is the detail that keeps the setup from becoming a mess. A shallow pull-out just below the machine, lined with something you can wipe or replace, catches the puck without a separate container cluttering the counter. Mine sits about six inches deep; any more and you’re wasting cabinet space, any less and the grounds spill on the pull.
The outlet placement is where I failed first. I put the GFI exactly where the grinder now lives, which meant the espresso machine cord had to loop around the cabinet side. I lived with an extension cord running behind the desk for almost two months before an electrician moved the outlet twelve inches left. If you’re planning this, mock up where each appliance will sit and mark the cord paths with tape before the drywall goes back on.
9. Rail System Storage
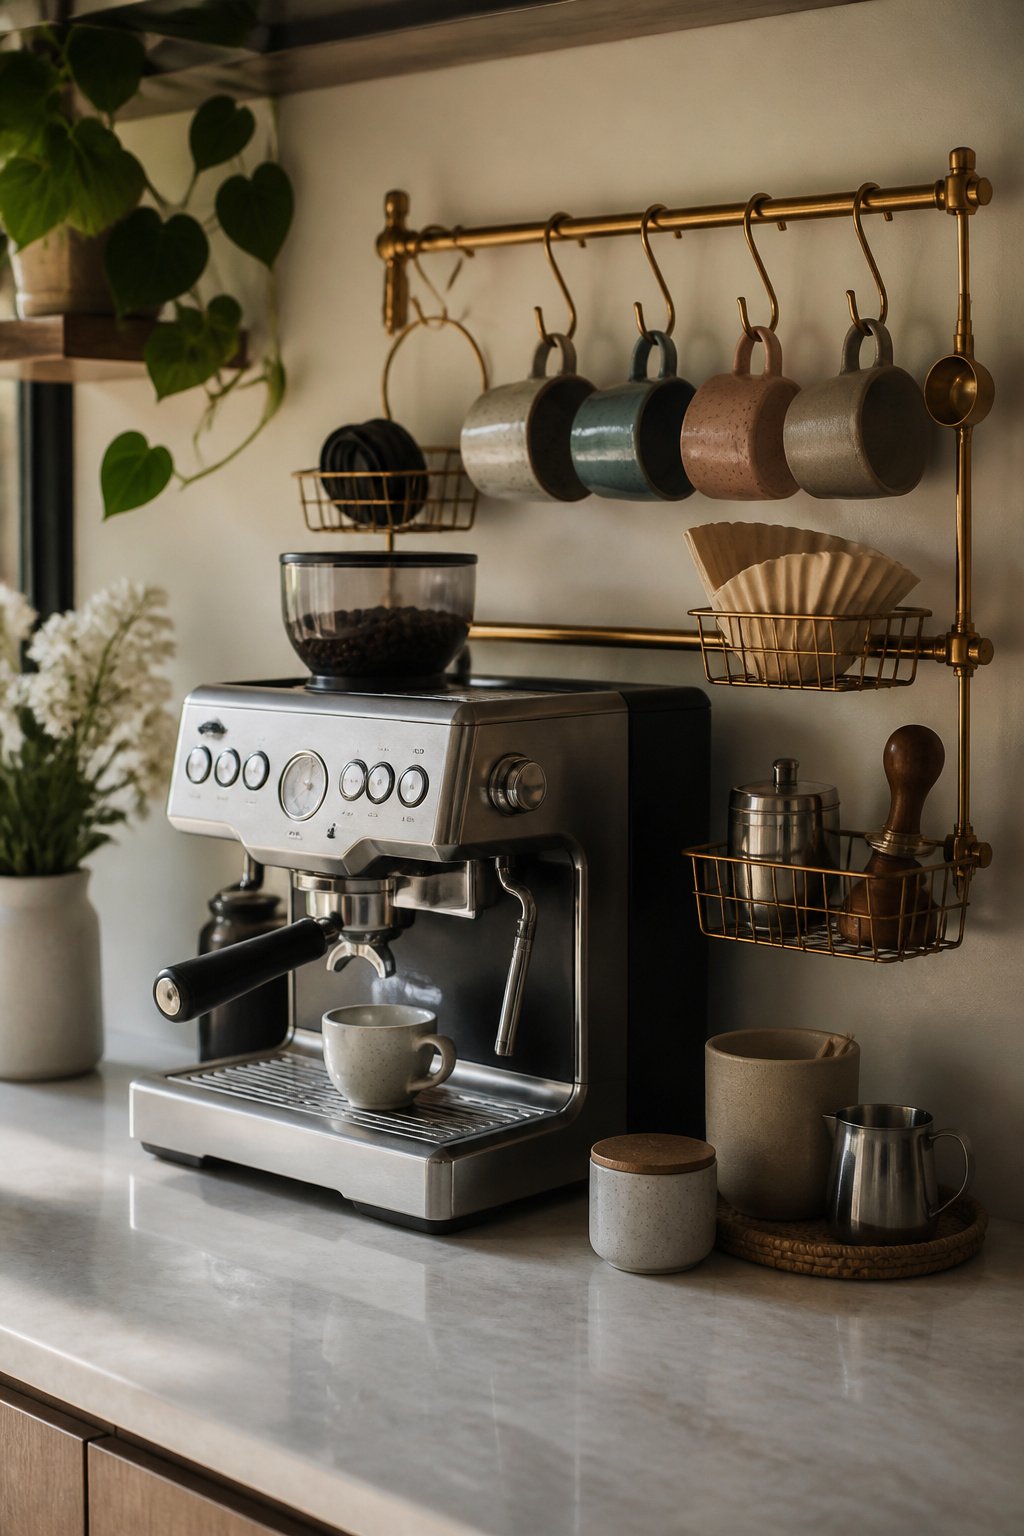
Brass or steel rails mounted on the wall behind your machine keep mugs, filters, and beans within arm’s reach without eating counter space. S-hooks hang cups by their handles, small wire baskets corral filters and tamping tools, and a shallow shelf above the rail holds the bean canister. The whole system stays flexible; you rearrange hooks as your mug collection changes.
Install the rail high enough that the lowest hanging mug sits above your machine’s steam vent, and leave three inches of open air above any espresso machine for the portafilter swing and venting. A home espresso bar built at standard counter height, around 36 inches, puts most machines at a comfortable working level, but the rail itself wants to land another 18 to 24 inches above that countertop plane. Check your machine height before you drill; a tall single-boiler or double-boiler unit with a cup warmer on top shrinks that vertical gap fast, and a rail set too low leaves you ducking around porcelain every time you lock in the portafilter.
10. Cabinet Skirt Hideaway
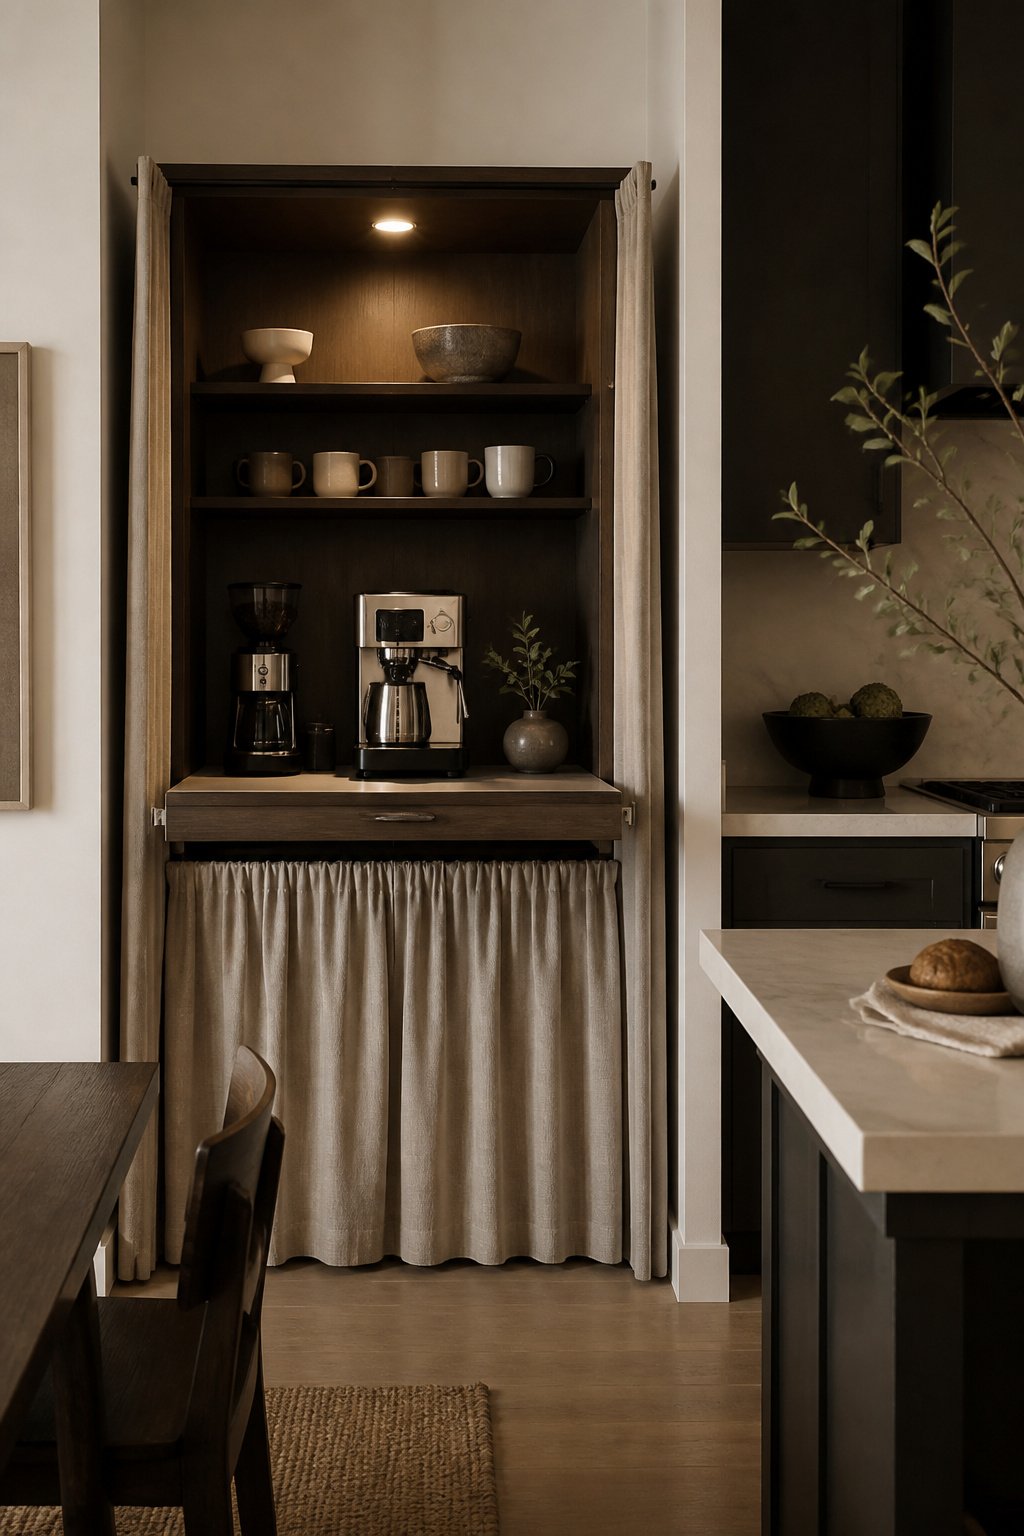
A shallow cabinet mounted between wall studs or freestanding against a kitchen wall becomes a full built in coffee bar once you solve the curtain problem. The skirt has to look intentional, not like a dorm-room fix, and it has to stay put when you pull it aside at 6 a.m.
I started with a tension rod tucked inside the cabinet frame, thinking I could swap fabrics seasonally. The rod slipped after two weeks of daily use. Coffee filters and pour-over gear weigh more than you’d guess, and every slide of the curtain loosened the spring. The fabric sagged in the middle, and the whole thing looked like I was hiding a broken dishwasher.
A ceiling-mounted track screwed into the cabinet top fixed it permanently. The gliders carry the weight across the full width, so the skirt, whether linen or cane paneling, stacks neatly to one side when you open it. Closed, the cabinet reads as a soft furnishing; open, you get the full station with shelves for mugs and a pull-out shelf for the grinder.
11. Stocked Bar Cart Conversion
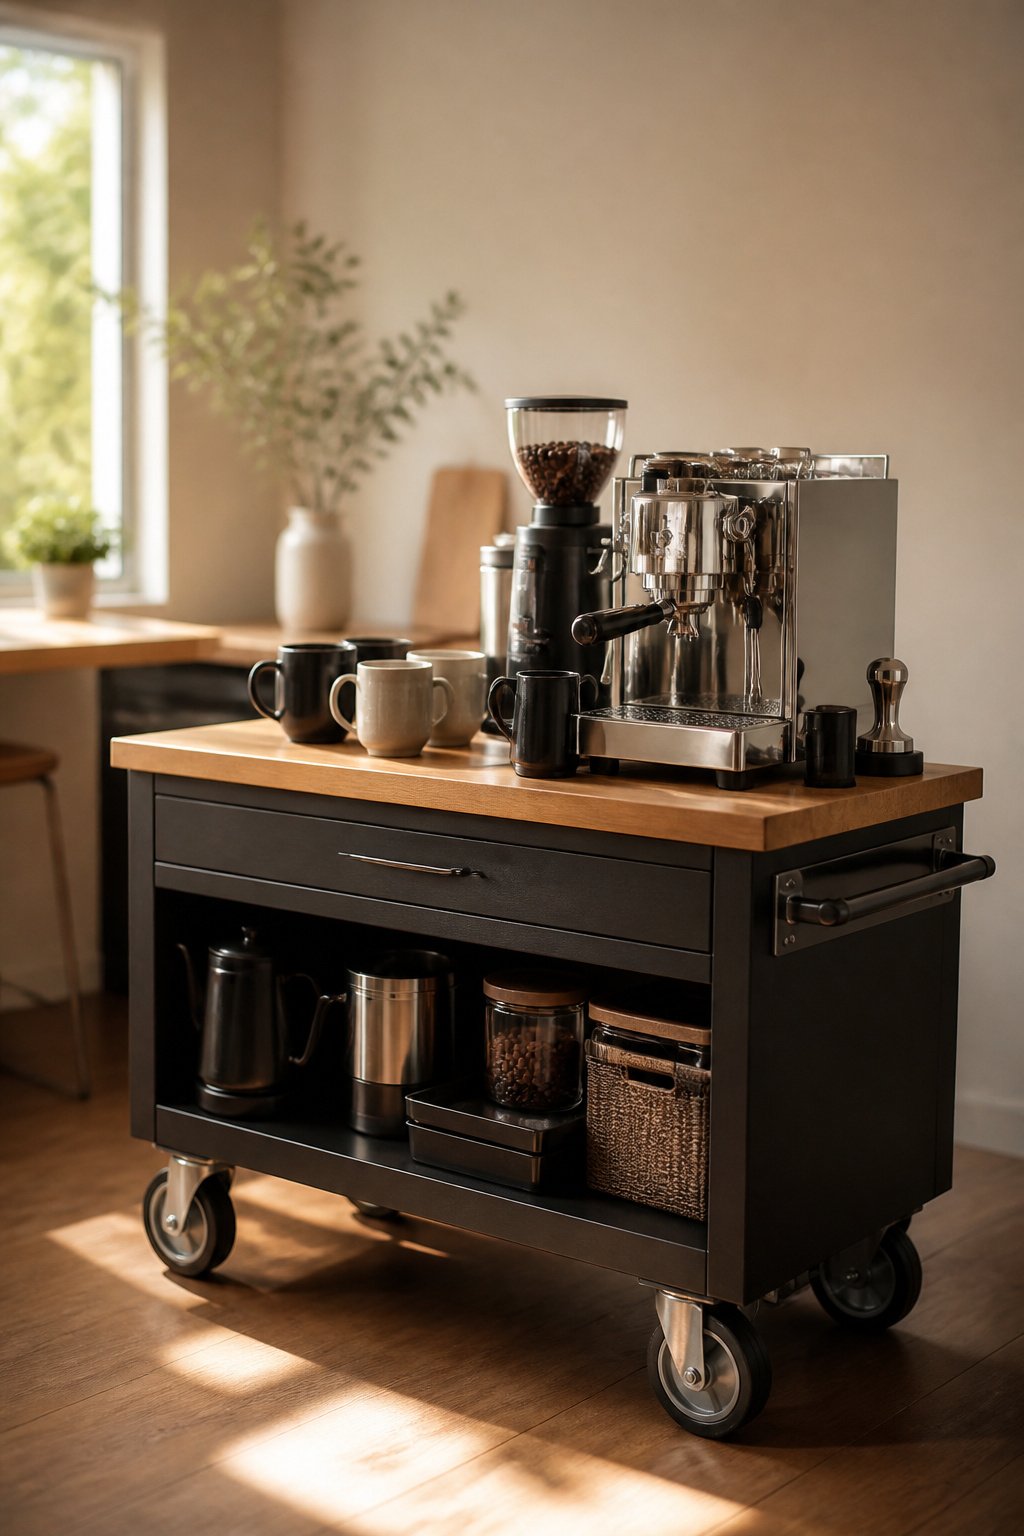
A rolling cart can become a semi-permanent built-in coffee bar with two fixed points: a backsplash screwed to the wall and a countertop anchored to the cart frame so it stops shifting. I started with a 24-inch cart, the width sources usually cite as the minimum for a functional espresso corner, and within a week the grinder was living on a shelf across the room. 36 inches became my minimum once I tried operating a grinder and machine side by side without knocking the portafilter into the wall. The extra foot lets you stage grounds, tamp, and pull without the shuffle. Keep the cart’s wheels if you want to roll it out for parties, but lock them and run a cleat along the baseboard so it registers in the same spot every morning.
12. Office Coffee Nook
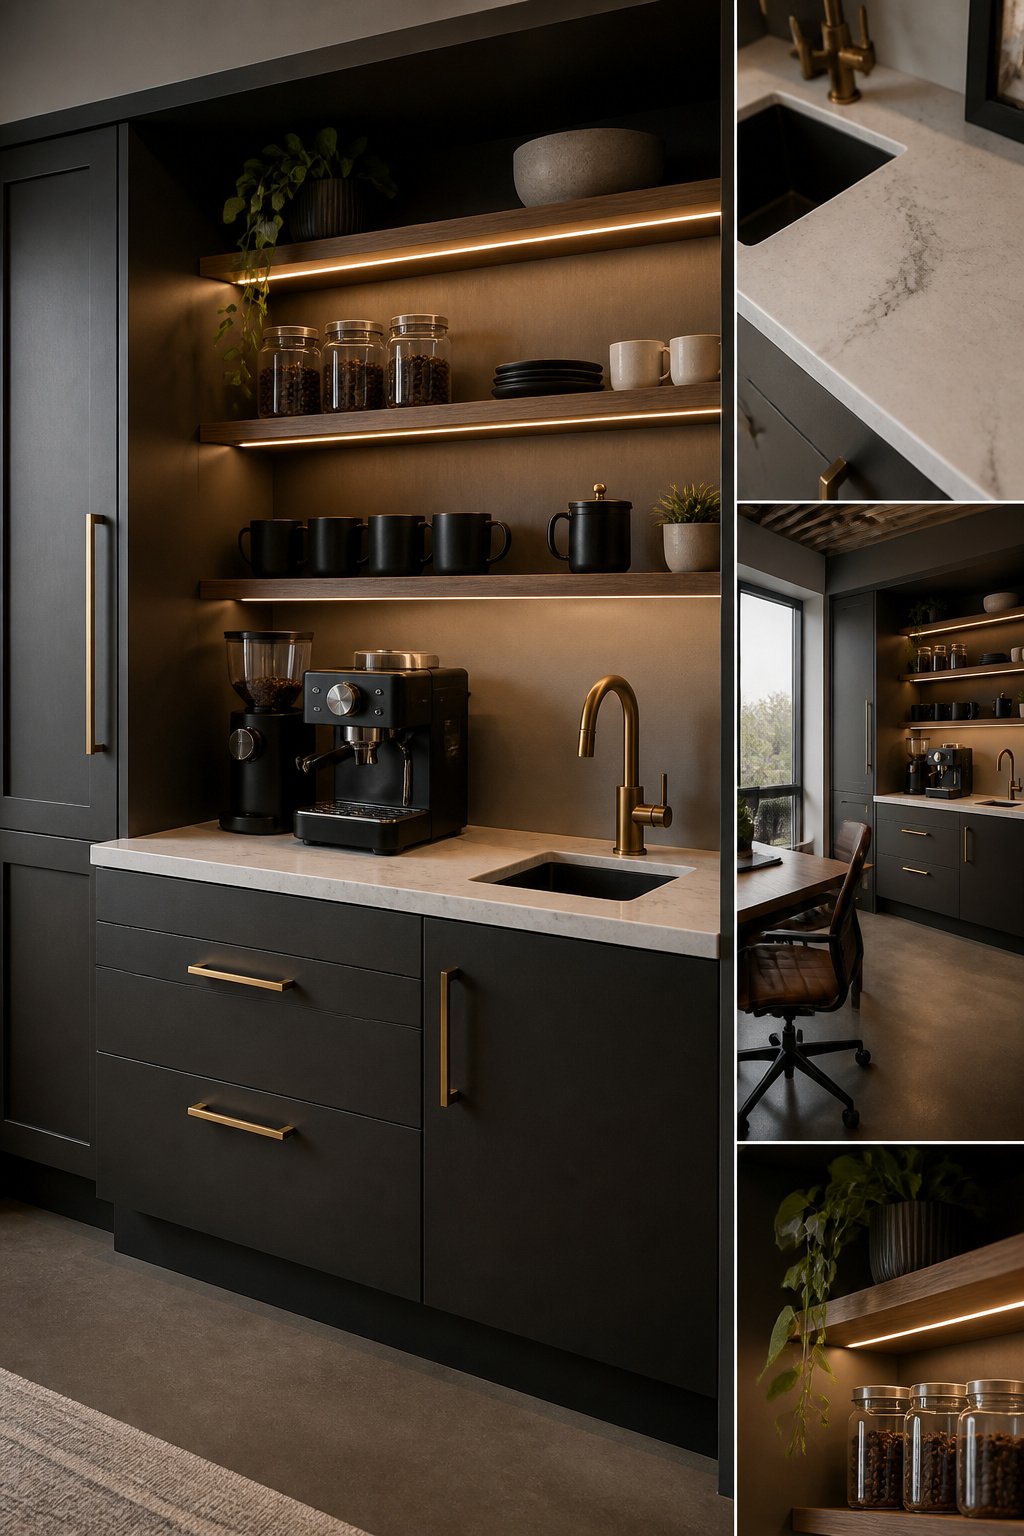
A built in coffee bar tucked into office shelving works best when the wet and dry zones are honest about what each side handles. Mine uses a quartz countertop scrap for the area around the machine, the sink, and anywhere water actually lands. Quartz handles the inevitable coffee and water spills without staining, and the scrap kept the cost low enough that I could spend more on the task lighting.
The dry storage section, where beans, filters, and backup cups live, sits in a wood surround that matches the rest of the built-ins. That contrast, stone against wood, keeps the station from looking like an afterthought.
Cable management matters more here than in a kitchen setup because office shelving rarely hides outlets well. LED strips under the upper shelf give enough light for early mornings without stealing desk space, and warm metal hardware in brass or matte black ties the two materials together so the nook feels intentional, not improvised.
13. Closet Conversion
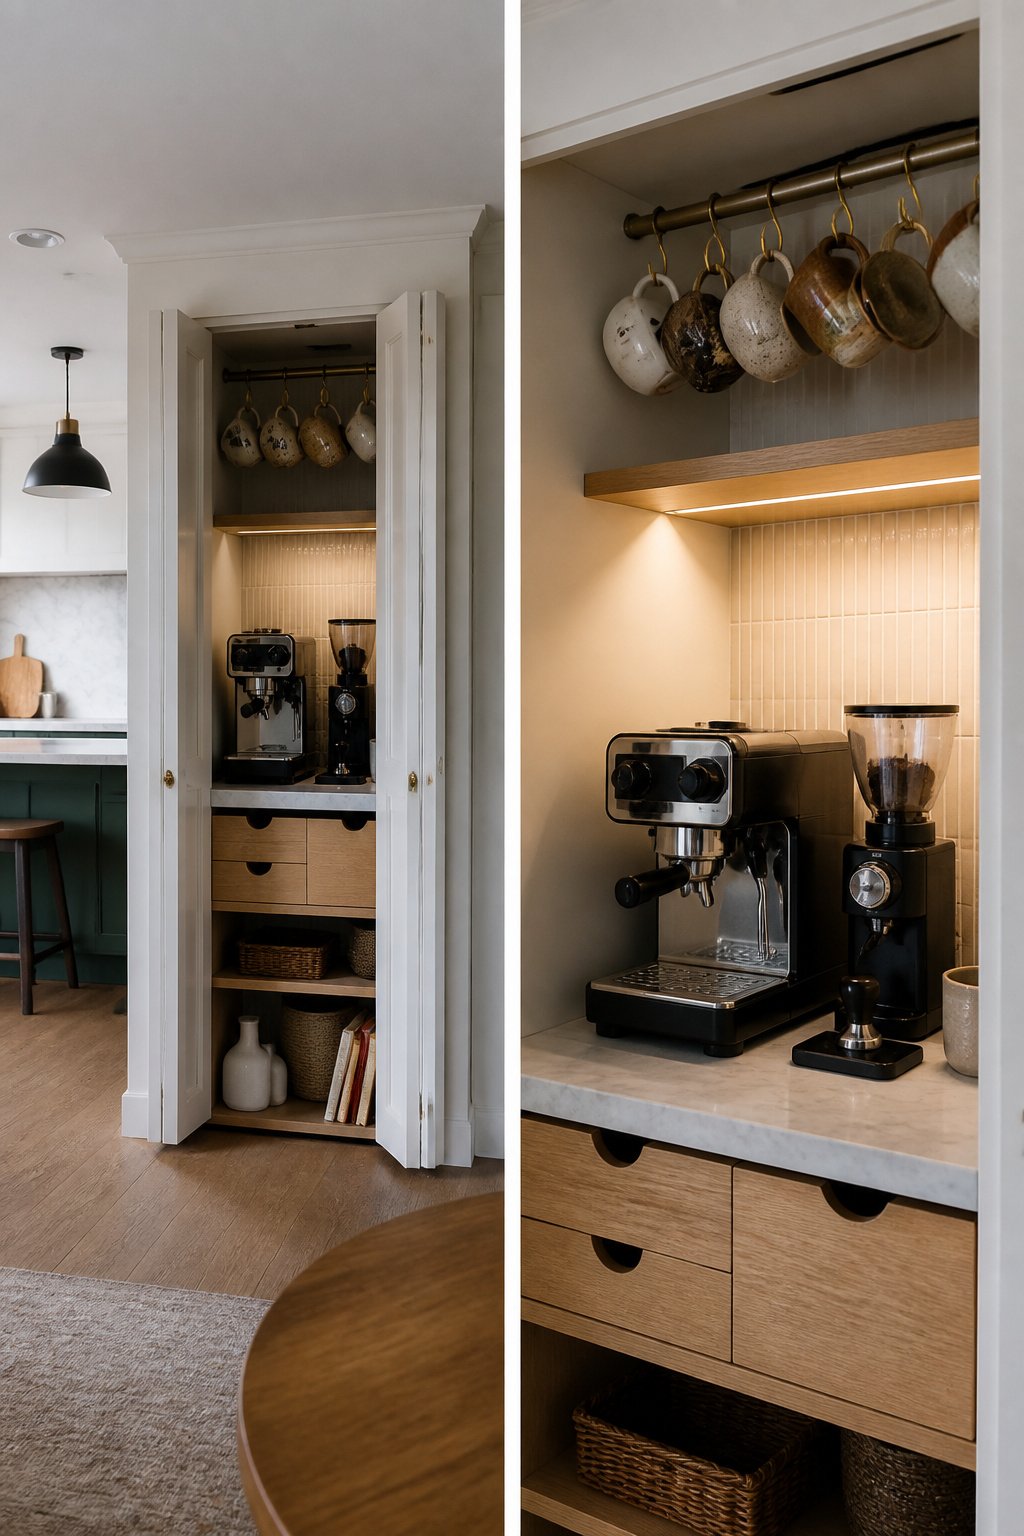
A reach-in closet with its doors removed gives you roughly 24 inches of counter depth once the framing is cleared, which is tight but workable for a single espresso machine and grinder. The trick is treating the remaining closet rod as hanging storage for mugs rather than ripping it out; ceramic cups dry faster on hooks than they do stacked in cabinets, and the rod keeps them at eye level where you will actually use them.
Steam ventilation is the part that can quietly wreck your drywall. Espresso machines vent heat upward, so any upper shelf or cabinet needs a few inches of clearance above the machine, and the back wall wants a durable backsplash material behind the portafilter zone. Electrical rough-in means at least two dedicated outlets, one for the machine and one for the grinder, ideally placed inside the closet cavity so cords stay hidden. Plumbing is not required unless you are running a hard-plumbed machine; most home setups use a refillable reservoir, which only needs a nearby sink for rinsing and refilling.
The concealed look depends on keeping the counter shallow enough that a pair of simple curtains or a single panel can close the opening when guests arrive. Go deeper than standard counter depth and the panel bows or the illusion breaks.
14. Modern Meets Vintage
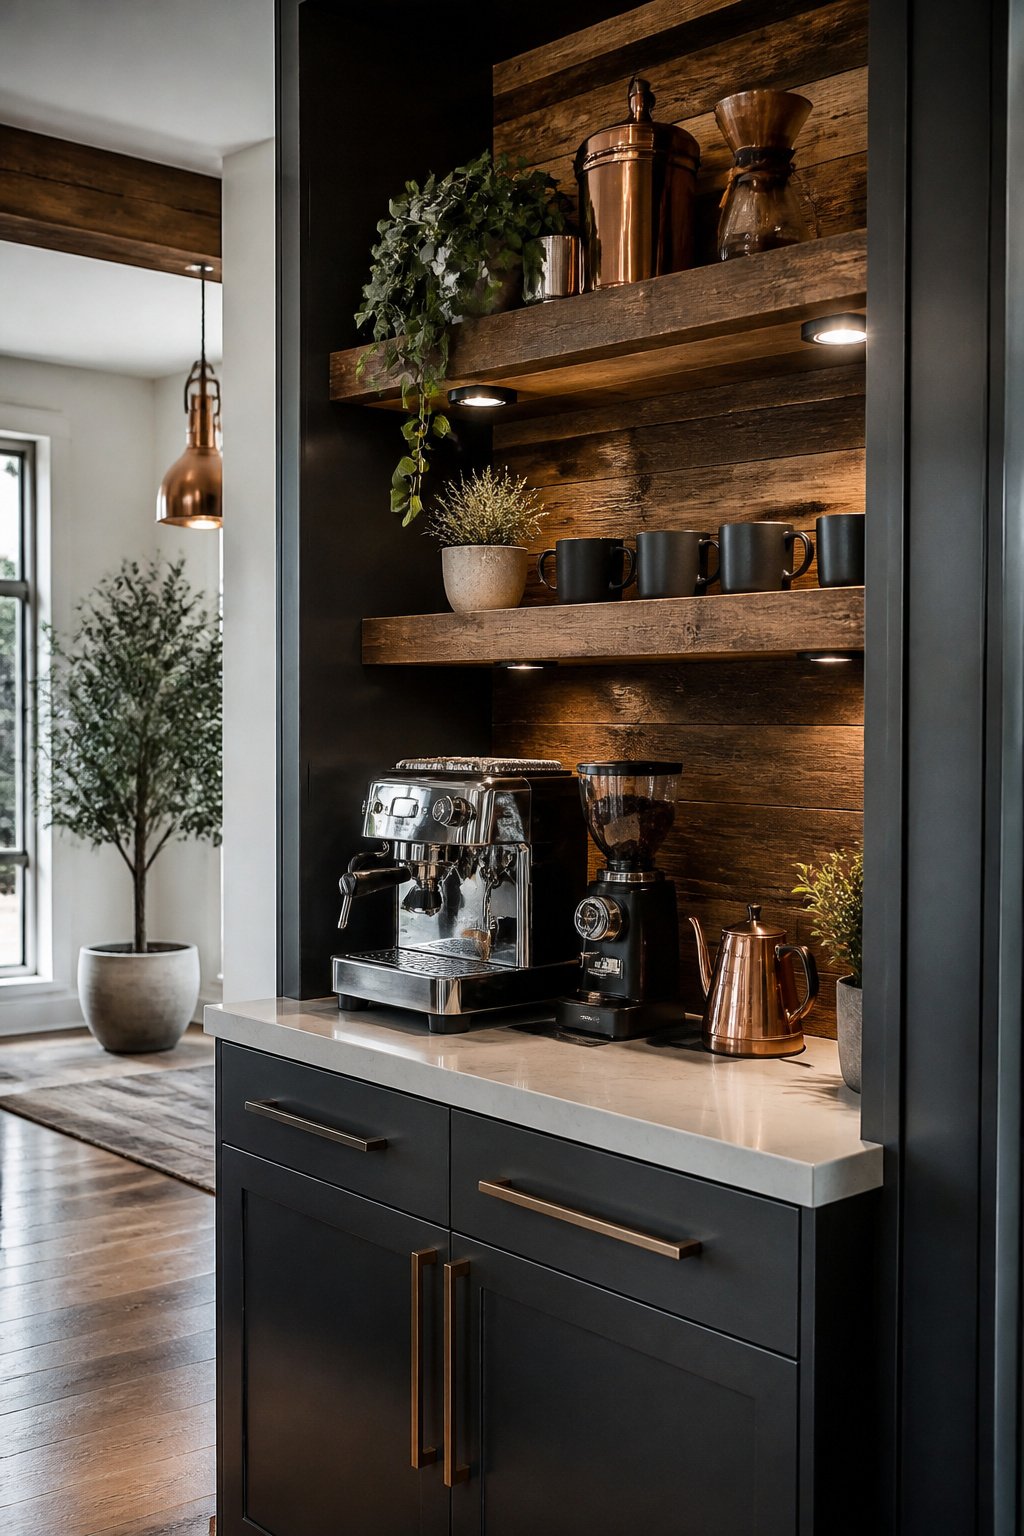
Sleek quartz counters with a cool, almost mirror-flat finish read as too clinical until you set something warm against them. Reclaimed wood shelving, rough with old nail holes and saw marks, does that work. The tension between the two is the whole point: one era trying too hard to look new, the other trying too hard to look old, and both failing in the best way when they share the same wall.
The risk is costume. A 1950s chrome machine in mint condition looks like a prop; a battered one looks like a flea market stall. What worked in the setup I kept returning to was a retro silhouette, rounded and compact, but with the patina of actual use. Dents you cannot fake. The brass cup rail mounted underneath the lowest shelf pulled the two eras together by belonging to neither. It caught the quartz’s reflected light and the wood’s amber tones without matching either, a third thing that let the other two stop arguing. Brass ages visibly, and that aging is what keeps the mix honest. Without it, the reclaimed wood starts performing heritage and the quartz starts performing laboratory.
15. DIY Base Cabinet Build
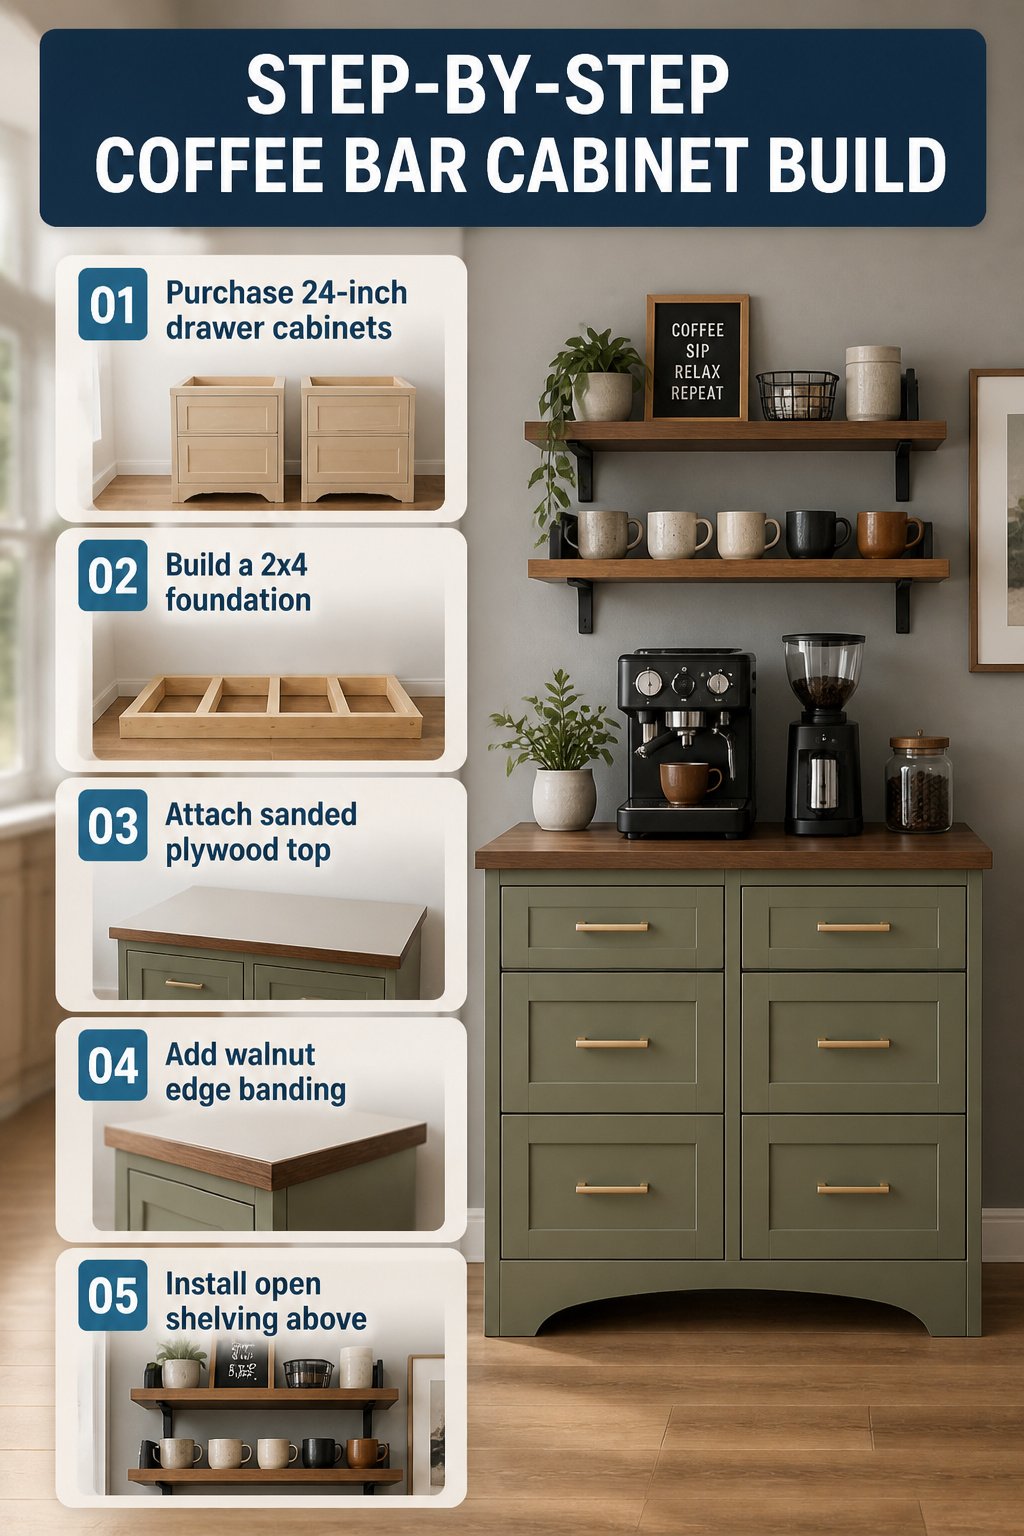
Two 24-inch drawer base cabinets from any big-box store give you the bones of a built-in coffee bar for about the same footprint as a standard dishwasher. I built mine on a 2×4 foundation first, which added 2.5 inches and let me level everything before the cabinets even touched the floor. The standard 34–39 inch height range lands most coffee bars right at hip level; mine finished at 37.75 inches with the countertop, which feels natural for tamping grounds without hunching.
For the top, sanded plywood cut to size beats stone on price and weight. I painted mine to match the wall, then ran walnut edge banding across the front edge to hide the ply layers. That banding cost more than the plywood itself, but it is the detail that makes the counter read as furniture rather than scrap. I skipped the same treatment on the sides where no one sees them.
Open shelving above keeps mugs within reach and gives the station that relaxed café feel. Deep drawers below, fitted with simple dividers, organize pods and filters far better than cabinet shelves ever could. I used leftover countertop plywood to cut an arched toe kick that mirrors a hutch I already own, which tied the new piece into the room without extra material spend.
Where to Put It
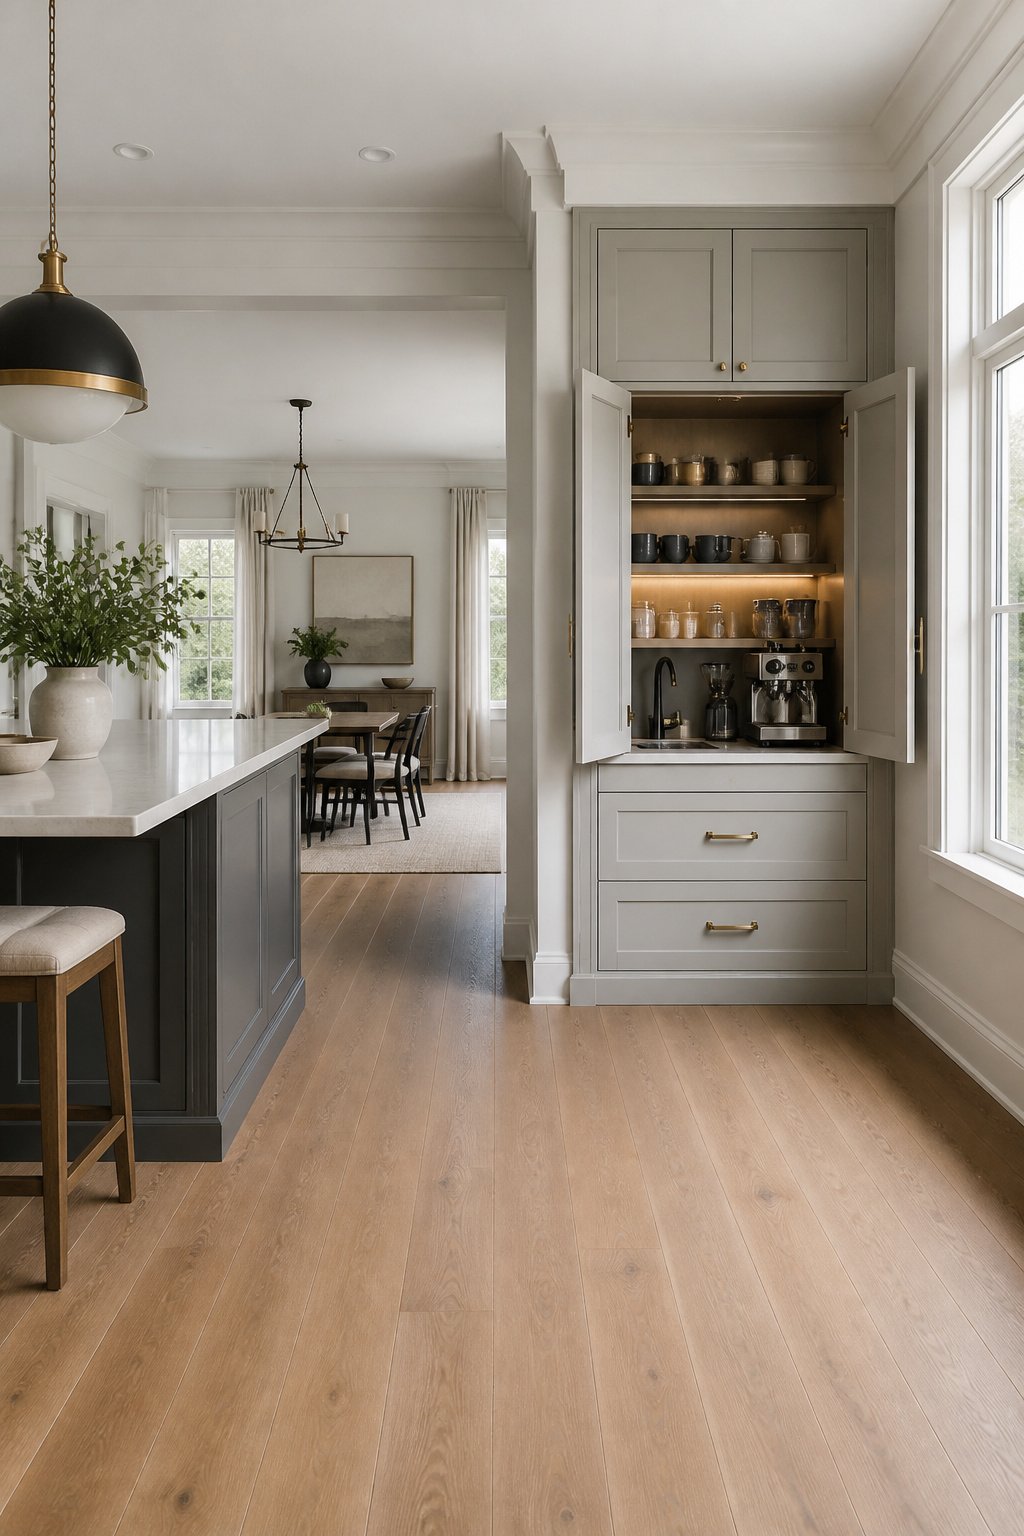
The end of a counter run is the easiest place to start. Dedicate the last 24 to 36 inches of existing countertop to coffee, ideally away from the main cooking zone so morning traffic does not collide with dinner prep. A recessed wall or unused corner steps up from that into something that reads intentional: cabinetry built into a nook gives a true station feel without eating the whole kitchen.
Inside a tall cabinet with bi-fold or pocket doors, the entire setup disappears. Open the doors in the morning, close them when you are done. An adjacent butler’s pantry or hallway off the kitchen keeps the main space clear during busy mornings, which matters more than it sounds when two people are trying to leave at once.
Proximity to a water line and easy outlet access are the two non-negotiables to check first. A nearby sink is enough for machines with refillable reservoirs; plumbing only matters if you are running a hard-plumbed espresso machine. Either way, measure your gear before settling on placement. Tall espresso machines and the swing of a portafilter need extra vertical clearance above the counter, so a cabinet or shelf that looks right on paper can end up too tight in practice.
Counter Depth and Clearance
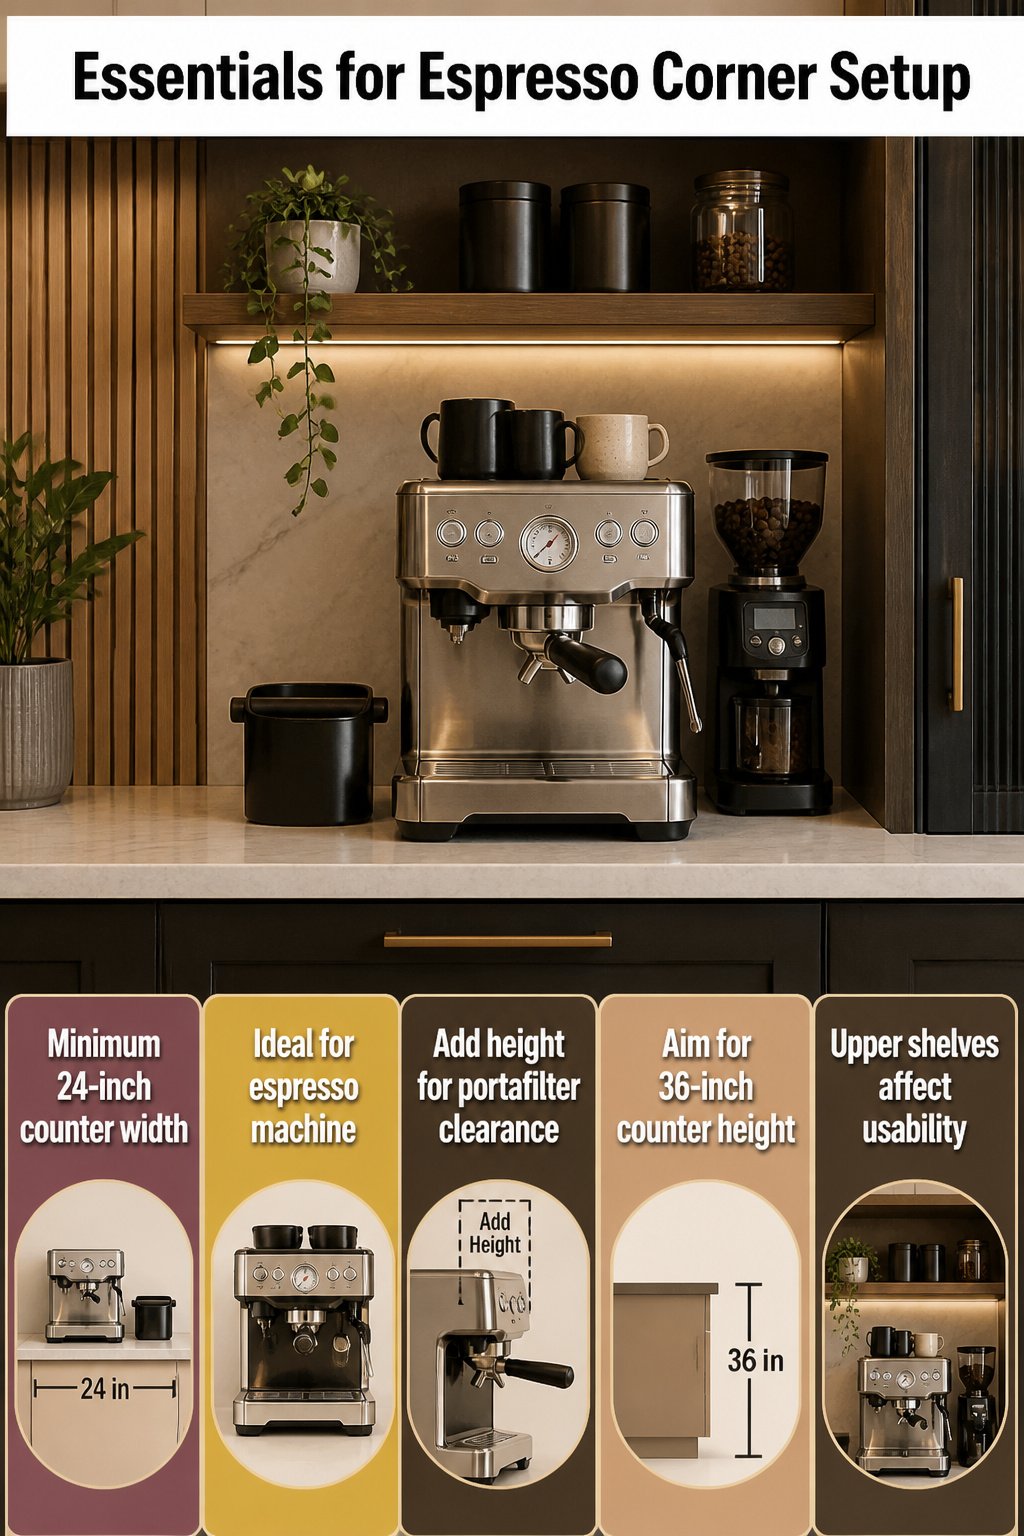
A functional espresso corner needs 24 inches of counter width at minimum, and that is exactly what it sounds like: room for the machine, a knock box, and barely enough space to work. Bump that to 36 inches if you are running a grinder alongside or want a small appliance garage tucked behind a sliding panel.
Vertical clearance is where most built-in coffee bars go wrong. Espresso machines run taller than drip brewers, and the portafilter swings upward when you lock it in. Measure your machine height, then add the headroom needed to lift the water reservoir or angle that portafilter without rapping your knuckles on the cabinet above. A few inches of breathing room above the heating element keeps steam from warping the shelf overhead and gives you space to actually use the thing. Counter height itself sits around 36 inches, which blends into a standard kitchen run, but the upper cabinet or open shelf above it is what determines whether the setup works daily or becomes a storage spot you avoid.
Storage That Actually Works
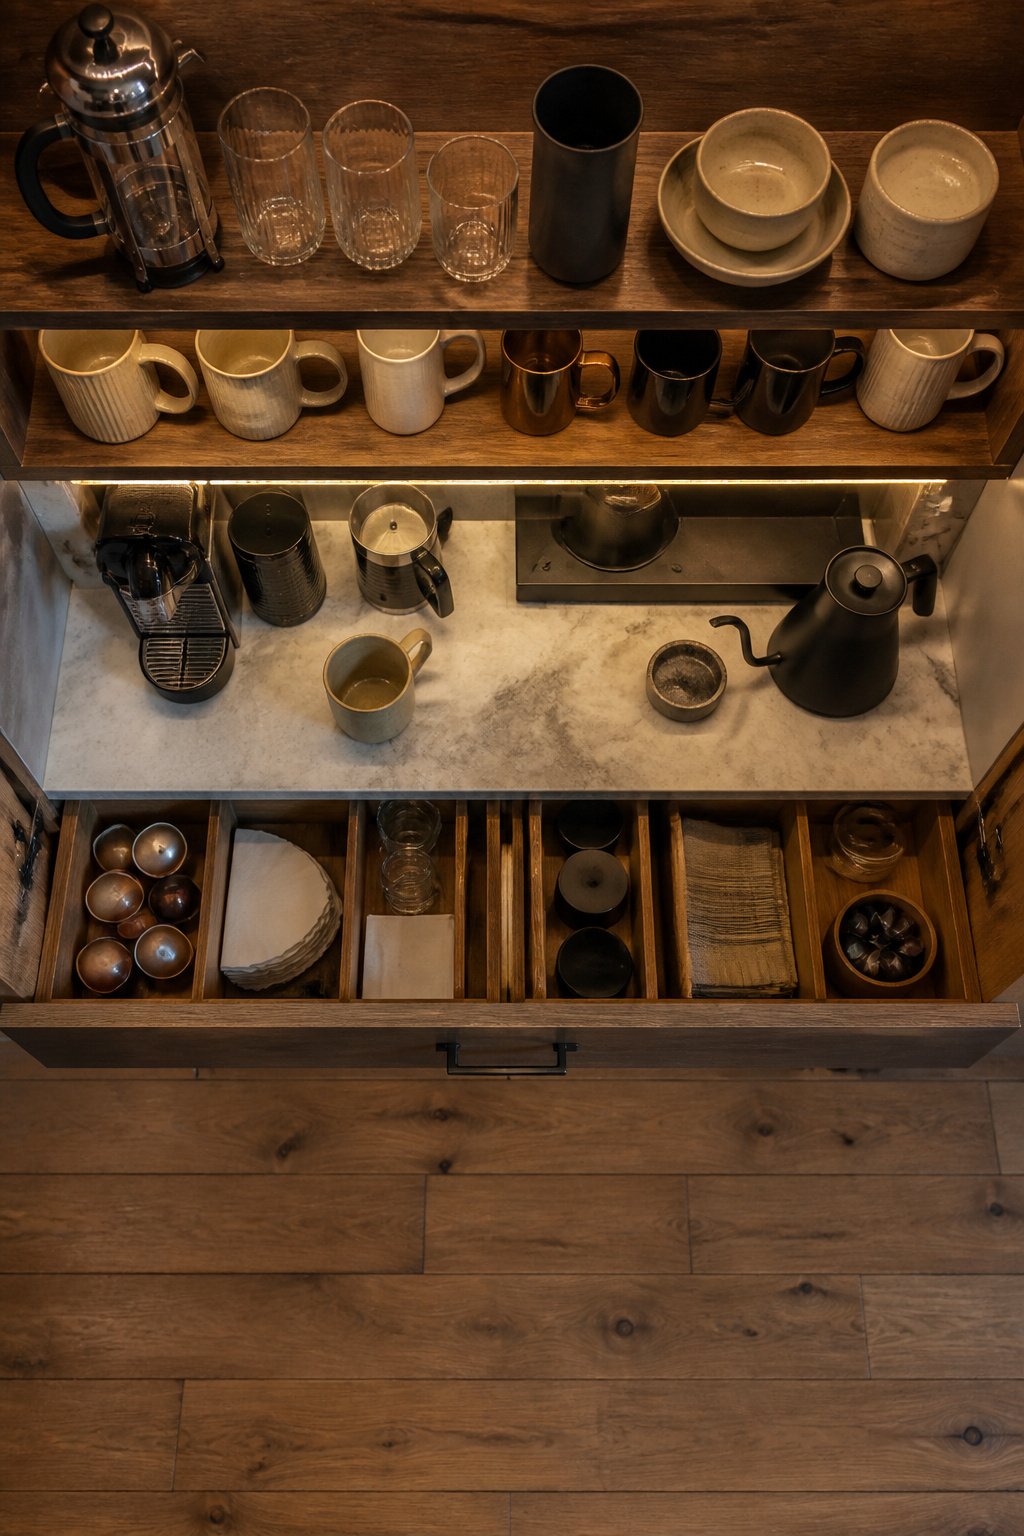
Open shelving above the bar keeps mugs and glassware within reach and gives that relaxed, café-like feel, though the dust settles fast. For the gear itself, deep drawers with dividers organize pods and accessories far better than a cabinet shelf ever could, and a shallow pull-out handles filters and small tools without the digging. I reach for the drawers first every morning.
Rail systems above the cabinet work well for hanging measuring spoons, whisks, or a grinder you use daily, but they read as busy if the bar faces an open-concept living area. The under-cabinet lighting I added thinking it would look nice turned out to be the most practical move in the whole build. It hits the countertop at 6 a.m. when the overhead kitchen lights feel aggressive, and it lets me read labels on syrup bottles without pulling everything forward. If you want the whole station to disappear on demand, retractable or pocket doors hide the clutter completely, which suits kitchens that are always on display.
Materials That Hold Up
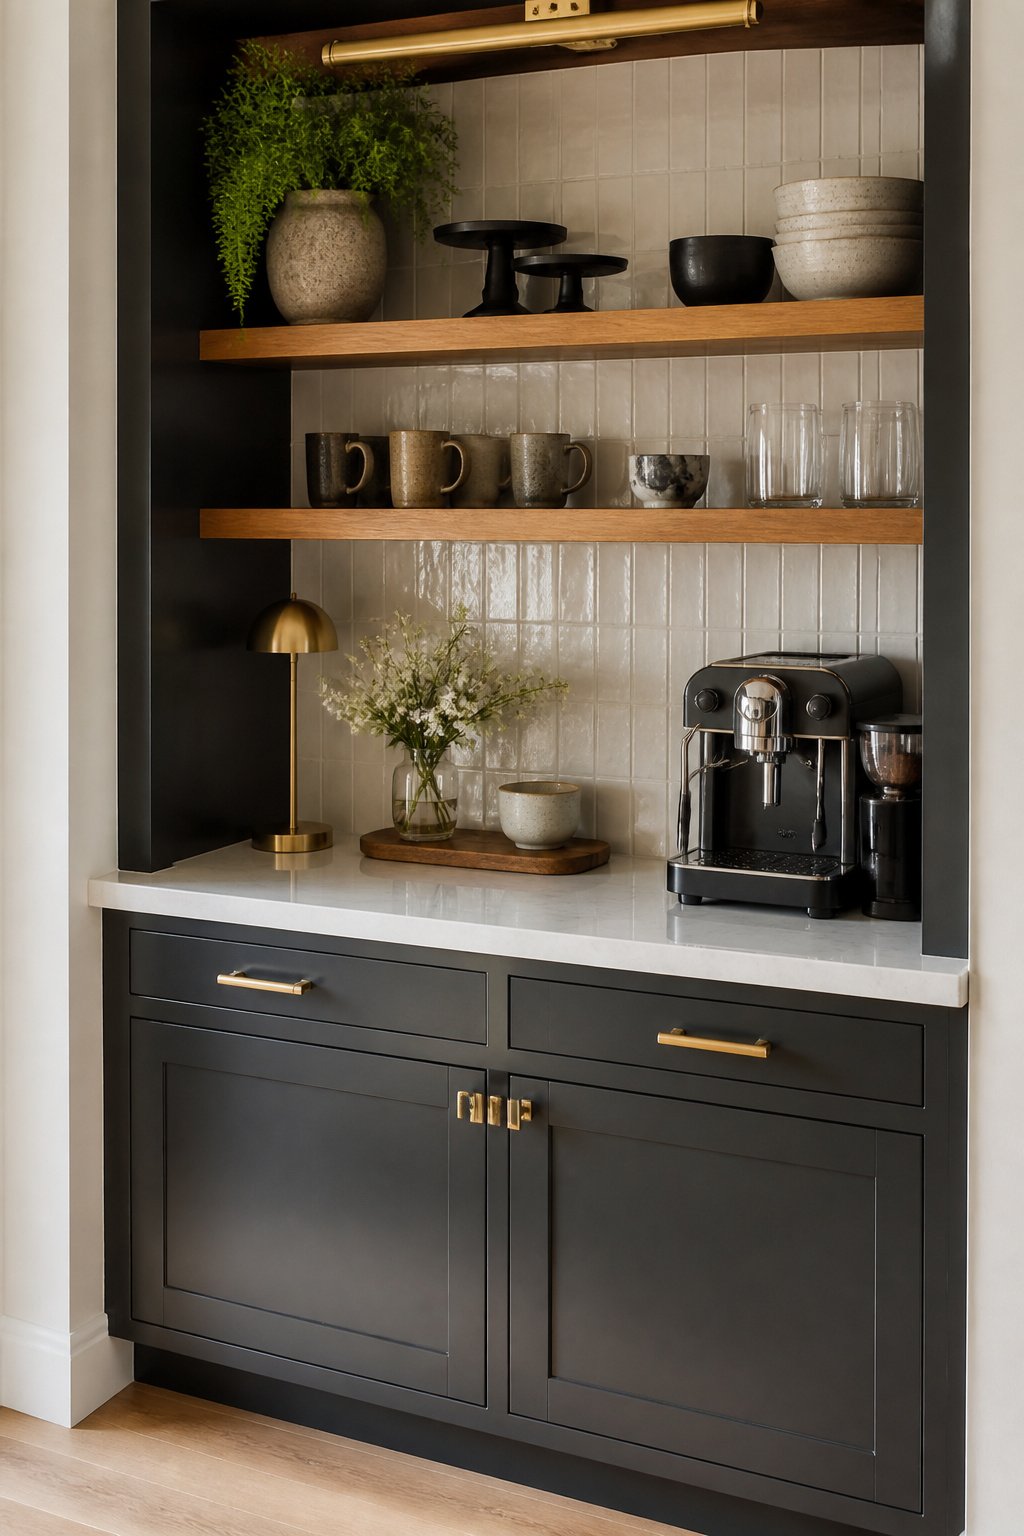
Quartz handles the heat and stain reality of a built in coffee bar better than almost anything else on the market. The resin binders make it non-porous, so coffee rings and water spots sit on the surface instead of soaking in. That matters more than the pattern when you’re pulling shots before dawn.
Wood warms the look, but it needs sealing and a willingness to wipe spills immediately. The steam from an espresso machine will eventually lift an unprotected finish near the group head. If the budget allows one splurge, put it toward the quartz and use wood for open shelving above, where the wear is gentler.
Tile backsplashes run the range from four-inch subway to slab-sized porcelain. The height that actually catches splatter is eighteen inches minimum from counter to cabinet bottom, not the four-inch accent strip that photographs well. Ground coffee, milk froth, and the occasional pulled shot all travel farther than you’d expect. A short backsplash looks finished in a staged photo; at home, it leaves drywall to absorb the evidence of daily use.
Brass or matte black hardware ties the materials together without demanding attention. The metal finish is the last decision, and the one easiest to change later if the kitchen’s existing pulls already set the tone.
Frequently Asked Questions
How much space do I need for a coffee bar?
A functional espresso corner needs at least 24 inches of counter width, which gives you room for the machine, a knock box, and enough space to work without juggling the portafilter over the sink. Bump that to 36 inches if you want a grinder alongside or extra storage. Vertical clearance matters just as much; tall espresso machines and the upward swing of a portafilter need headroom above the stated height, so measure your gear before locking in cabinet or shelf placement.
Do I need plumbing for a built-in coffee bar?
Most home setups do not need it. Many espresso machines pull from refillable reservoirs, so a nearby sink for rinsing and refilling is enough. Plumbing only becomes necessary if you are running a hard-plumbed machine. Either way, easy outlet access and water within reach are the two non-negotiables to check first.
Where’s the best place to put a coffee station?
The end of a counter run is the simplest start; dedicate the last 24 to 36 inches away from the main cooking zone so morning traffic does not collide with dinner prep. A recessed wall or unused corner steps up to something that reads intentional, while a tall cabinet with bi-fold or pocket doors hides the entire setup when closed. An adjacent butler’s pantry or hallway off the kitchen keeps the main space clear during busy mornings. Pick a spot near an outlet and within easy reach of water.