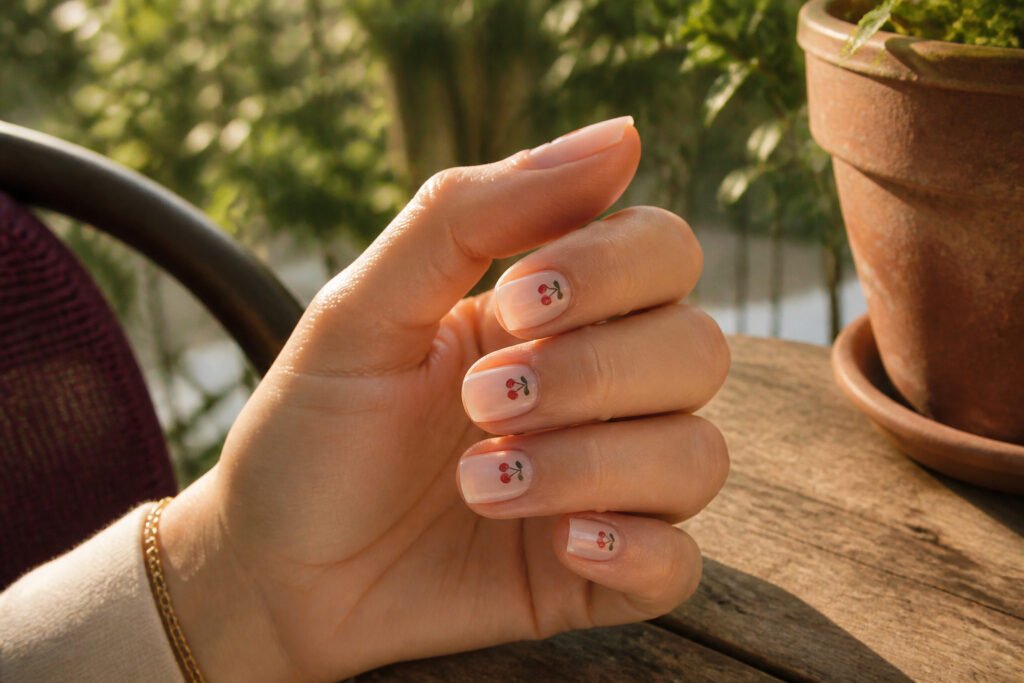
Cherry nails are manicure designs built around the cherry motif, whether that means a single red dot on a neutral base or a full set of sculpted 3D fruit. The real difference between a design that works and one that looks like accidental ketchup is the base you choose; a soft beige or milky jelly lets the red pop where stark white turns chalky. A single 3-millimeter cherry at the cuticle line of a short square nail reads as quiet detail rather than costume, which is exactly why the micro version has become the default for hands that spend time in conference rooms.
1. Simple cherry nails
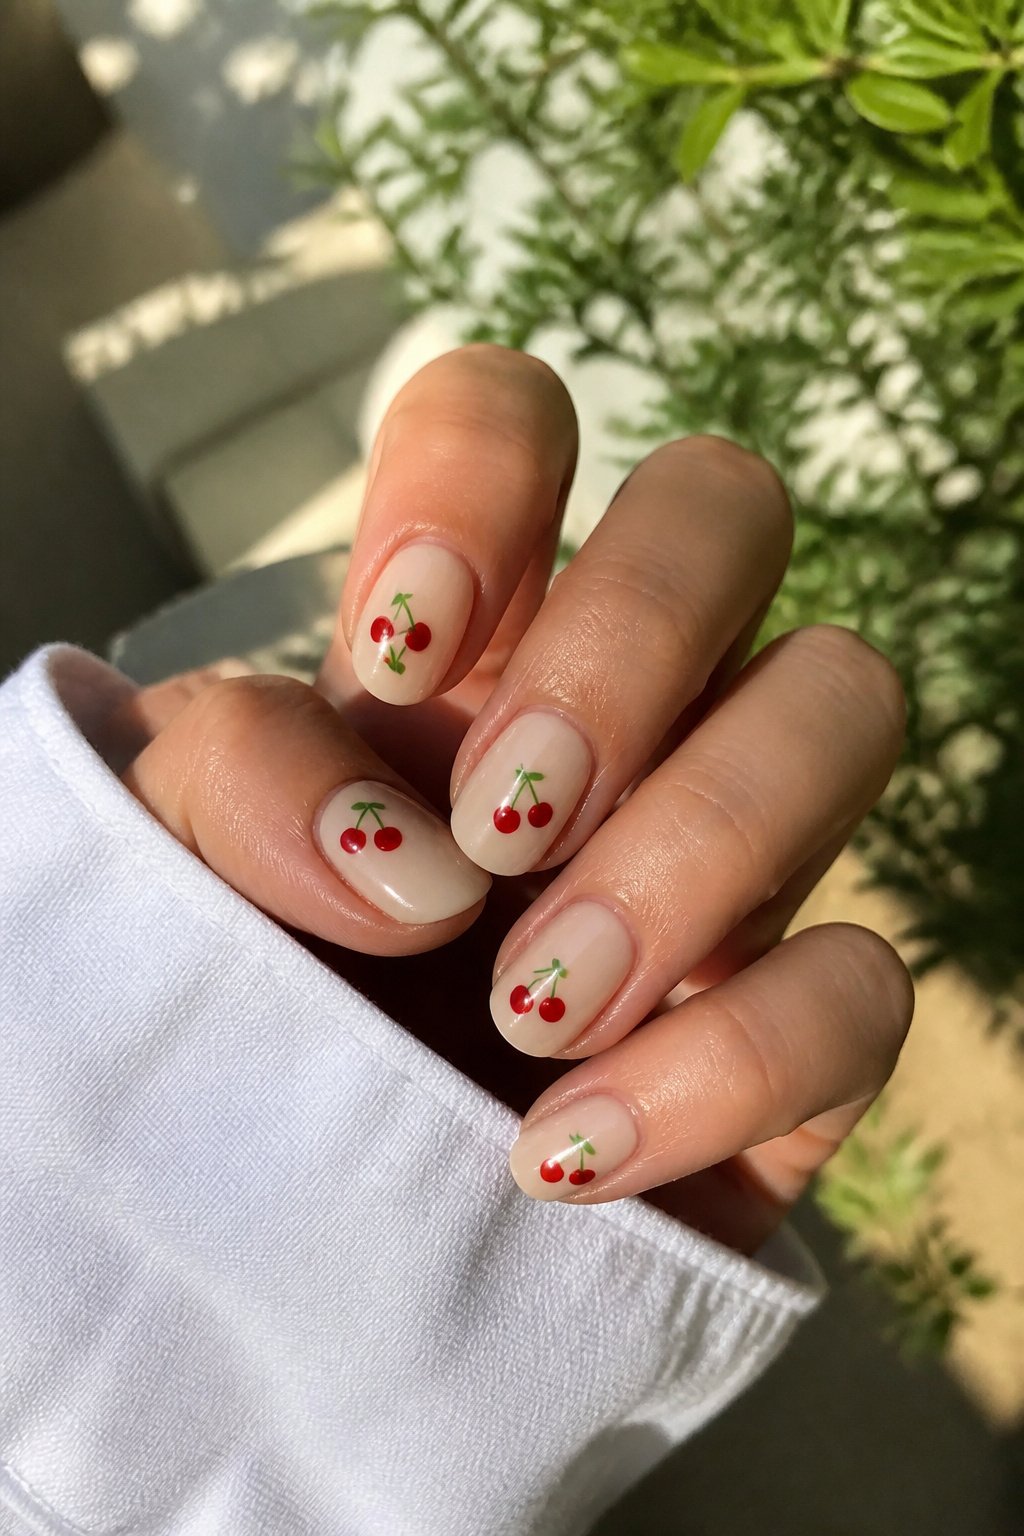
Small red cherries on a neutral or clear base are where most people start with this trend, and for good reason. The design reads instantly as cherries without demanding steady enough hands for leaves, stems, or shading. A soft beige, taupe, or creamy white underneath lets the red pop without competing, and a glossy topcoat keeps the whole thing from looking like a sticker you forgot to seal down.
For the fruit itself, CND Vinylux Longwear Red Nail Polish holds up through the week without chipping into that pinkish fade that cheap reds turn by day three. The shape comes from a dotting tool if you own one, or the rounded back of a bobby pin if you do not. Two slightly overlapping dots per cherry, placed off-center so they look like dropped fruit rather than perfect beads, does the job. Skip the green leaves until you have the placement down; even plain red dots on bare nails scan as cherries once the eye expects them.
2. Striped cherry nails
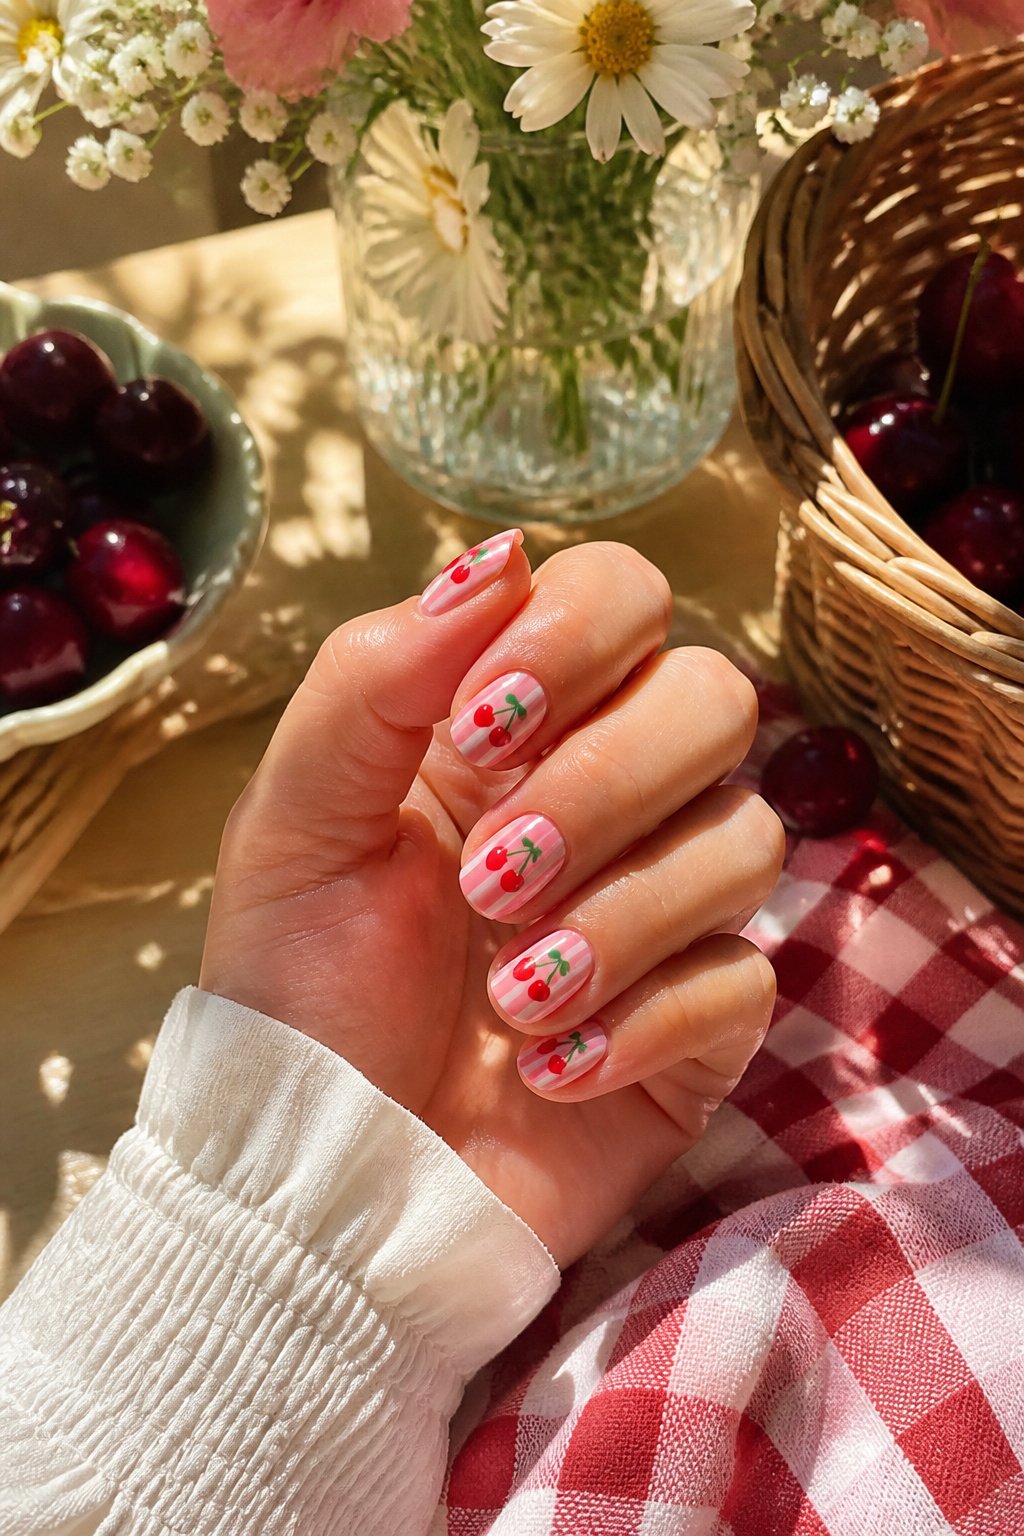
Vertical stripes running the length of the nail give cherry motifs a frame that keeps them from floating aimlessly. I tend toward red and white for this pairing, since the stripe reads as picnic-blanket structure and the scattered fruit drops right into that mood without extra explanation. Horizontal stripes work the same way, though they shorten the look of longer nails more than most people expect; on my own squared-off shapes, a single broad red band across a pink base with two small cherries tucked above it looked balanced where a full cherry pattern alone had felt cluttered. The stripe does the organizing so the fruit can be irregular. Red and pink combinations soften the contrast if the classic diner aesthetic feels too sharp for everyday wear, and a thin metallic stripe between color blocks adds enough polish that the scattered cherries need only the simplest dot-and-stem detail to finish.
3. Pink cat-eye cherry nails
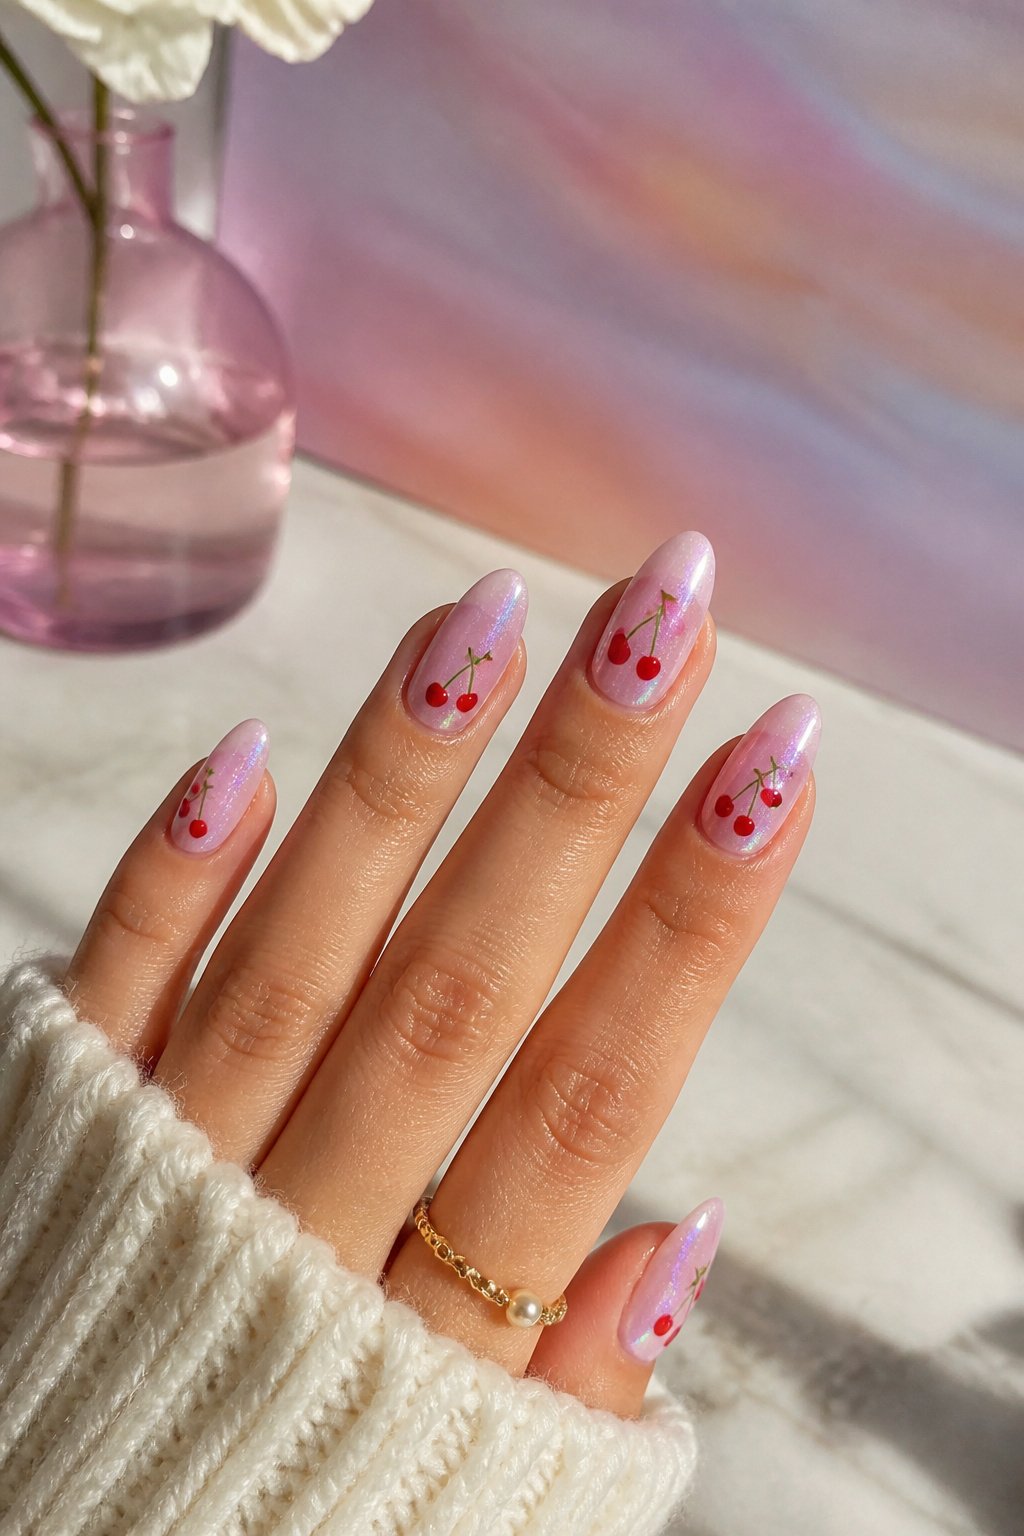
Magnetic cat-eye polish in pink gives cherry nails a depth that flat color never quite reaches. The shimmer runs through the polish like silk, shifting as your hands move under light, and that living surface makes hand-painted or stamped cherries sit forward like they’re actually resting on something dimensional rather than pasted on top.
The trick is letting the cat-eye base cure fully before adding fruit. Stamp or paint your cherries in a slightly deeper or cooler pink than the base so they read as separate objects, not blobs on a matching field. A thin line of deeper red or burgundy at the cherry’s center, where the shadow would fall, keeps the shape from turning into a red circle.
Pink cat-eye cherry nails work best when the magnetic effect runs in one consistent direction across all ten nails, horizontal or vertical, so the shimmer doesn’t fight the cherry placement. Vertical pulls tend to flatter shorter nails; horizontal reads more dramatic on longer shapes. Either way, the cat-eye layer needs a no-wipe top coat before you start detailing, or the magnet’s pattern can blur when you brush on color.
4. Micro cherry nails
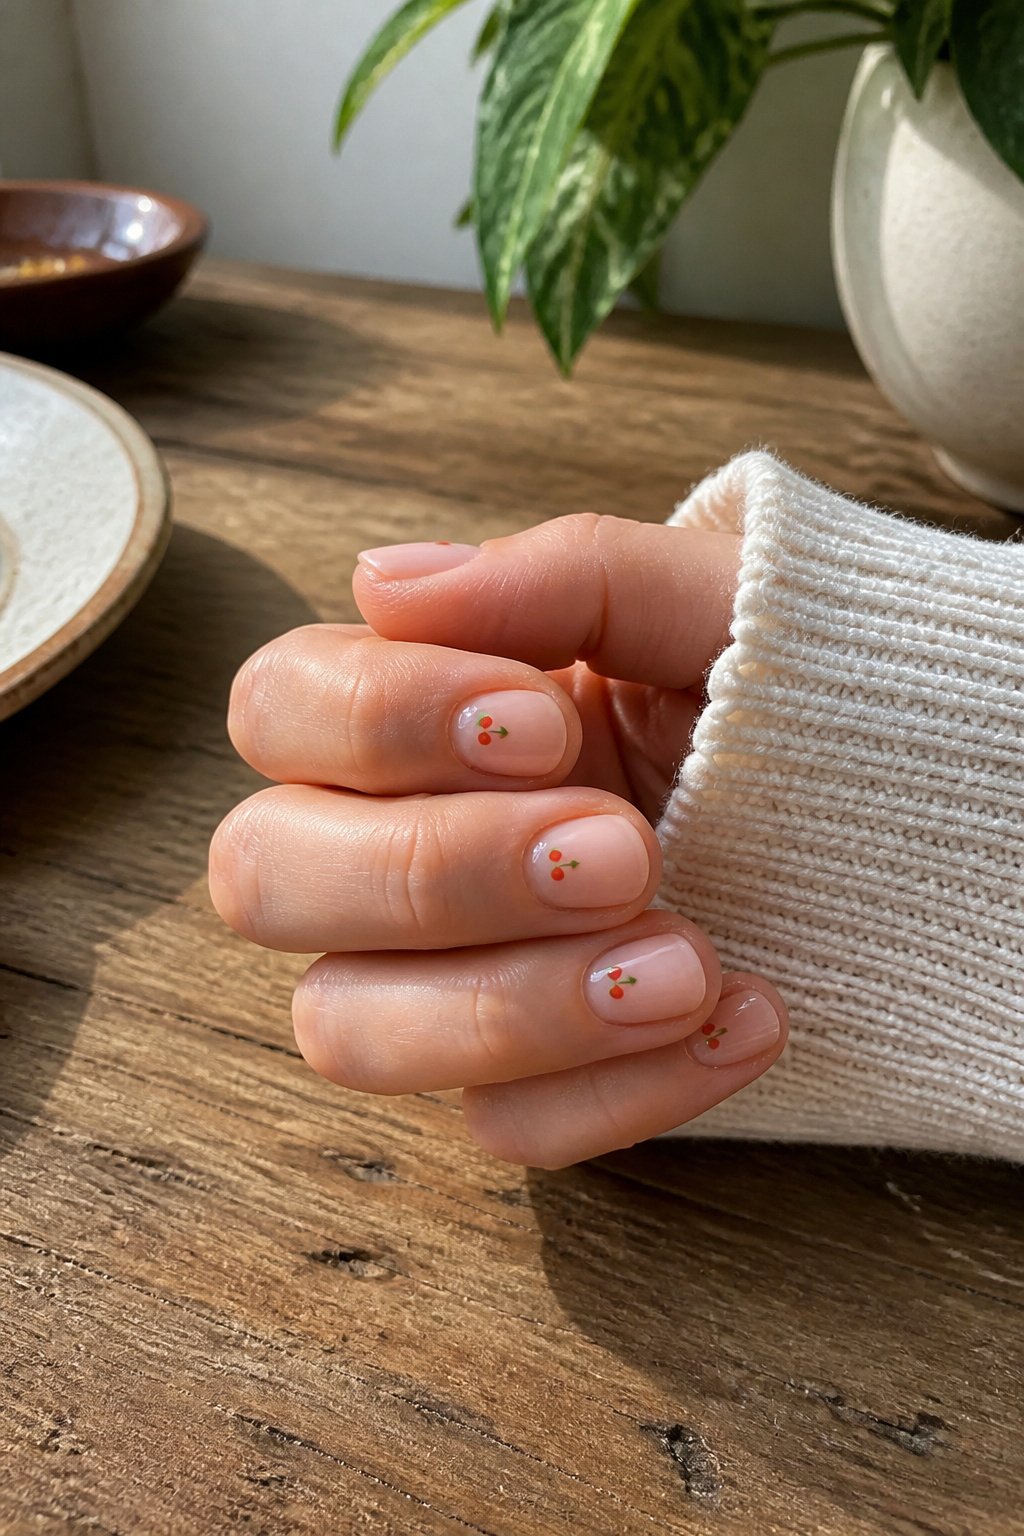
The smallest cherry motifs, sometimes just a pair per hand, land best at the cuticle line or tucked into a corner of the tip. A single 3-millimeter cherry at the base of a short square nail reads as a detail, not a costume, which is why this style has become the default for anyone whose hands spend time in a conference room or a keyboard tray. I kept mine to the pinky and ring fingers only, leaving the other three nails in plain cherry red, and no one in three weeks of client meetings asked about my nails until I mentioned them first. The placement matters more than the count: one tiny fruit sitting high on the nail, near where the free edge begins, draws the eye upward and makes a short nail look slightly longer. Two cherries, if you want them, should sit at different heights so they do not read as a printed pattern. Gel stampers and the smallest dotting tools, the kind sold in five-packs for cuticle cleanup, are the right equipment here; freehanding at this scale tends to wobble into a smudge.
5. Airbrush cherry nails
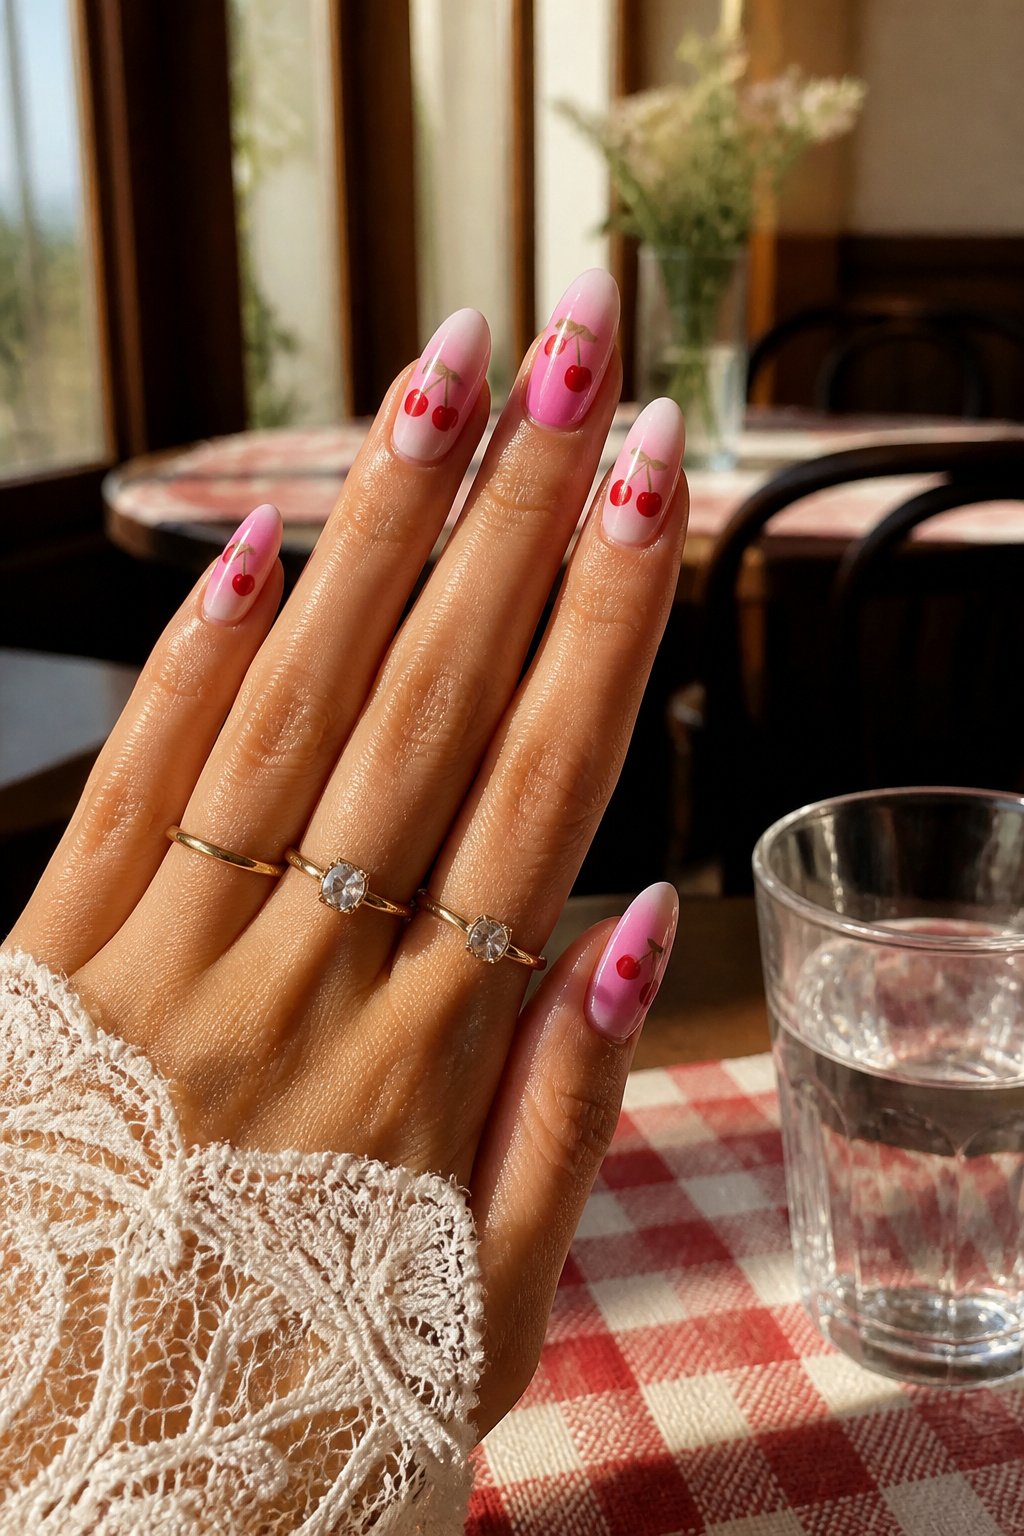
An airbrushed base changes the whole mood of cherry nails. The gradient never sits flat the way a solid polish does; color fades from pale pink at the cuticle to white at the tip, or from lavender into nothing, with that soft haze you only get from a gun. Against that mist, the cherries read as something lifted off a 1980s ski sweater or a diner placemat, not a graphic tee. Hard lines would kill the effect. The vintage feel lives in the blur.
You can build the background yourself with a small compressor and stencils from any nail supply shop, or book a tech who keeps the equipment clean. Stenciled fruit keeps the shape consistent across all ten fingers; freehand cherries, if you have the brush control, look looser and more like the original airbrush era. Either way, the base needs to cure fully before the top layer goes on, or the red bleeds into the gradient and you lose the separation that makes the design work.
6. Glass cherry nails
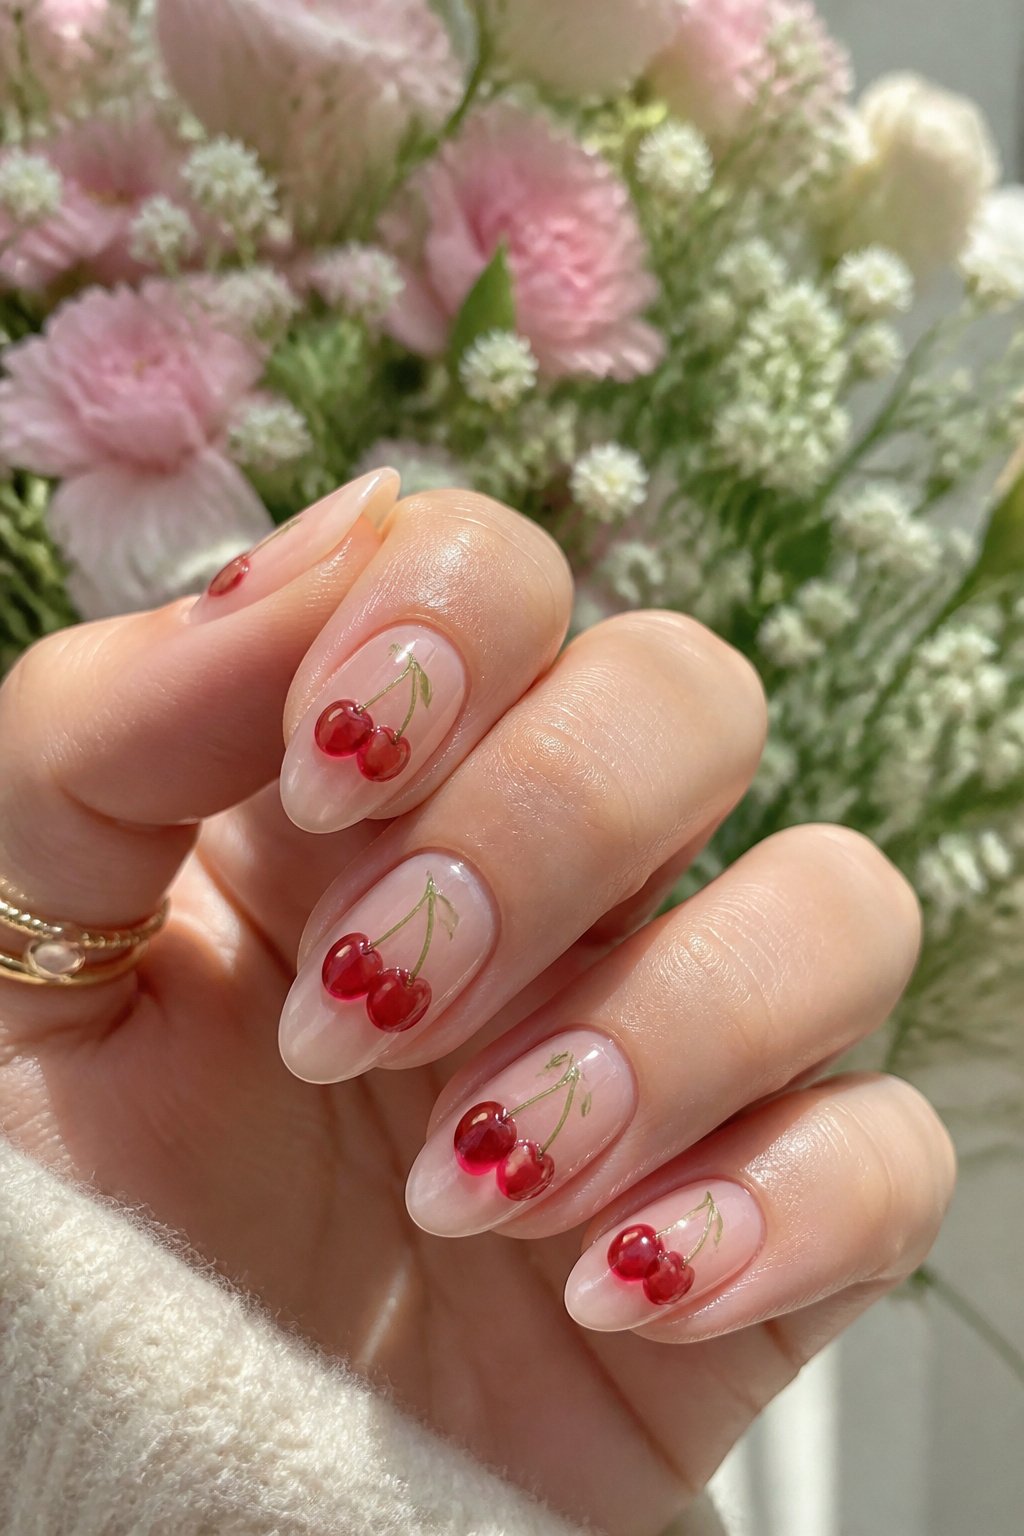
The Korean glass nail technique changes how cherry designs read on the hand. Instead of opaque red sitting on top of the nail like a sticker, translucent jelly layers let light pass through, so the color seems to glow from somewhere inside the nail itself. Applied to cherries, this means the fruit looks wet, almost like candied fruit under syrup rather than flat paint.
Building it takes patience I did not have at first. The base needs to be a milky sheer or a soft neutral, never stark white, or the effect turns chalky. Then the red goes on in three or four whisper-thin coats, each one cured but not fully covering what is beneath. The cherry shape itself is usually hand-painted with a slightly deeper translucent red, or stamped on with a jelly polish that matches the base tone. A dot of opaque white or pale pink at the highlight, kept tiny, gives the dimension without killing the see-through quality.
What convinced me, comparing dozens of these, is that the top coat matters as much as the color. A thick gel top coat with some body to it, cured to a high shine, is what turns those thin layers into actual depth. Skip that step and you have red nails that are merely thin, not glassy. The look works best on shorter to medium lengths; once the free edge gets too long, the jelly effect starts to look like stained tips rather than lit-from-within fruit.
7. Baby blue 3D cherry nails
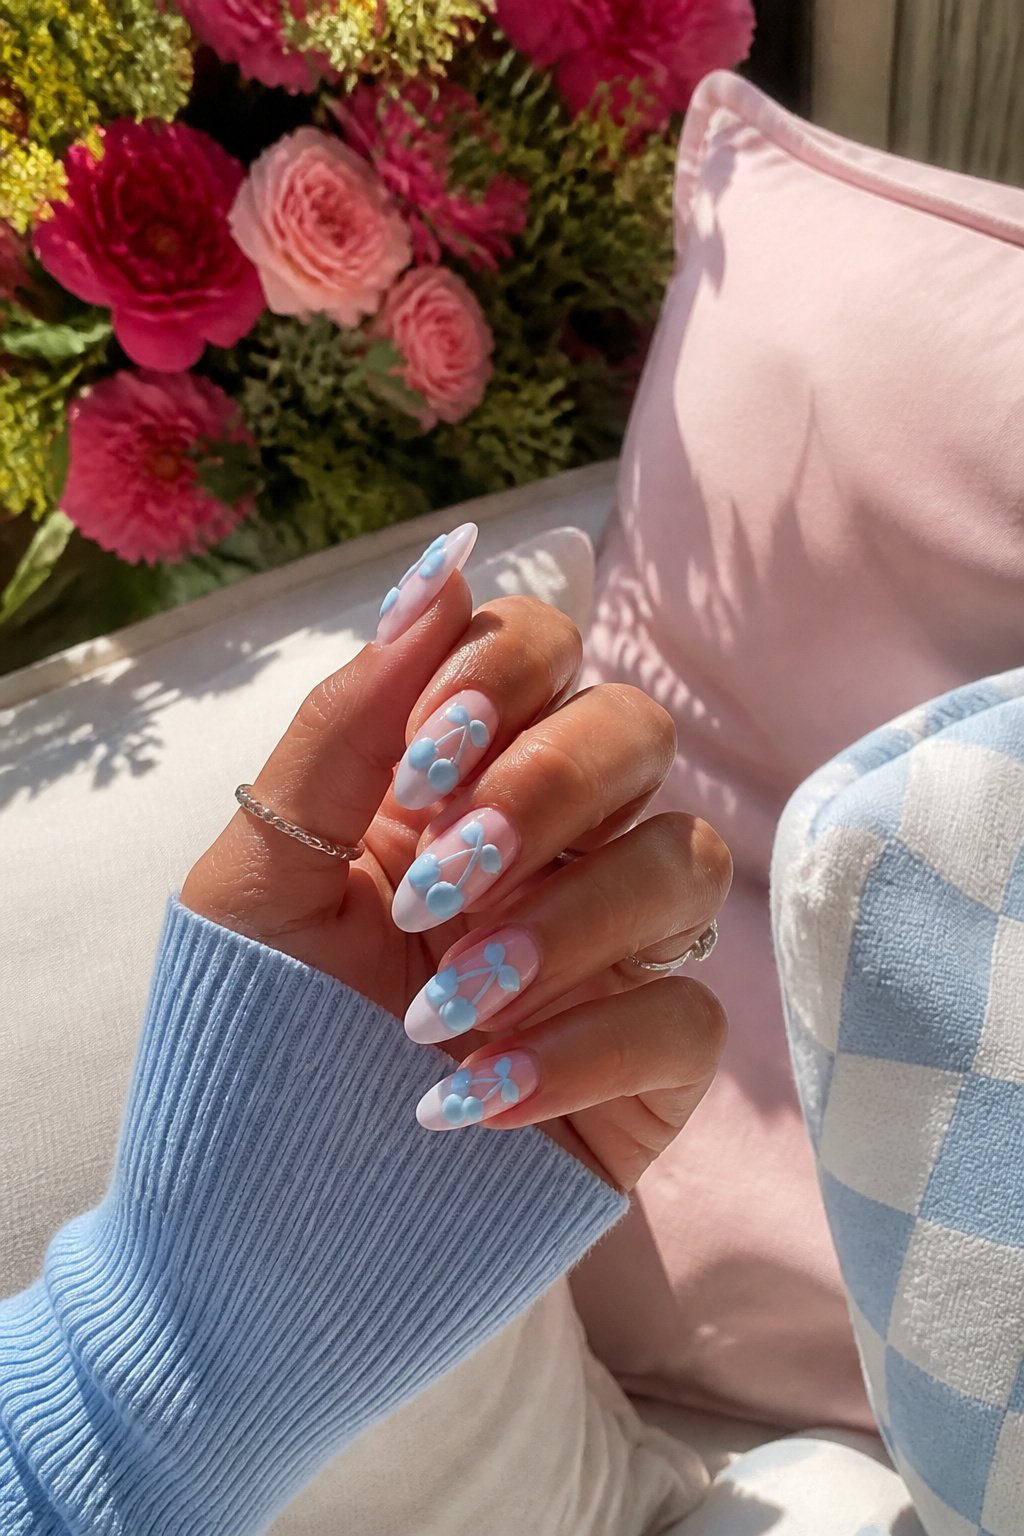
A pale blue base gives 3D cherry nails a cooler, quieter mood than the usual white or nude backdrops. The contrast reads less diner-booth and more summer sky, which works for anyone who wants the cherry motif without full retro kitsch.
Sculpting gel cherries need a UV lamp and a steady hand. Building the fruit in layers of red gel, adding the green stem, then capping the whole thing without trapping bubbles takes practice. Most home kits run small, so the learning curve is real. Premade cherry charms from nail supply stores skip that step entirely; glue them on after your base cures and you’re done in minutes.
Neon green dots or swirls alongside the red fruit push the look even further toward playful, especially if you alternate the pattern nail to nail. The combination lands squarely in summer-event territory: bright, a little loud, and deliberately not subtle.
8. Coquette cherry nails
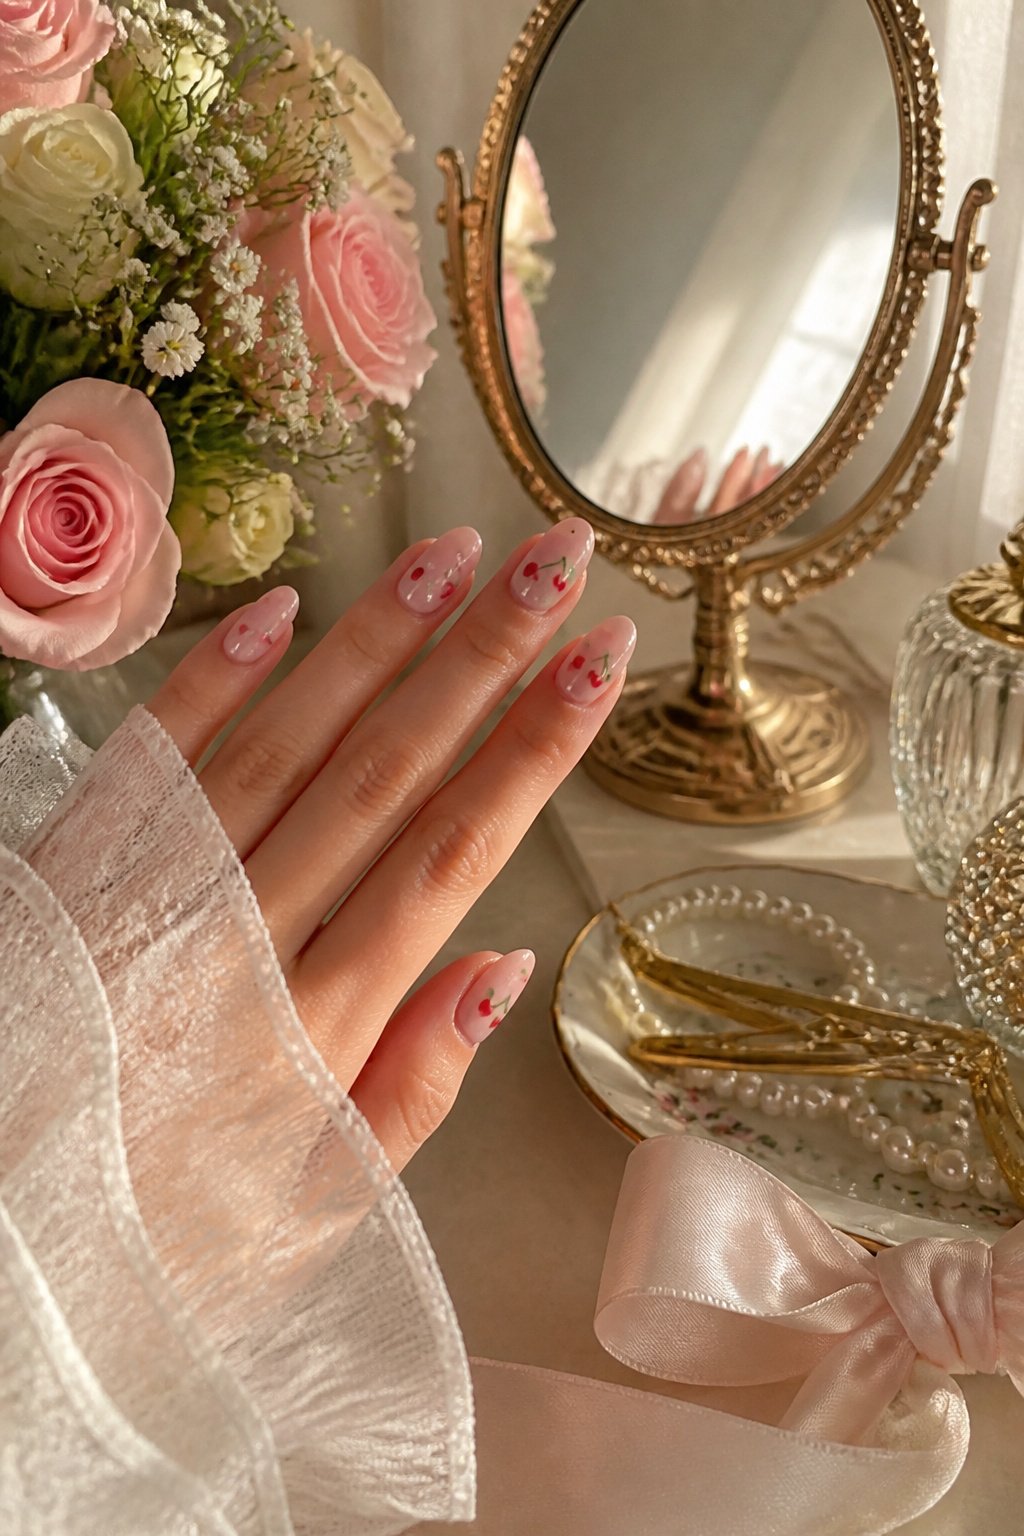
The coquette cherry nail pulls from a specific 1990s romantic mood: think soft-focus music video stills, not the bolder pin-up look that cherry prints usually carry. A sheer pink or milky white base sets the tone, with cherries drawn small and scattered rather than clustered center-stage. What makes it read coquette is the hardware. A single ribbon stripe, maybe in satin-finish red or pale blue, runs across one nail. Tiny pearls or gold beads sit at the cuticle or trace the curve of a French tip. Bows, if you use them, should be micro-sized and placed off-center so they look like an afterthought.
The cherry illustration itself stays delicate. Outlines in fine brown or deep rose, filled with a wash of true cherry red rather than opaque pigment, keep the feel airy. I have seen versions where the cherry stems tie into actual bow decals at the nail edge, which works if the scale is restrained. Go larger and the look tips into costume territory. The 1990s reference matters here: this is the aesthetic of a worn-in camisole and a single strand of fake pearls, not the full structured femininity of vintage repro style. Keep the finishes matte or satin; high gloss reads too modern and breaks the daydream.
9. XL cherry nails
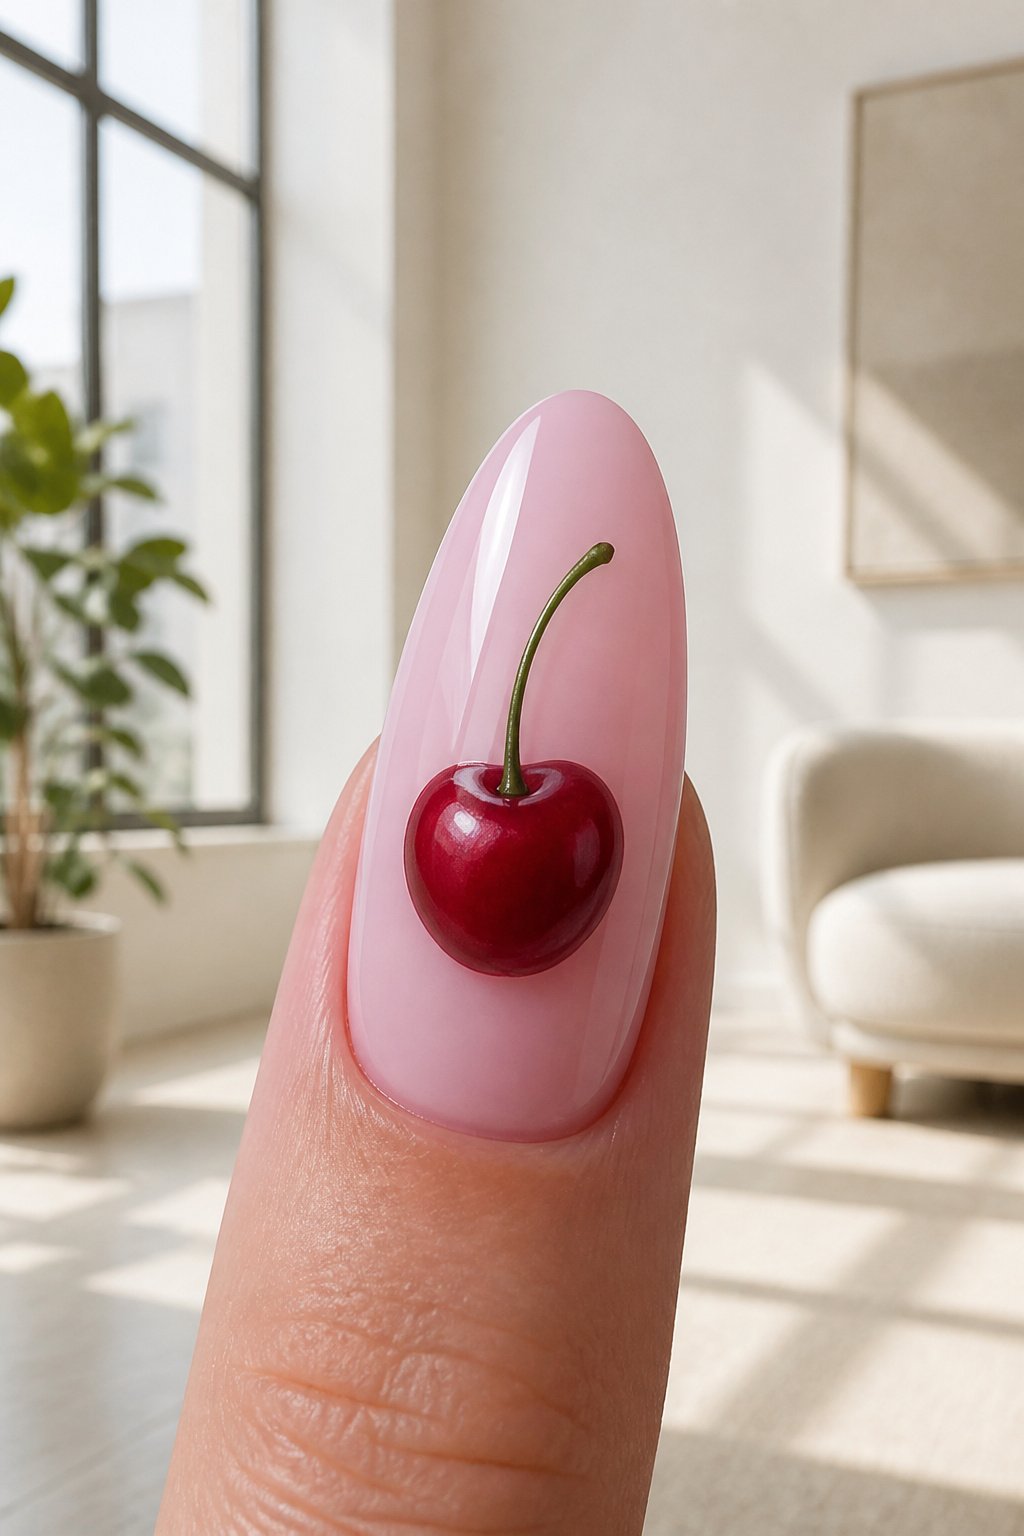
The oversized cherry motif lands differently than the scattered-fruit looks most people try first. One large cherry per nail, or a single fruit that stretches across two adjacent nails as a continuous design, reads as intentional rather than busy. The shape needs room to breathe. On a short square nail, the stem and leaf get compressed into a smear; on an almond or stiletto shape with real length, the curve of the fruit and the bend of the stem stay distinct enough to register from conversation distance. I have seen the two-nail version work best on the ring and middle fingers, where the natural gap between the nails lets the stem arch realistically. The base color matters more here than with smaller motifs. A solid, opaque background, cream or pale pink, keeps the cherry from fighting for attention. Glitter or competing patterns underneath tend to break the silhouette. If the fruit itself is going to carry detail, a dimensional red with a darker shadow at the dimple and a tiny white catchlight, that is enough ornament for the whole hand.
10. Slime green cherry nails
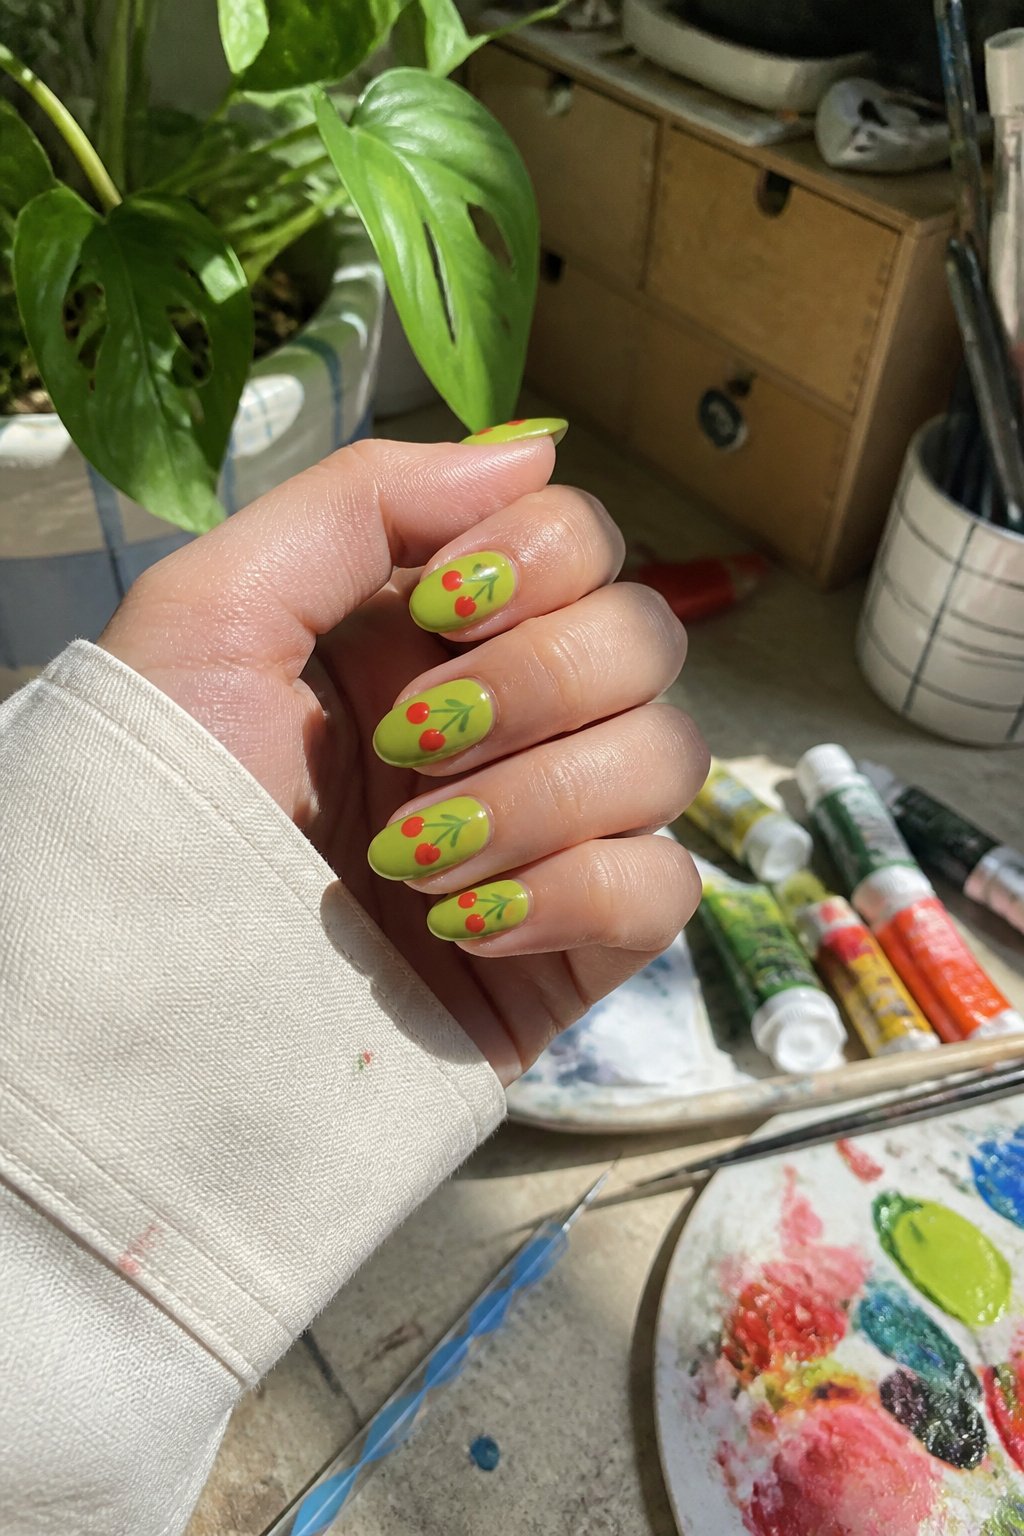
Acid green and cherry red share a wavelength relationship that makes each appear more saturated when they sit side by side. The green pushes the red toward candied depth rather than flat holiday kitsch. I noticed this first on a pair of vintage sunglasses, but the same logic holds on a nail bed: a slime green base turns the cherry into something you want to bite rather than something you’d find on a wrapping paper.
The trick is keeping the green dirty enough. A clean kelly or emerald reads Christmas; a yellow-leaning, almost-sickly acid keeps the pairing in 2026 territory. I would paint the full nail in two coats of that green, then lay the cherries on with a dotting tool or the back of a bobby pin, nothing smaller than 4 mm or the red gets lost. Leave the stems thin and black, or skip them entirely if your hand shakes. The contrast does the work.
Wear this with a white tee and vintage denim, or let it clash against a pink sweater. The whole point is that it shouldn’t match your outfit too carefully.
11. Polka dot cherry nails
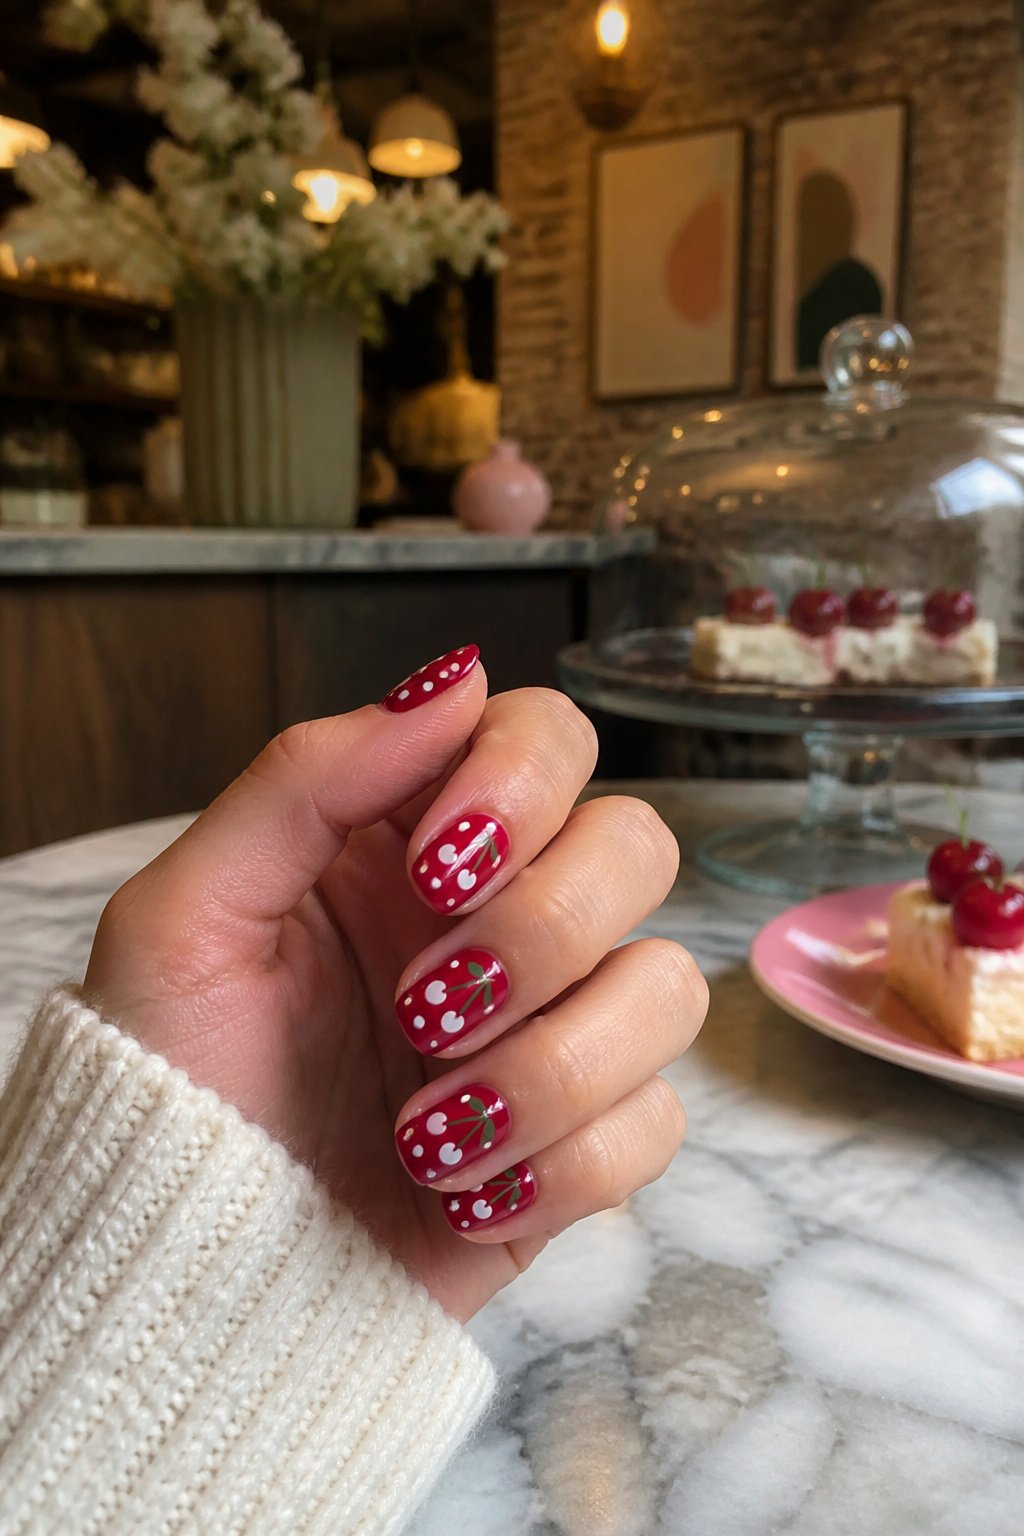
Polka dots give cherry nails a graphic backbone that shifts the whole mood depending on how you use them. A field of tiny white dots on red reads as abstract seeds scattered around the fruit, almost like a cherry print blown up to nail scale. Reverse it and the dots become background noise, something retro and soda-fountain that lets a single cherry illustration sit on one accent nail without looking lonely.
The scale matters more than the color. Dots too large next to a small cherry drawing fight for attention; dots too fine disappear into the base coat. I have seen the cleanest results when the dot size matches the cherry’s highlight or the pupil of the little cartoon face some designs add. Matching red and white keeps it classic diner, but a mint or butter yellow dot against a deeper cherry red turns the whole thing into pattern play that barely needs the fruit motif to hold together. That is the version I would wear if I wanted cherry nails that did not read too literally at a work meeting.
Placement is the other variable. A diagonal scatter of dots across four nails with one cherry on the thumb feels different from dots clustered only near the cuticle like a half-moon in reverse. The first reads playful, the second almost like vintage textile. Neither is harder to execute; the decision is just which reference you want the hand to carry.
12. Chrome cherry nails
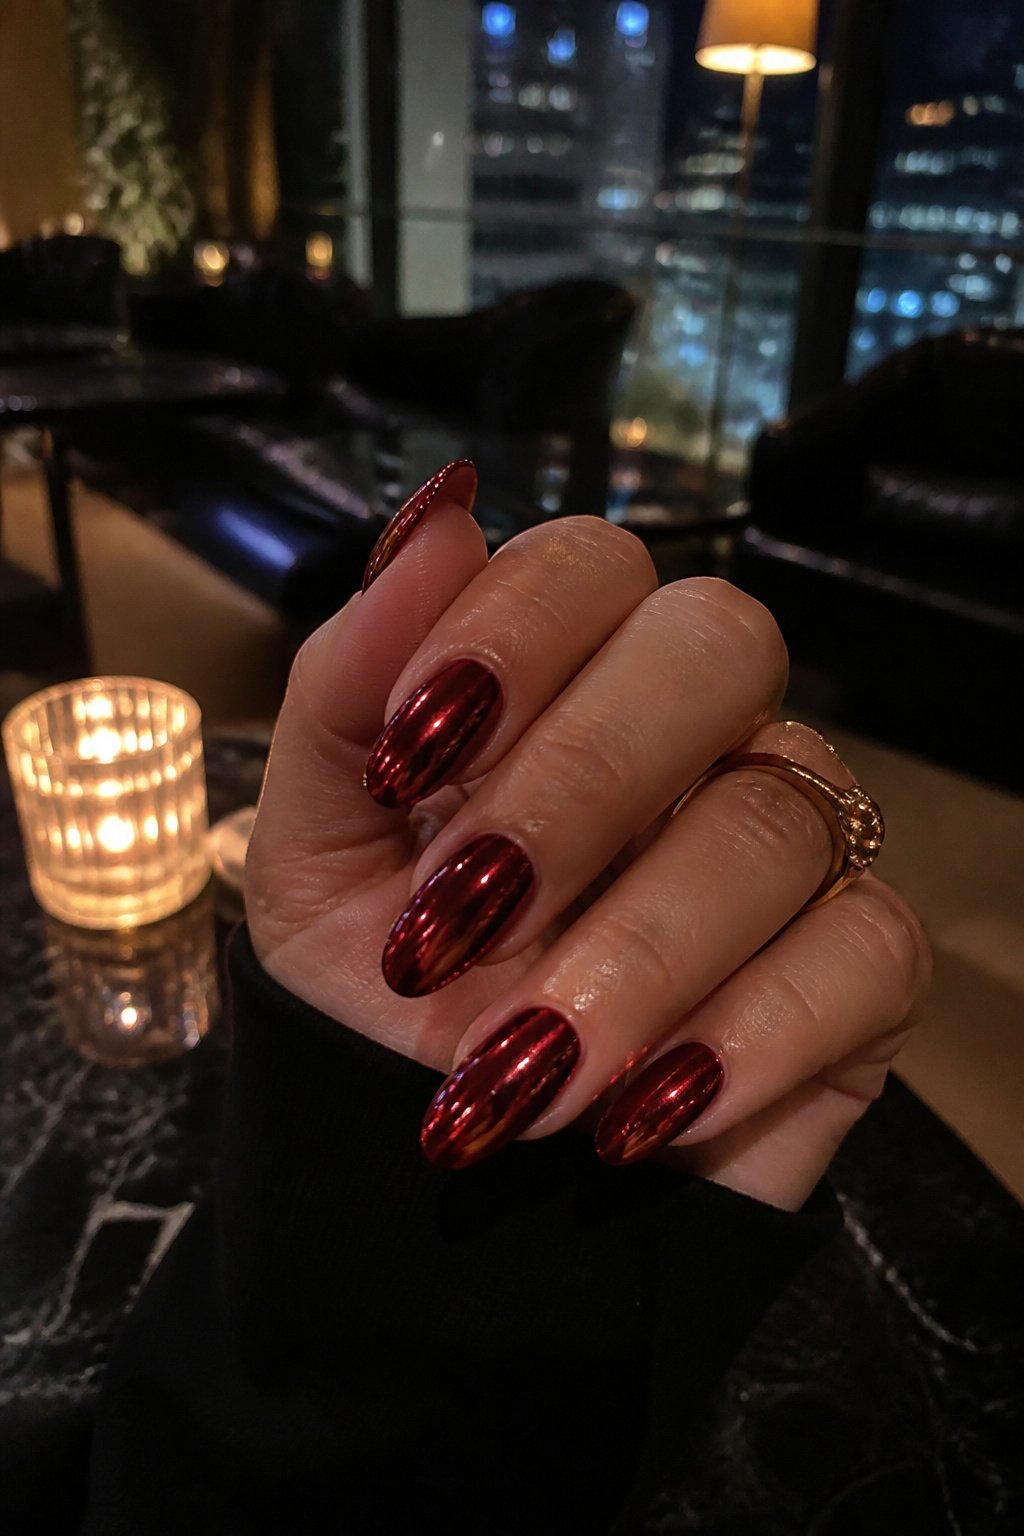
Chrome powder over a red base gives cherry nails a completely different personality than glossy polish ever could. The mirror finish catches light the way actual cherry skin does, shifting from deep crimson to almost silver depending on where you stand. I have watched this effect under a restaurant pendant lamp and again in afternoon window light, and the two versions looked like entirely different manicures.
The cherries themselves work best in negative space, painted around with a fine brush so the chrome shows through as the fruit’s natural highlight. Decals work too, though finding ones thin enough to lie flat under the powder layer takes some searching. The chrome will emphasize any bump or edge, which is the point when it works and the problem when it does not.
A colored base beneath the powder, burgundy or even a soft coral, pushes the reflection warmer than pure silver chrome allows. The trick is applying the powder over a no-wipe top coat that has cured fully but still has enough tooth to hold it. Too smooth and the powder streaks; too sticky and you get patches that look like tarnish rather than mirror.
13. Cherry picnic nails
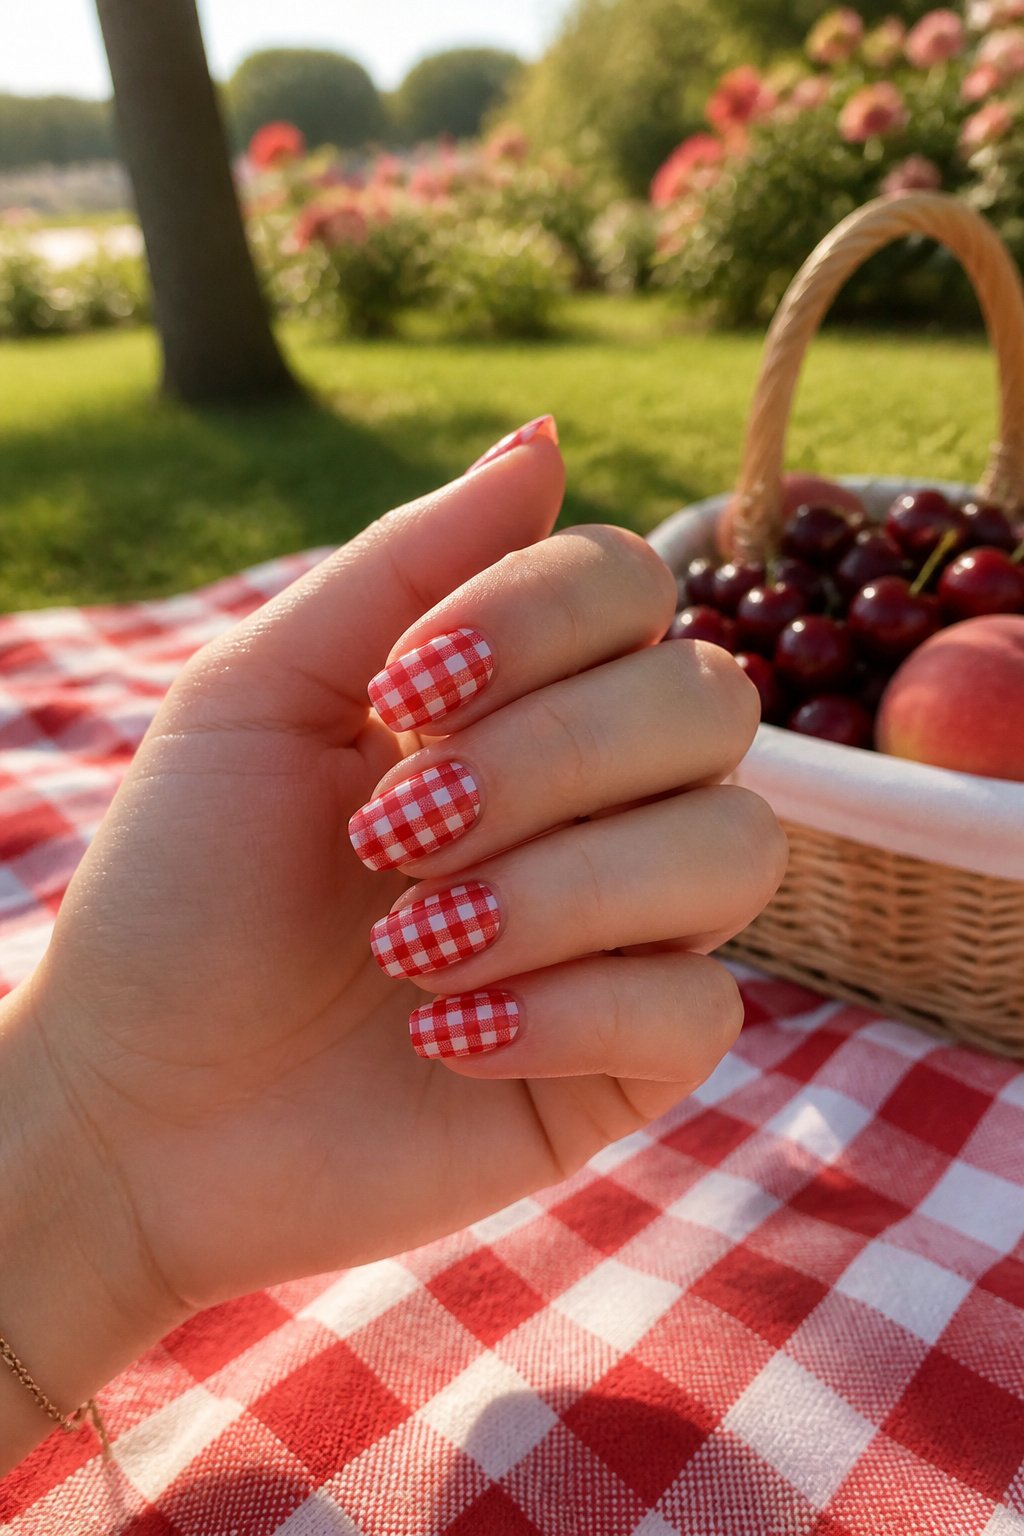
A gingham or checkered tablecloth pattern makes the most literal sense of any cherry design, because the nails themselves become the picnic blanket where the fruit lands. Start with a cherry red base, or flip it and lay the red down as the check lines over white or a soft pastel. The second route reads more like an actual cloth; the first reads more like cherries on a red tablecloth, which can work but needs the contrast to stay sharp.
The lines want a thin nail art brush and a steady hand, or a striping tape if patience runs short. Small cherry illustrations or stickers drop on afterward, scattered rather than lined up, so the eye moves across the nail the way it would across a real spread. Some builds push the scene further: tiny ants marching toward a stem, or a basket-weave texture on one accent nail to suggest the carrier underneath. Those extras turn the design from pattern into setting, though they also turn a twenty-minute job into an hour. For summer outings or casual events, the simpler gingham-plus-cherries version usually wins; the full scene-setting pays off only when the occasion actually involves a picnic blanket and daylight.
14. Half moon cherry Frenchies
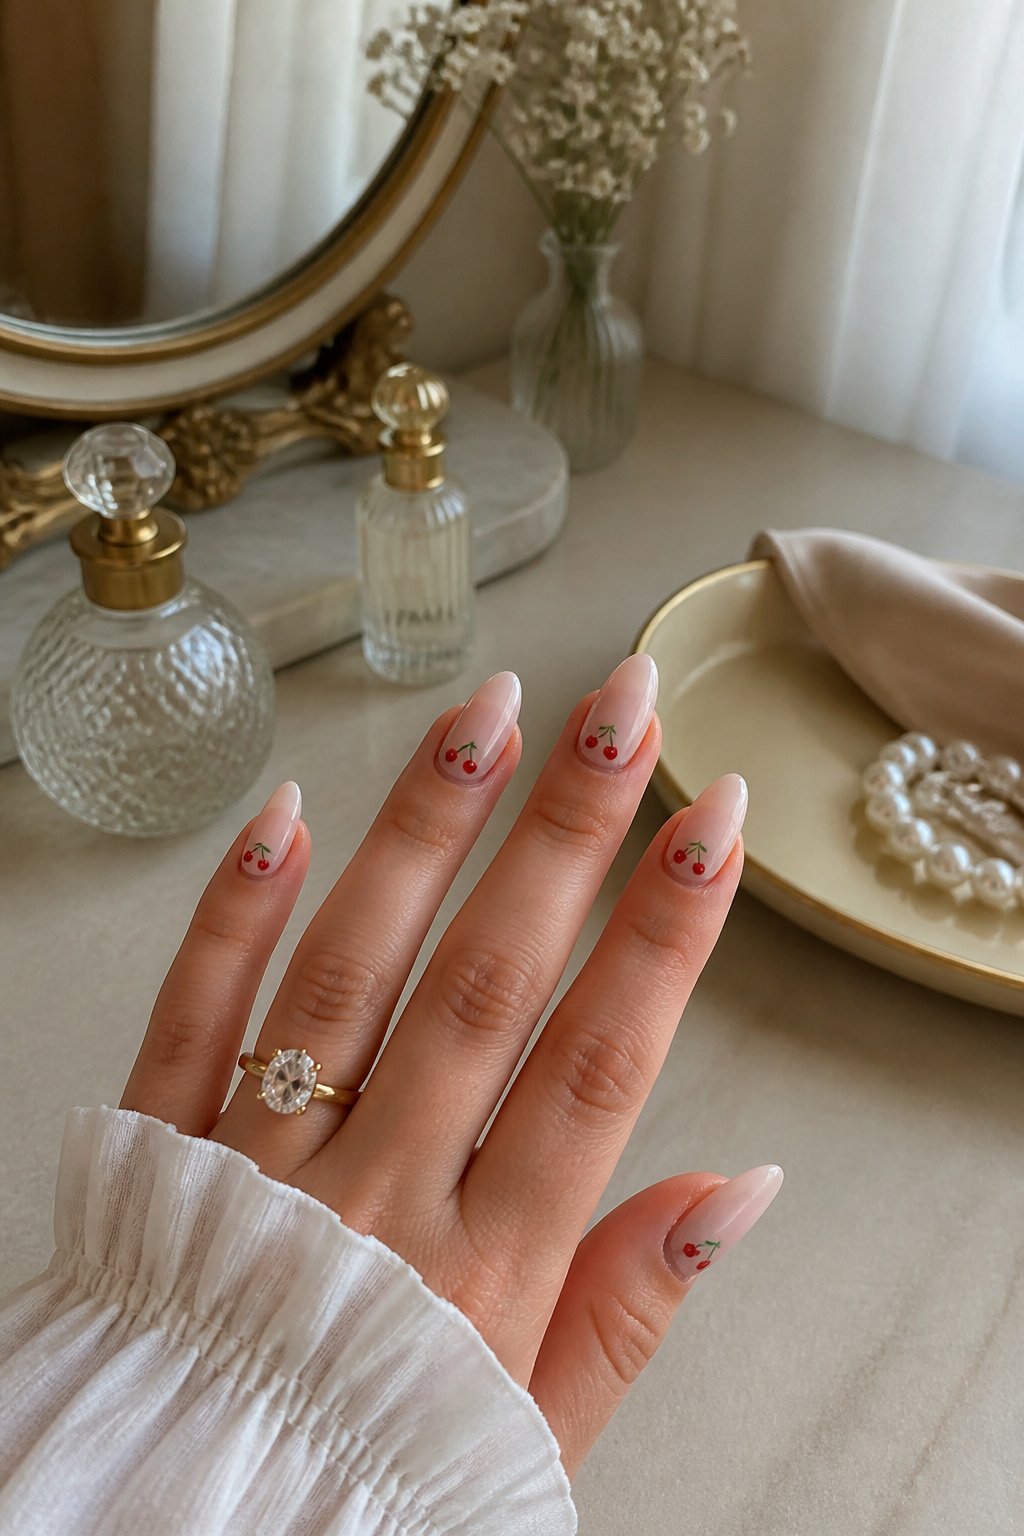
The half-moon manicure sits at the opposite end of the nail from the French tip, which makes the two a natural pair. Paint a pale pink or nude base first, then mask off a curved band at the cuticle line with a reinforcement sticker or the rounded edge of a hole punch. That exposed crescent becomes your cherry orchard. A fine brush lets you dot in two small circles for each fruit and pull a thin stem upward, with a single green leaf angled off to one side. The French line at the tip stays classic, in the same cherry red you used for the fruit bodies, so the design holds together without turning busy. I would keep the cherries to two nails per hand, maybe the ring fingers, and leave the rest as clean half-moons with red tips. The eye needs somewhere to rest. If your crescent is too wide, the fruit clusters look squeezed; too narrow, and the detail gets lost. A reinforcement sticker from any office supply section gives you the same curve every time, which matters more than you’d think for symmetry across ten nails.
15. Hot pink cherry Frenchies
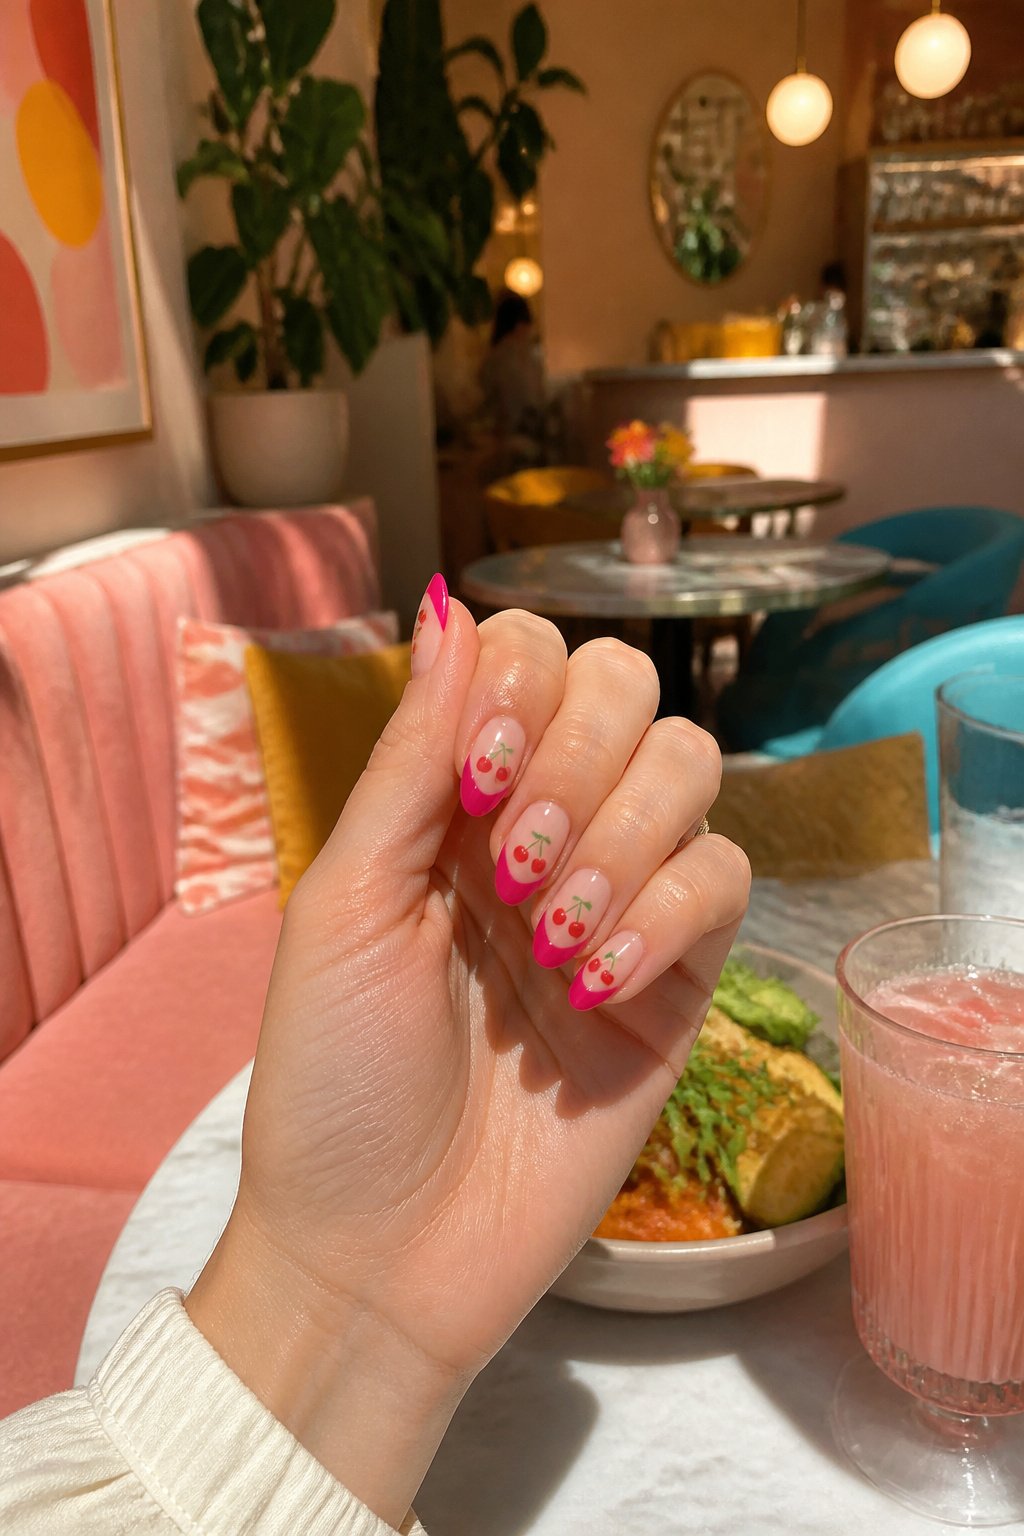
Hot pink tips swap out the traditional white of a French manicure for something that reads immediately as playful rather than prim. The cherries land at the smile line or cluster on a single accent nail, and the pairing feels less vintage-diner than a classic red-and-white cherry combo tends to. A fine brush keeps the fruit motifs small enough that they do not fight the pink for attention. Nude or pale pink bases work best underneath; anything darker and the hot pink starts to look muddy against it. Keep the cherry details to one nail per hand, two at most, or the manicure tips into costume territory fast. Green leaves, painted with the same fine brush, give the cherries enough definition that they read as fruit and not red blobs. This is the option for someone who wants the coquette energy of cherry nails without the full picnic-blanket commitment.
16. Cat-eye polka dot cherry Frenchies
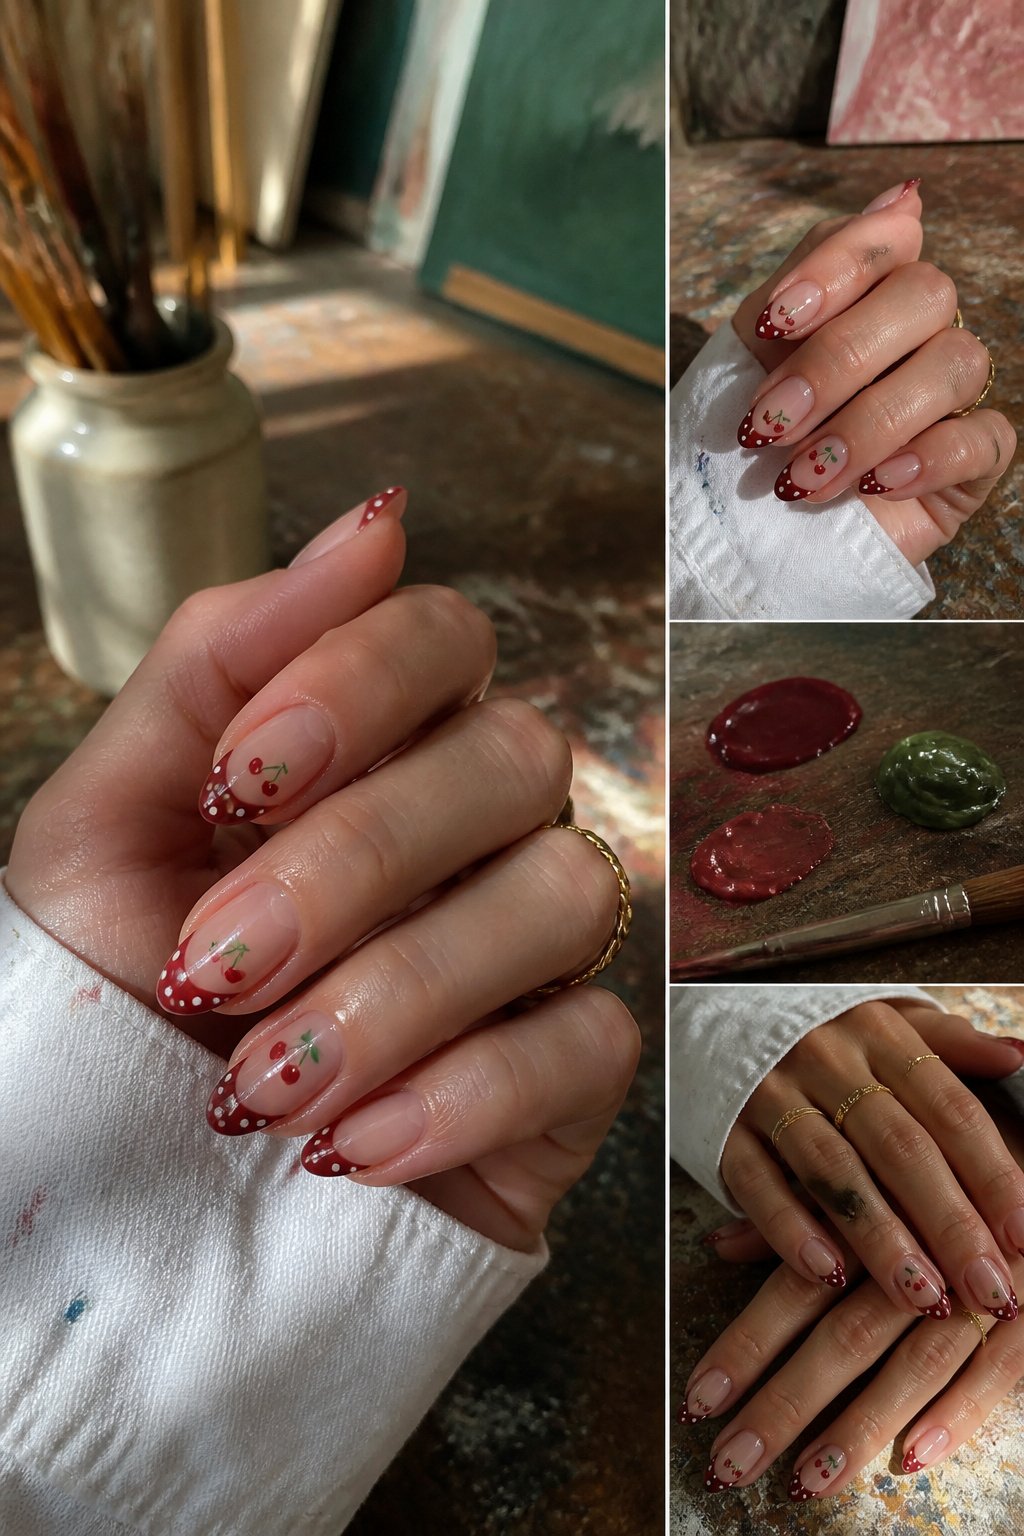
Magnetic cat-eye gel gives the base its shifting, velvet-like depth, and that depth is what keeps a busy design from reading as flat stickers. The trick is deciding which nail carries which element. On my own hands, I would put the full cherry cluster on the ring finger, keep the cat-eye strip clean on the middle, and split the polka dots and the French line across the remaining nails so no single finger tries to do all three at once.
The cat-eye base needs to be cured with the magnet held at one consistent angle before any top layer goes on, because the shimmer locks in place and you cannot shift it later. Polka dots over cat-eye work best when the dots are small and spaced wide, otherwise the eye loses the shimmer entirely. The French tip line, if you want it crisp, gets painted last with a fine liner brush or a sticker guide, sitting just above the cat-eye shift so both remain visible.
Cherry accents this small call for either hand-painted detail with a dotting tool or a waterslide decal you seal under gel. Either way, the stem should angle toward the cuticle or the sidewall, never straight up the center, which looks stamped on rather than placed. This is a salon appointment or a very patient afternoon at home; the base alone takes three coats plus magnet time, and rushing the cure between layers smears the whole effect.
17. Milky cherry nails
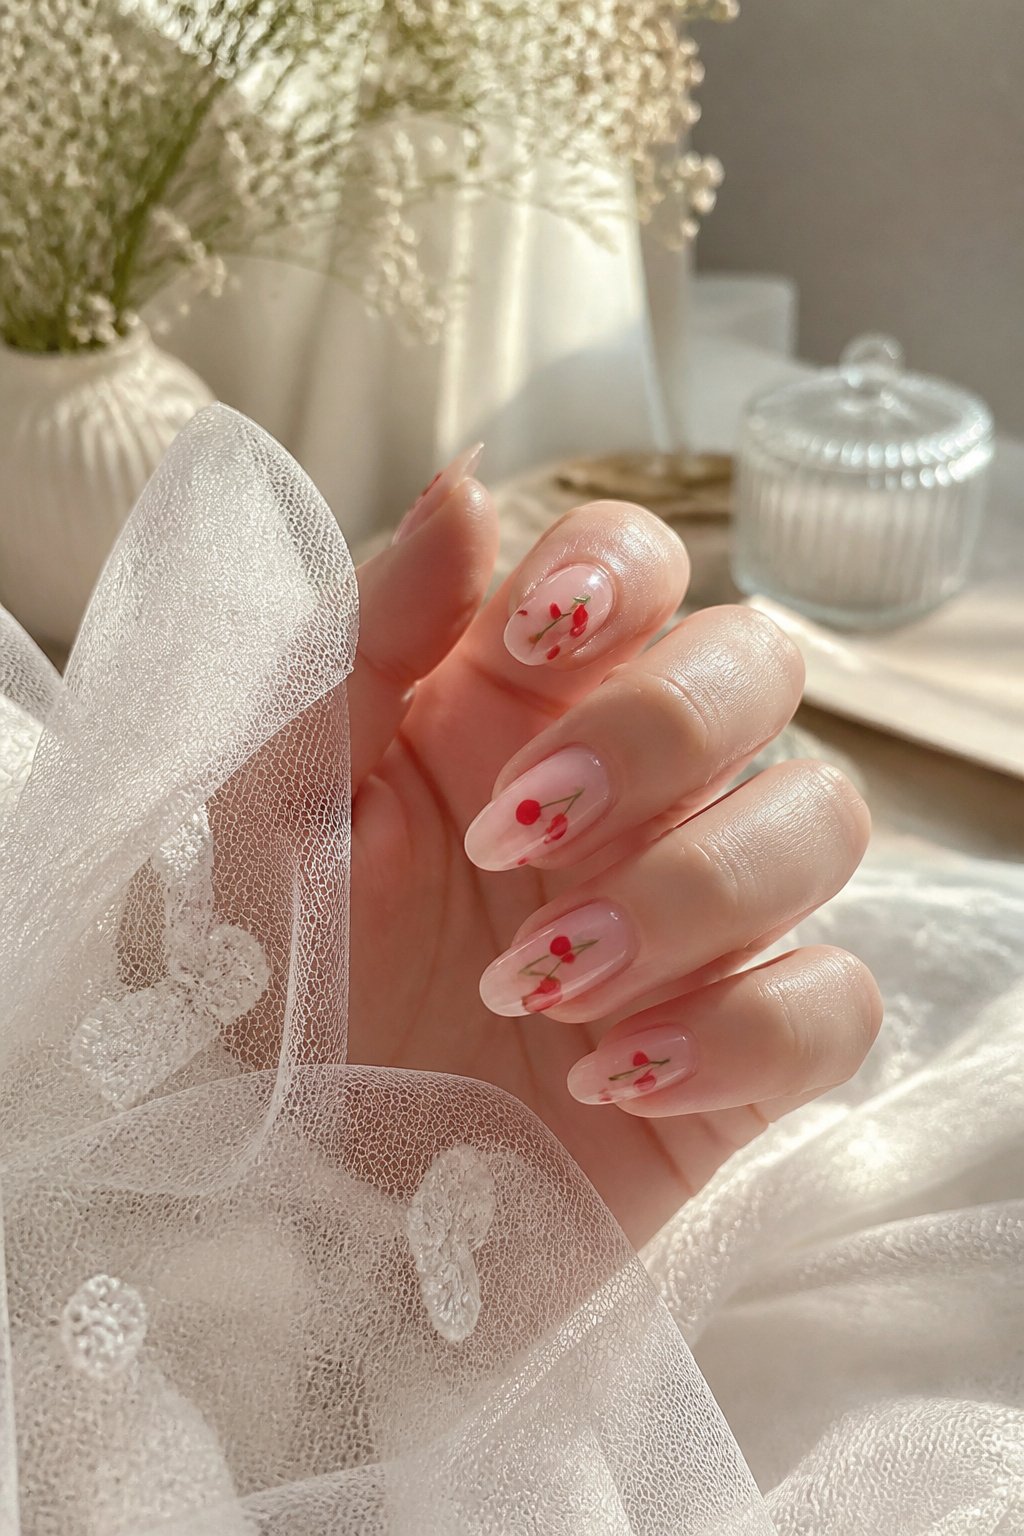
A sheer jelly base in milky white or pale pink changes how red cherry art reads on the nail. The color underneath stays visible but softened, so the red you paint on top drops from loud to washed-out and dreamy. Two coats of a jelly tint give enough coverage to build on without turning opaque; three coats starts defeating the point.
This is the version for anyone who likes the cherry motif but finds standard cherry nails too bold for daily wear. The same small fruit silhouettes or stem details work here, they just sit in a haze rather than shouting against a solid ground. I have seen this base paired with a barely-there glitter or left completely plain under the cherry accent nail, and both keep the volume low.
The tradeoff is visibility. Under office fluorescent light or from a few feet away, the cherries can disappear into the milky field, which is either the intention or the frustration depending on what you wanted. If you need the design to read across a room, this is not your finish.
18. Baby blue gingham cherry nails
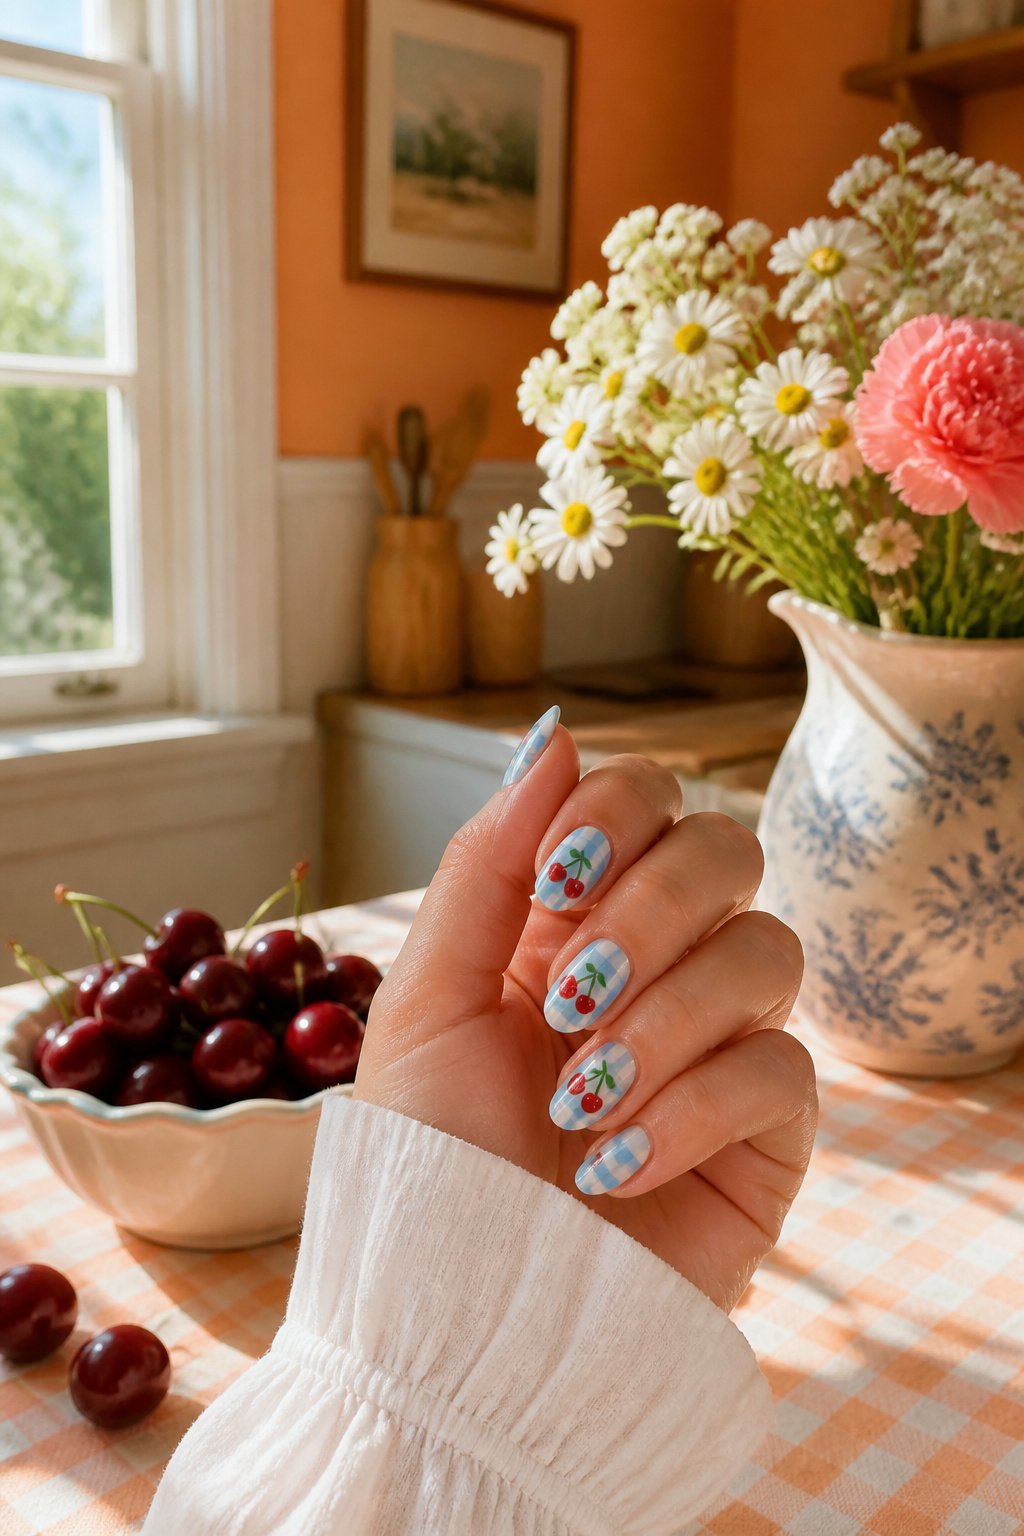
Pale blue gingham with cherry motifs pulls straight from 1950s and 1960s fashion prints, the kind you’d see on a cotton day dress or a kitchen curtain panel. The check itself reads preppy and clean, which keeps the cherry from tipping too sweet. Two shades of blue, not one, give the gingham its depth: a lighter sky tone for the base, a slightly deeper cornflower for the intersecting lines. That contrast is what separates a flat grid from something that looks woven.
The cherries sit at one or two nails max, usually the ring finger or thumb, painted in classic bright red with a small green stem. Stamping the gingham saves time and keeps lines crisp, though hand-painting with a striping brush lets you vary the scale to fit shorter nail beds. I’ve seen this pairing done with matte top coat over the check and glossy on the fruit, which sounds fussy but actually reads as texture, not technique showing off. The whole thing works best on a squoval or almond shape; square tips start looking like a picnic blanket in a way that isn’t the point.
19. Butter yellow cherry nails
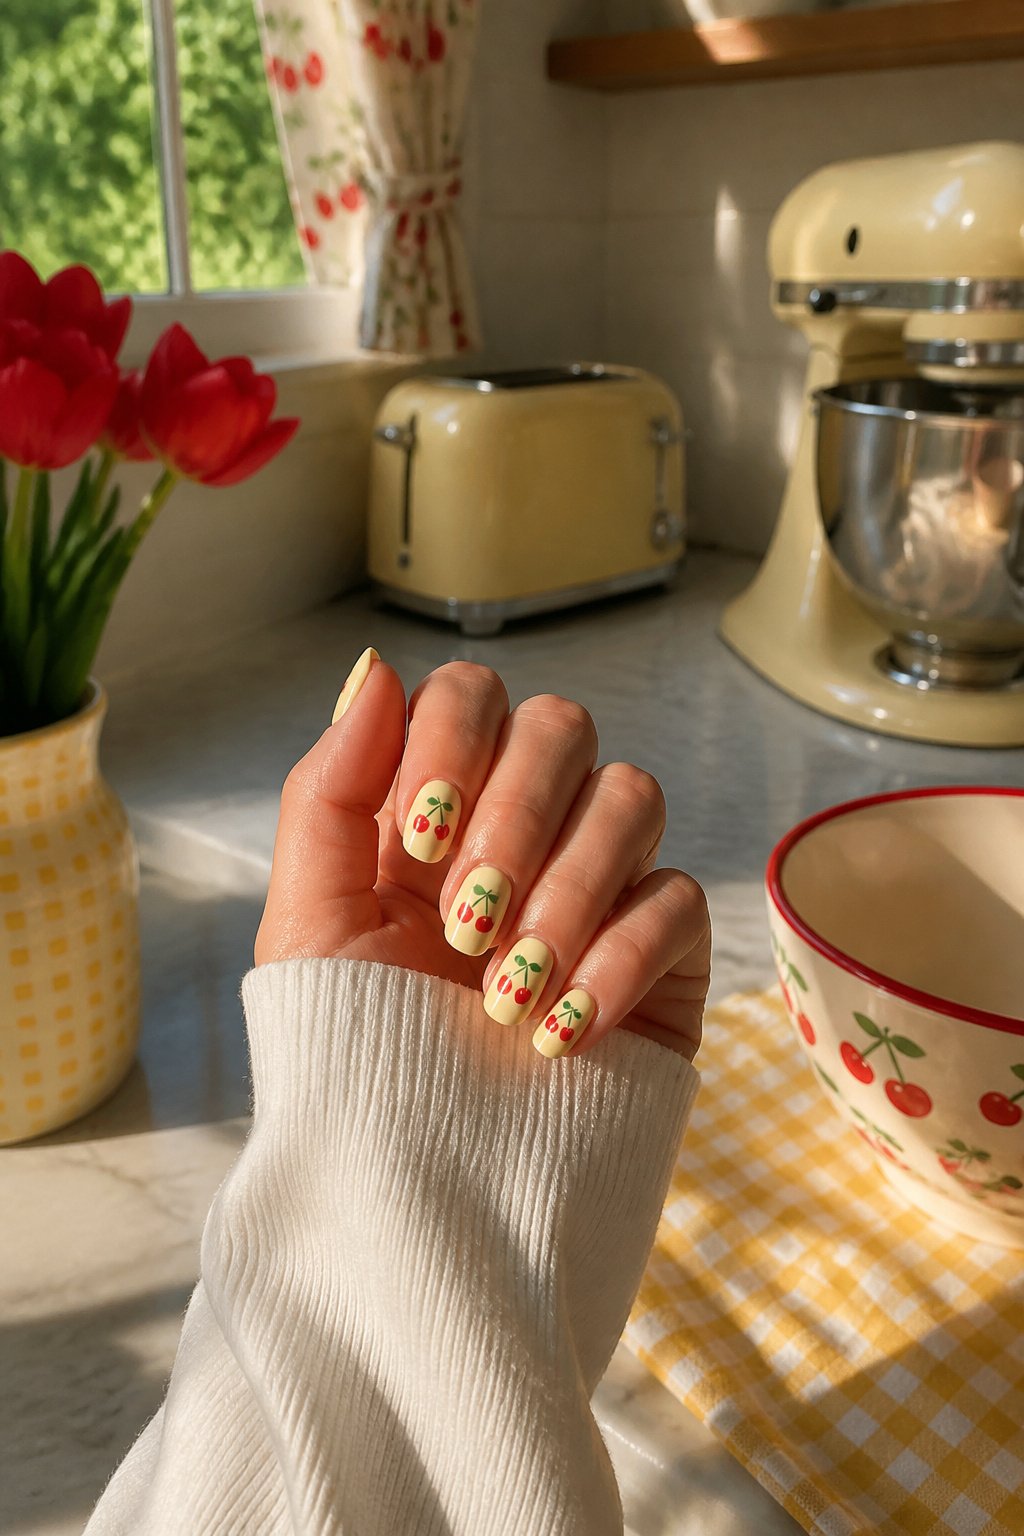
Butter yellow cherry nails pull their color story straight from vintage kitchen curtains and mid-century cookbook illustration, where pale golden backgrounds made red fruit look sun-warmed and edible. The yellow reads as optimistic rather than loud, a warmth that flatters most skin tones without competing for attention. Red cherries sit cleanly against it, though deep pink offers a slightly softer take that still keeps the retro feel intact. What convinced me, looking through dozens of these designs, is that the base needs to stay genuinely pale; anything approaching mustard shifts the mood from sunny kitchen to 1970s appliance. A true butter yellow, almost cream with a whisper of gold, keeps the reference clear. Small details matter here: a thin stem in soft green, maybe a single leaf, rather than piling on extra fruit that would break the calm. The look works best on short to medium nails where the color blocks stay readable without turning busy.
20. All the cherries cherry nails
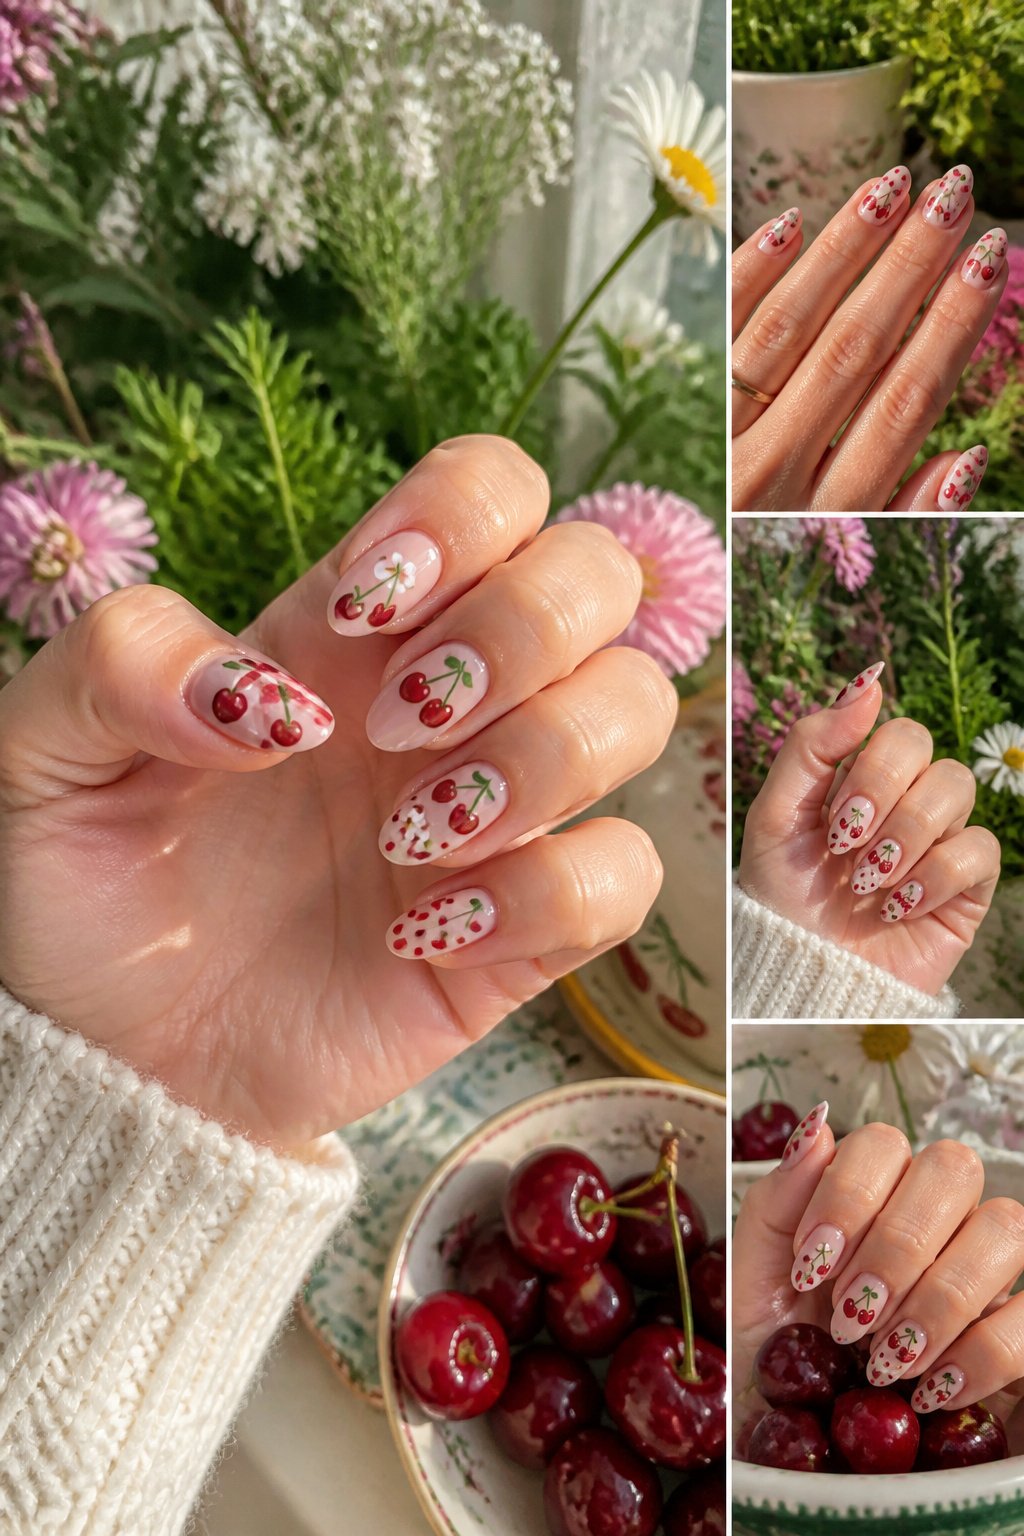
Ten nails, ten different cherries: stemmed on the thumb, stemless on the index, a bright red pair on the middle finger, a single dark one on the ring, green underripe tones on the pinky. No two nails should match. The effect is deliberate excess, like a bowl tipped over and everything landed where it pleased.
The eye reads it as abundance rather than clutter because each cherry still reads as a cherry. Scale helps: a tiny micro pair beside an XL single keeps the eye moving. Color temperature matters more than exact shade; a cool green stem against a warm red fruit gives enough contrast that the next nail can flip the combination entirely.
This approach asks more of your artist, or of your steady hand, than a repeating pattern. Each nail is its own small decision. The payoff is a manicure that looks collected over time rather than designed in one sitting, closer to a sticker book filled in chapters than a single poster.
21. Juicy cherry nails
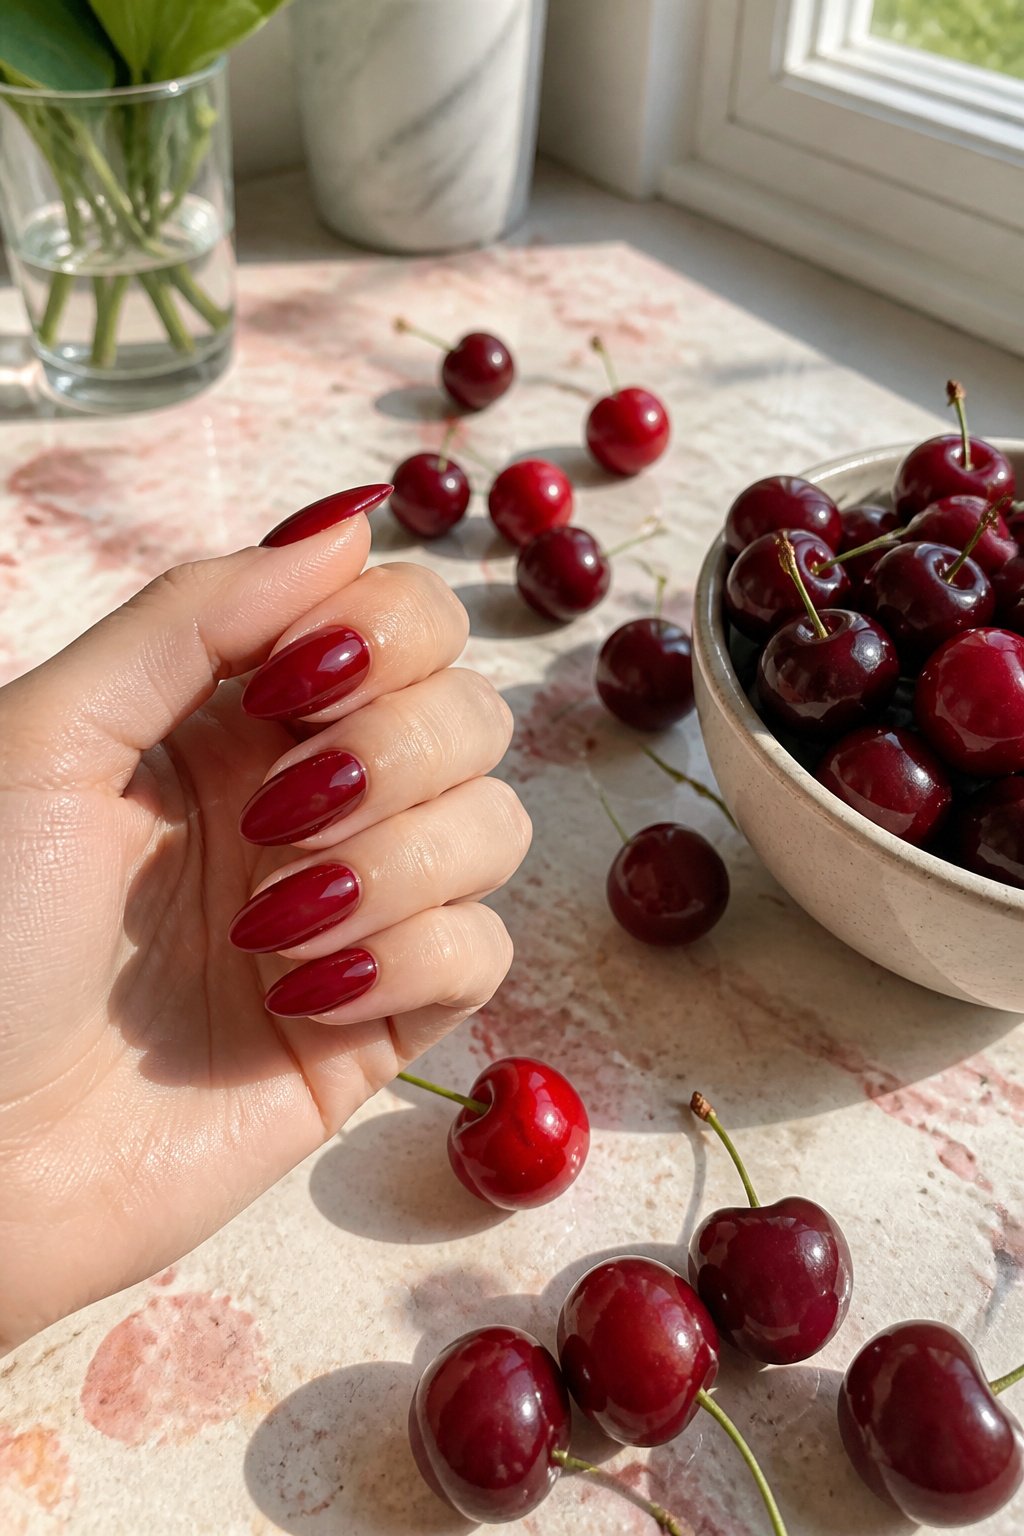
A wet-look finish reads as literal fruit on the nail because light behaves the same way on a curved cherry surface as it does on a rounded nail bed. The gloss has to sit thick enough to pool slightly at the edges, catching light the way a just-washed cherry catches window light. Without that depth, the design flattens into a sticker.
The reflection detail is what sells it. A thin stroke of white or pale pink, placed where a highlight would land on actual fruit, usually high and off-center, gives the nail dimension that a single red coat never achieves. The placement matters more than the opacity; too heavy and it reads as a stripe, too faint and the eye skips over it. I have seen this go wrong when the highlight is centered like a half-moon, which looks decorative rather than reflective.
A gel top coat cured to a glass finish holds the look longer than regular polish, but the real work is in building the layers beneath. Two coats of color, the highlight painted in between, then the top coat floated over everything so the brush does not drag the white through the red. Rushing that last step turns the highlight pink, which is not the same thing at all.
22. Frozen cherry nails
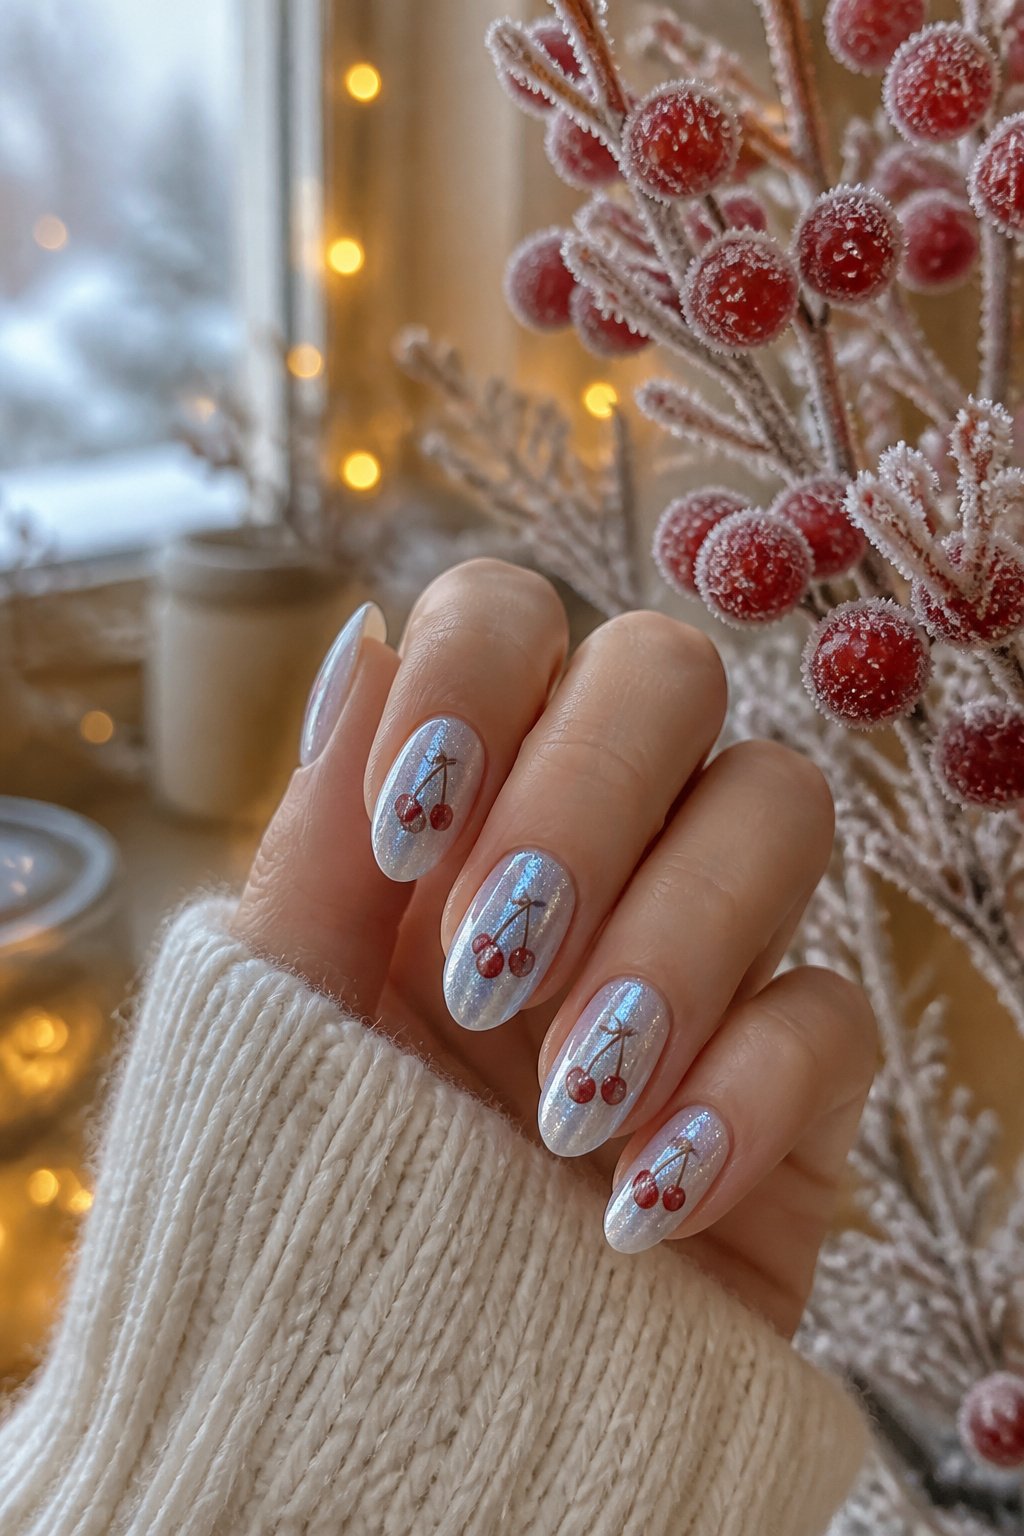
Pale blue-white bases read winter instantly, and the silver shimmer layered underneath catches office light like frost on a window. The cherries themselves sit under a sugar-coated finish, matte enough to look preserved, glossy enough to catch the light wrong and read wet. That contradiction is what makes the design work. A nail artist I watched online builds the effect with a sheer white over pale blue, then presses fine glitter into the uncured top coat before adding the fruit. The stems stay dark, almost black, so the red pops against the ice rather than sinking into it. What convinced me, comparing this against the usual summer cherry, is how the same motif flips its season without changing its shape. The shift is all in temperature: cool base, cool sparkle, fruit that looks stored rather than picked. For holiday wear, this reads intentional where a bright red cherry in December can look like you forgot to change your polish. The one limit is opacity. Too much white and the cherries float like stickers; too little and the winter reads as dirty spring. Three thin layers of that sheer white, tested on a single nail first, tends to land in the right zone.
23. Dark cherry nails
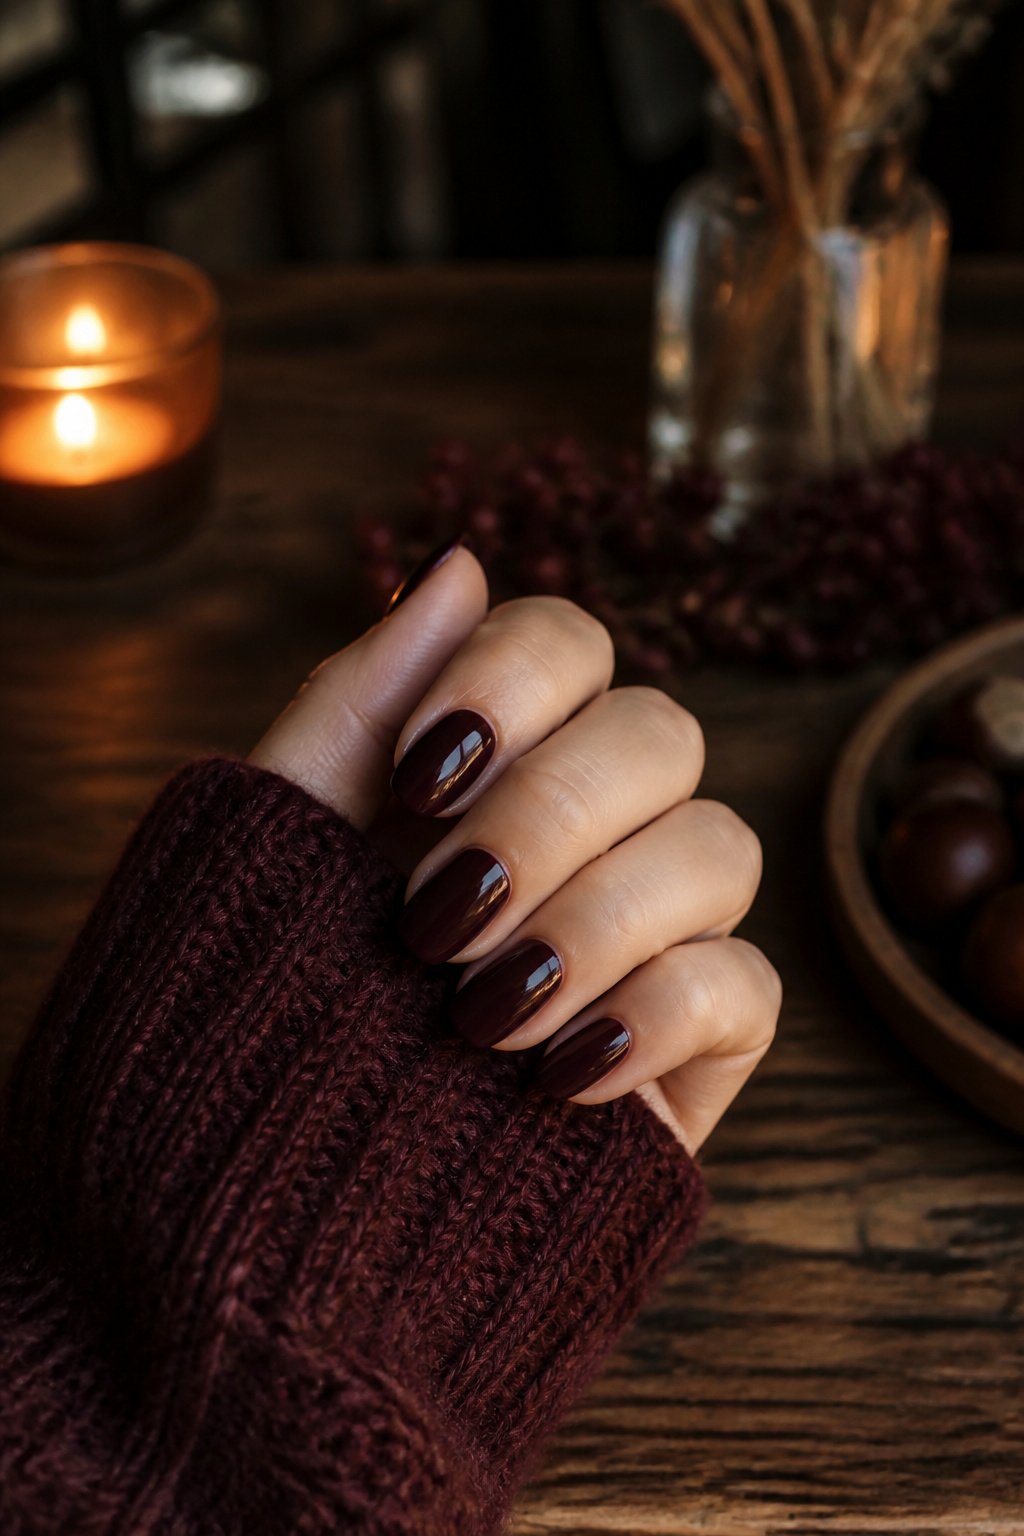
Deep burgundy, blackened red, and oxblood tones shift cherry nails from playful to something closer to gothic romance or autumnal sophistication. The move works best when the base itself goes dark: a near-black plum, a charcoal neutral, or a matte espresso that lets the darker cherry motif sit just a shade above it without ever reading as bright.
I have seen this combination fail when the cherry illustration itself carries too much highlight. A single reflective dot on each fruit, placed off-center, keeps the dimension without breaking the mood. Skip the green stem entirely, or render it in near-black rather than kelly green. The silhouette matters more than the botanical accuracy here.
For autumn wear, a dark cherry on oxblood reads as intentional; the same design on bare pink or white tips looks like a summer manicure that lost its way. The tonal match between base and motif is what separates sophisticated from confused. If your wardrobe runs toward charcoal, olive, or camel, this version of cherry nails lasts longer in rotation than its brighter cousins.
Why cherry nails keep returning
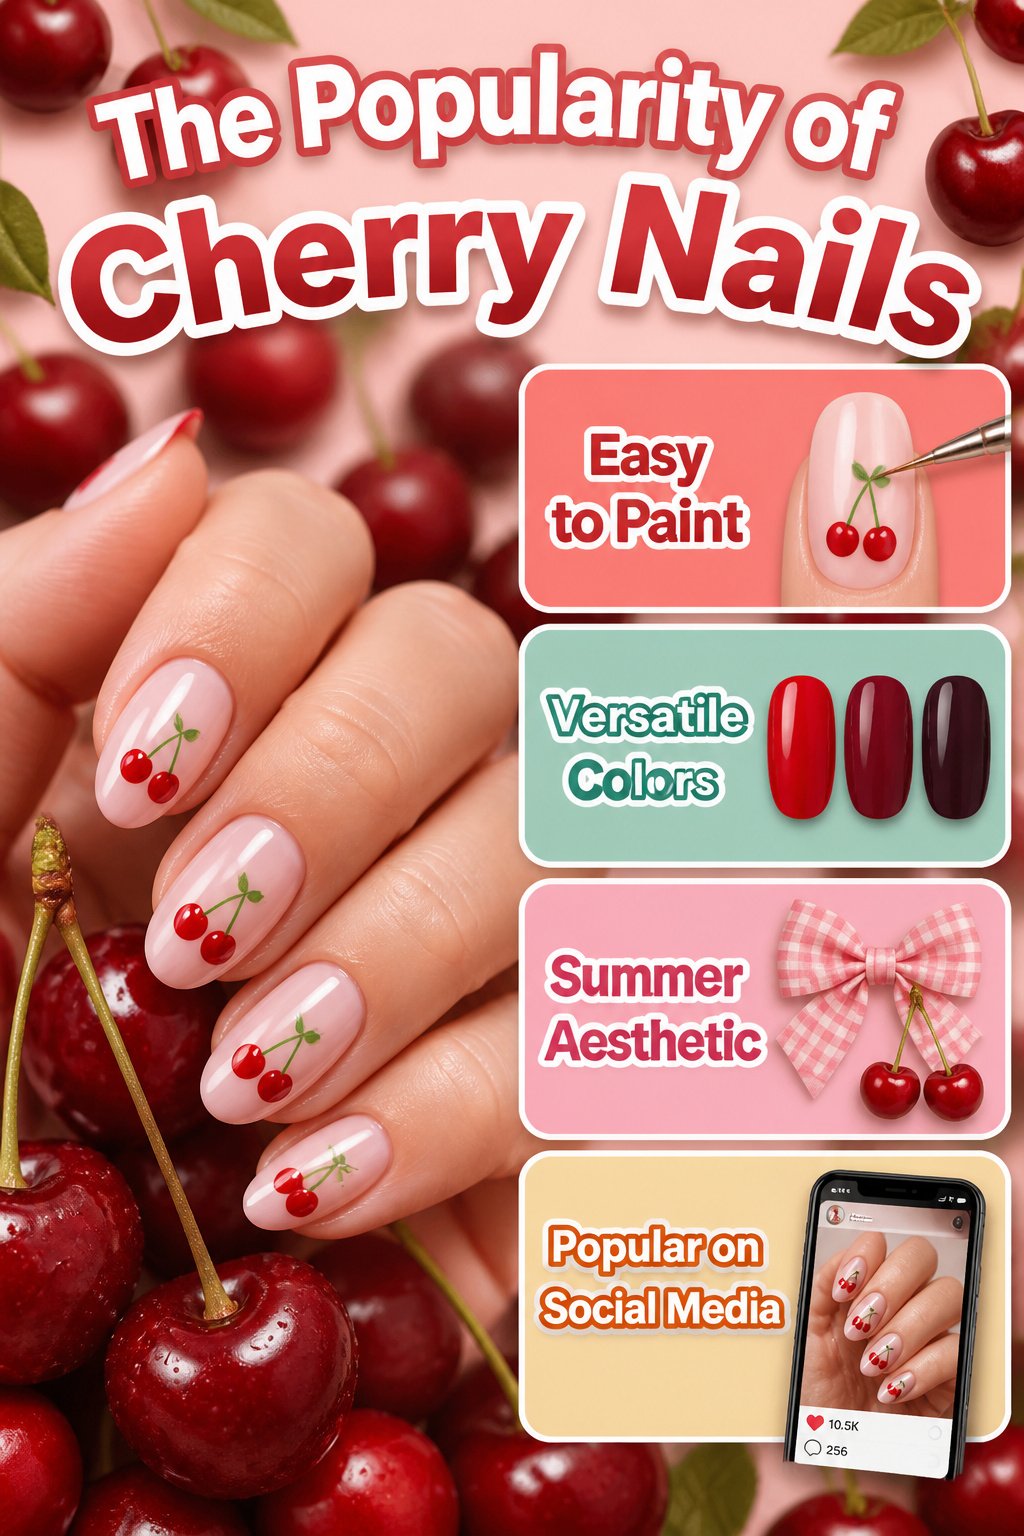
Cherry nails surface on my feed every spring the way actual cherries show up at the farmers market: predictable, but still welcome. The motif has enough structure that a beginner can paint two red dots and a green stem and call it finished, yet it stretches far enough for chrome finishes, cat-eye layers, or 3D gel builds when someone wants to spend the afternoon on it. That range is why the design keeps cycling back instead of dying off.
TikTok and Instagram pushed it hard heading into 2026. The coquette aesthetic helped: gingham, pastels, and oversized bows pair naturally with a tiny fruit that looks like a lip stain you actually ate. Summer manicures lean sweet and playful, and cherries fit that mood without requiring a salon appointment most people can’t book anyway. Micro fruit nails had their moment last year; cherries took the title this season.
What keeps the look alive is how easy it is to match to a personal vibe rather than copy exactly. Juicy red, dark burgundy, even black cherry for colder months: the shade moves with the calendar, and the motif stays the same. The flexibility is the point. You can stripe it, dot it, chrome it, or keep it minimal, and it still reads as the same trend. That is rare in nail art, where most motifs look wrong the moment you simplify them. Cherries are an exception.
Techniques that make cherries look right
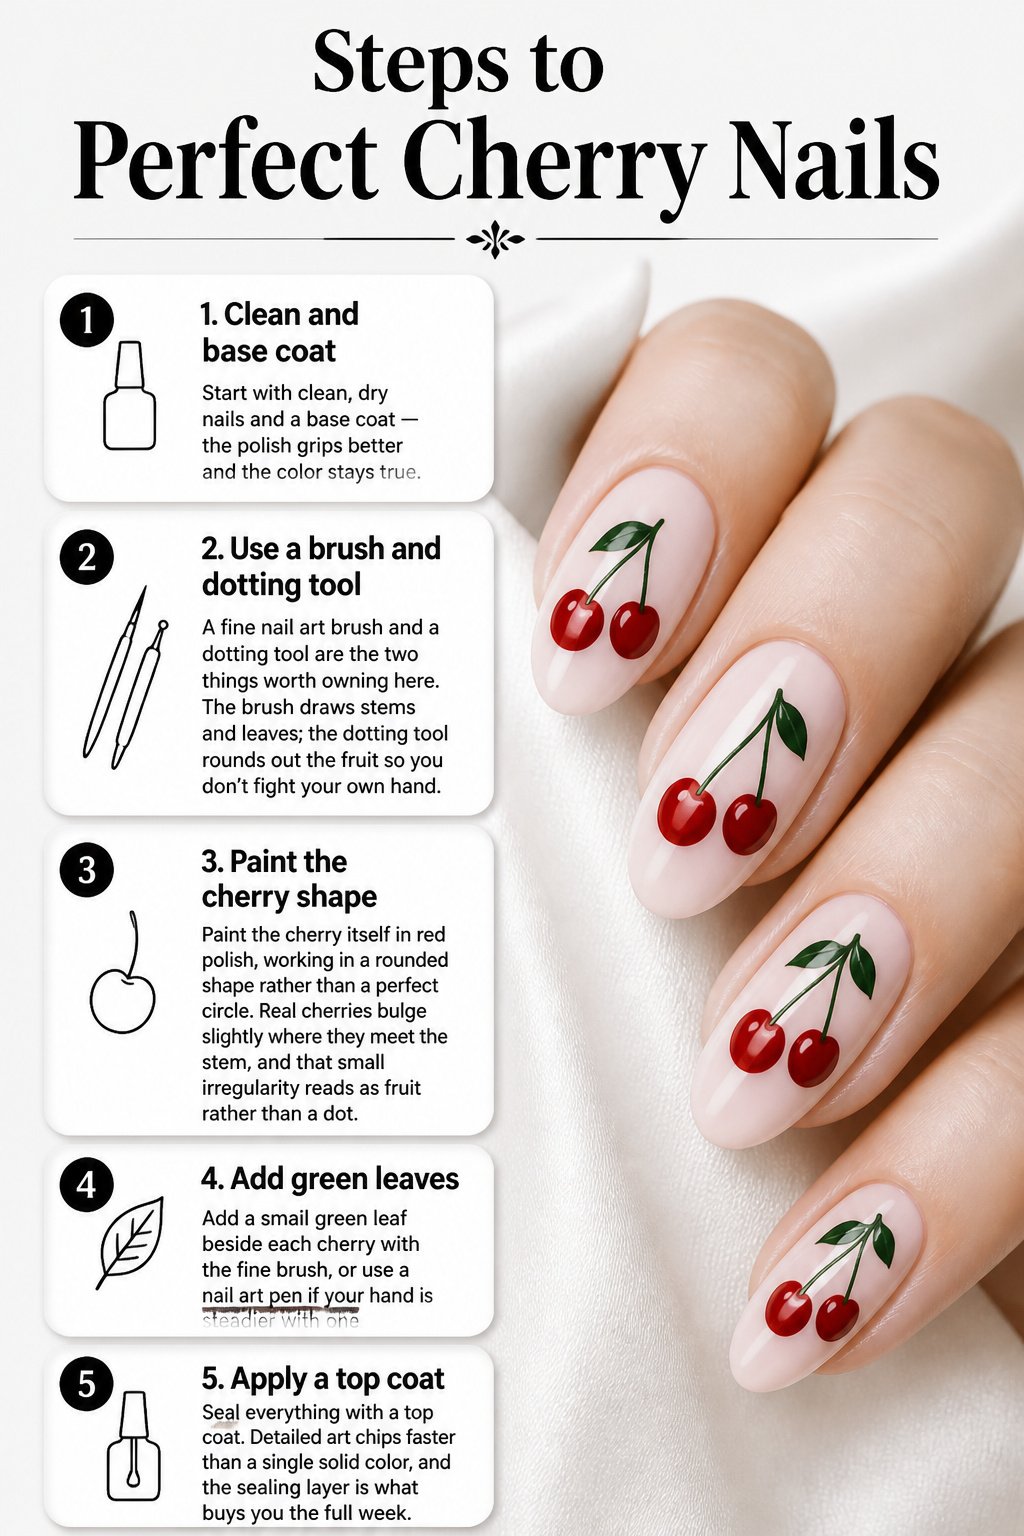
- Start with clean, dry nails and a base coat — the polish grips better and the color stays true.
- A fine nail art brush and a dotting tool are the two things worth owning here. The brush draws stems and leaves; the dotting tool rounds out the fruit so you don’t fight your own hand.
- Paint the cherry itself in red polish, working in a rounded shape rather than a perfect circle. Real cherries bulge slightly where they meet the stem, and that small irregularity reads as fruit rather than a dot.
- Add a small green leaf beside each cherry with the fine brush, or use a nail art pen if your hand is steadier with one.
- Seal everything with a top coat. Detailed art chips faster than a single solid color, and the sealing layer is what buys you the full week.
Color schemes that work
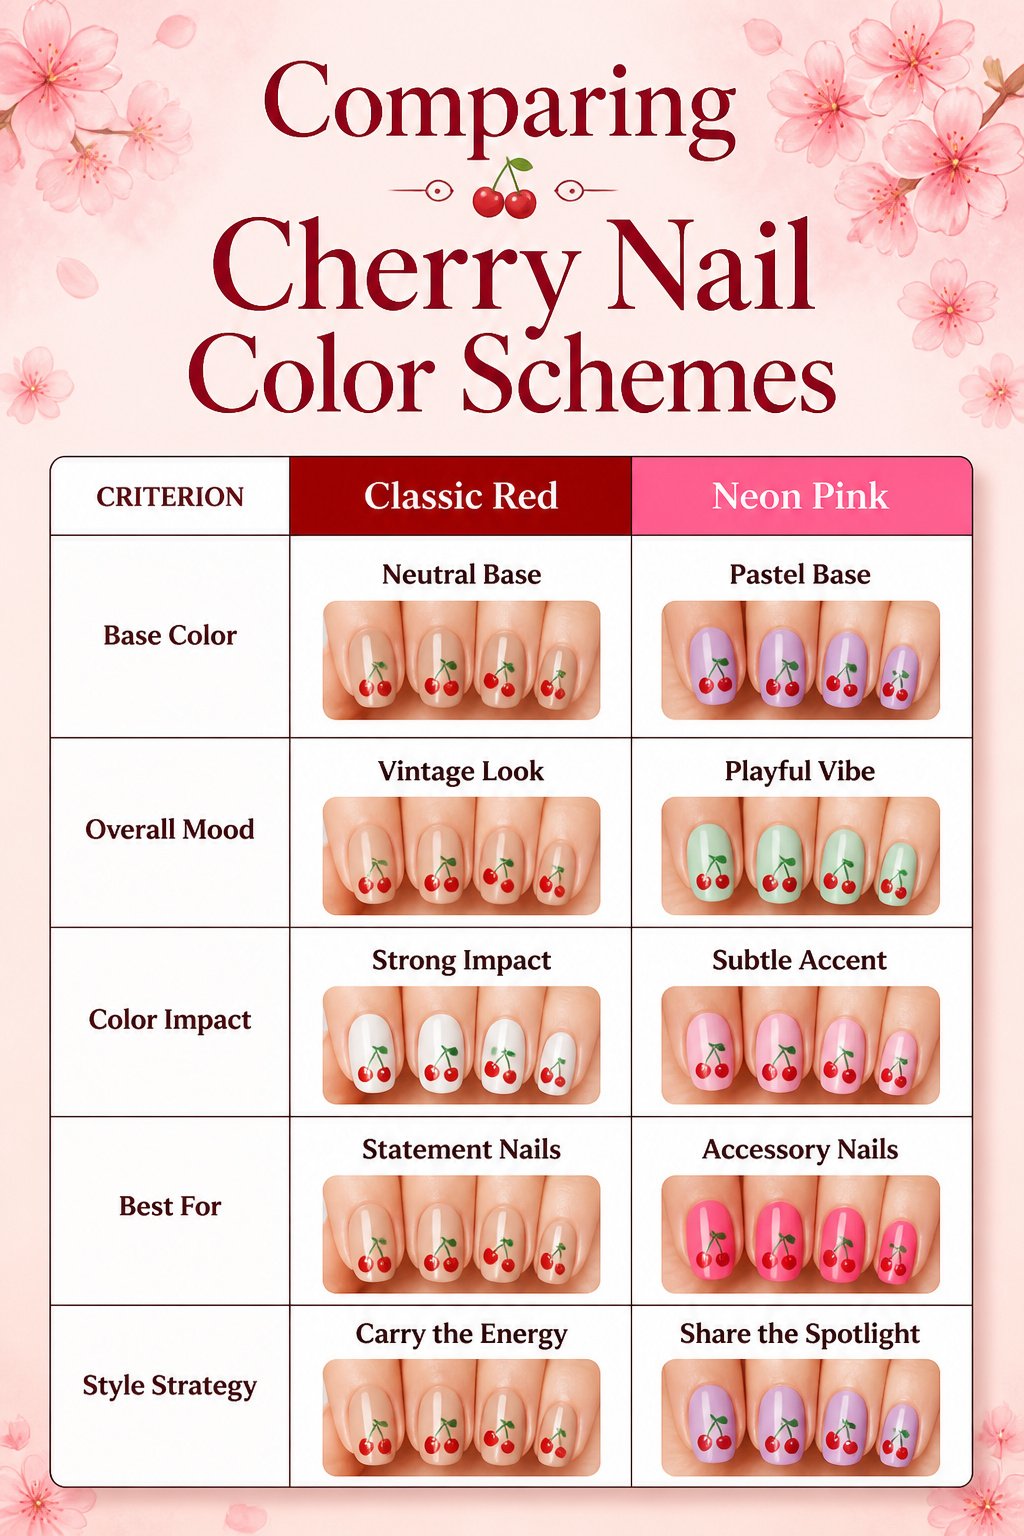
A true cherry red on a neutral base still reads as the classic choice, the one that nods to diner booths and 1950s illustration without trying too hard. The color here matters precisely: the cherry nail trend specifically emulates fresh, vibrant fruit color, not the deeper brick or blue-reds that trend in winter. Manucurist Green Nail Polish Red Cherry gets this right, a true mid-tone red that sits between orange and crimson the way a just-ripe Bing cherry does.
Neon and pastel bases shift the whole mood. A hot pink ground with cherry red fruit turns the design toward something more current, almost sticker-like, while a soft lavender or mint base keeps it playful without veering childish. The same cherry motif on bare beige reads vintage; on white, it reads clean and almost editorial.
What convinced me, sorting through dozens of these designs, is that the base color does more work than the cherry itself. A neutral base asks the red to carry all the energy. A saturated base splits the attention, which works when you want the nails to feel like an accessory rather than a statement. Two ways to play this: match your base to something you already wear daily, or go deliberately off-key with a neon ground and treat the nails as their own outfit piece. The neutral base wins if you need one manicure to last through multiple contexts; the neon wins when you are building the look around the nails from the start.
What cherries on nails actually mean
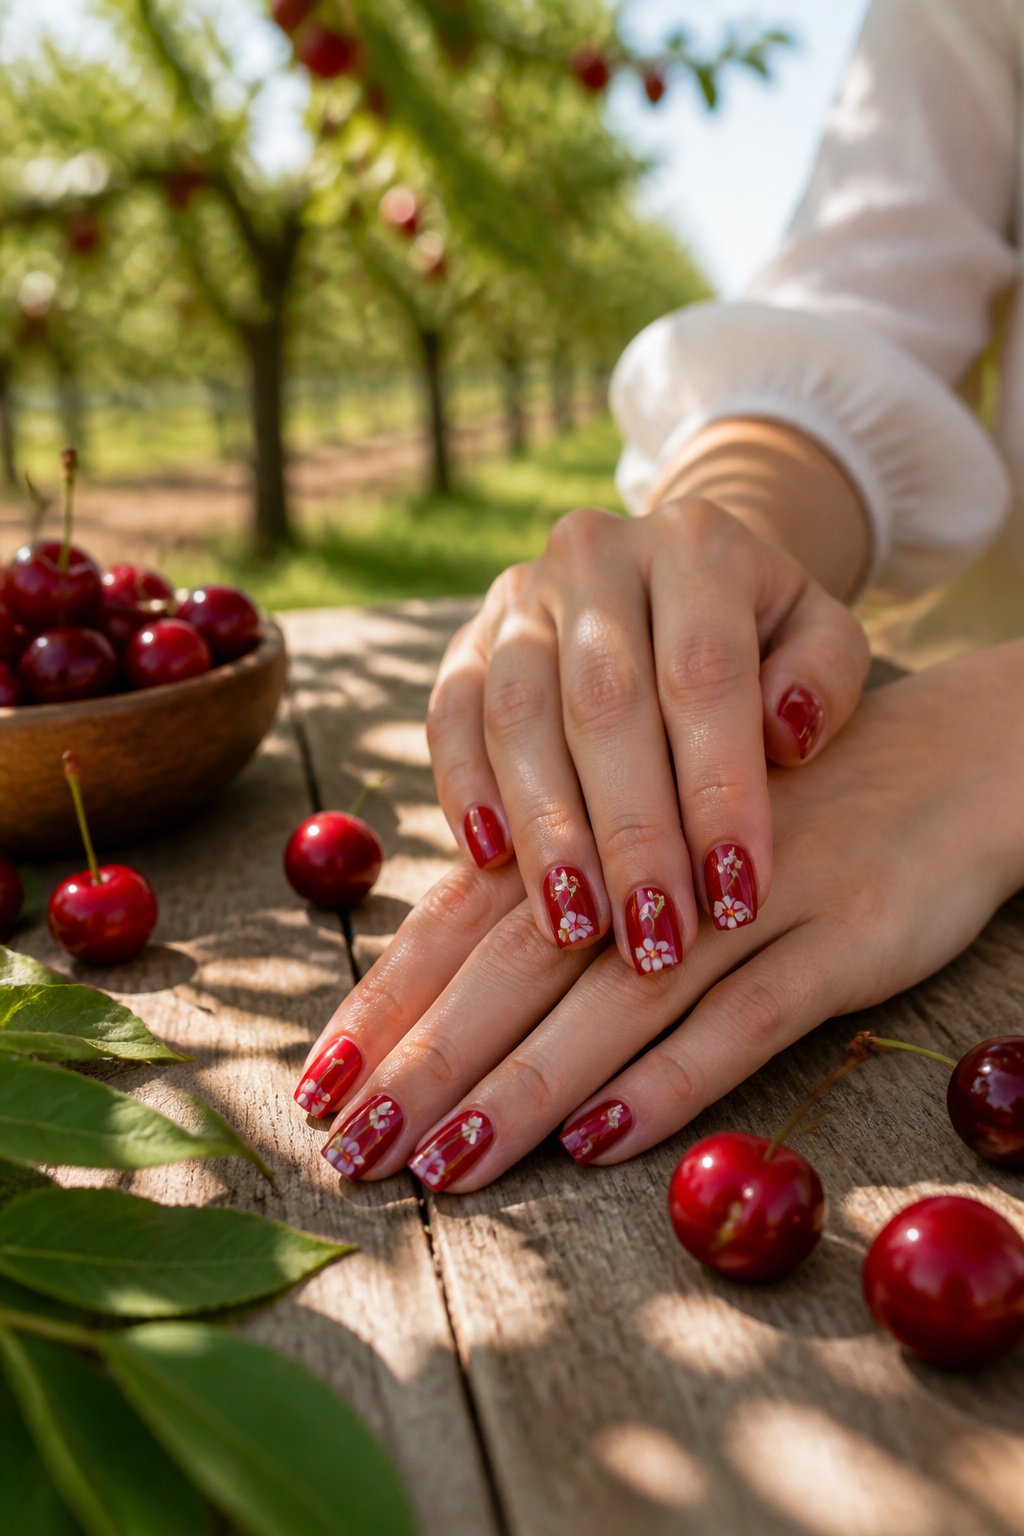
The bright red hue of cherries carries a warmth that reads as sweetness and joy before it reads as mere decoration. On nails, that association becomes a small personal statement: the wearer is signaling indulgence and liveliness, not following a trend chart. Some people choose the motif because it connects to a specific memory, maybe a childhood orchard or a regional cherry harvest they grew up near. Others simply like that the fruit looks edible enough to bite, which adds a playful, almost mischievous layer to an otherwise polished manicure. Either way, cherry nail art moves past pure aesthetics into something the wearer can explain if asked, or keep private if not. That flexibility, the ability to mean something personal without shouting it, is what keeps the design from feeling like a passing novelty.
Frequently Asked Questions
How do you draw cherries on your nails?
You can create cherry shapes by pressing two slightly overlapping dots of red polish with a dotting tool or the rounded end of a bobby pin. Place them off-center so they look like dropped fruit rather than perfect beads, and add a thin green stem with a fine brush once the placement feels natural. A soft beige, creamy white, or taupe base underneath makes the red pop without competing for attention.
What is the cherry red nail trend?
The cherry nail trend covers everything from solid cherry-red polish to manicures that feature actual cherry motifs scattered across the nail. It ranges from juicy bright reds through dark burgundy, and pairs easily with summer directions like stripes, polka dots, chrome finishes, or cat-eye effects. The trend fits the broader coquette mood of picnic blankets, pastels, and playful femininity, but can be dialed up or down depending on how literal you want the fruit imagery to be.
How do I decorate my nails with cherry designs?
Start with a base coat, then build your chosen style: simple hand-painted dots for basic cherries, stamping or decals for crisp repeats, or sculpted gel and premade charms for three-dimensional fruit. Tools like dotting tools, fine liner brushes, striping tape, and gel lamps expand what you can execute at home, while airbrush or magnetic cat-eye bases add professional depth if you have access to the equipment or a tech who does.